
Every year, american homeowners lose millions to property damage caused by relentless Japanese knotweed. This invasive plant is notorious for its ability to regenerate from fragments as small as one centimeter, quickly overwhelming gardens and even threatening building foundations. Addressing knotweed is more than a gardening chore, it’s about legal responsibility and protecting your investment. In the following guide, you will find practical steps to identify, remove, and prevent knotweed regrowth with clear, science-backed methods.
Table of Contents
- Step 1: Assess Infestation And Identify Affected Areas
- Step 2: Prepare Garden And Ensure Safe Access
- Step 3: Apply Direct Energy Eradication Techniques
- Step 4: Install Root Barriers For Long-Term Control
- Step 5: Verify Complete Removal And Monitor Regrowth
Quick Summary
| Primary Insight | Detailed Explanation |
|---|---|
| 1. Identify Affected Areas Early | Carefully inspect your property to locate all instances of Japanese knotweed, as even small fragments can regenerate. Document these locations for effective removal planning. |
| 2. Prepare the Treatment Area | Clear debris and secure the site to avoid accidental spread during removal. Use visible barriers to mark the affected area and minimize soil disturbance. |
| 3. Use Direct Energy Techniques | Employ innovative methods like thermo-electric treatment to eradicate knotweed efficiently while preserving surrounding vegetation and allowing rapid ecosystem recovery. |
| 4. Install Root Barriers | Create underground barriers with impermeable materials to prevent future knotweed growth. Ensure correct installation to eliminate gaps that could allow regrowth. |
| 5. Monitor for Regrowth | Conduct inspections over at least two growing seasons to detect any signs of resurgence, as even small root fragments can restart an infestation. |
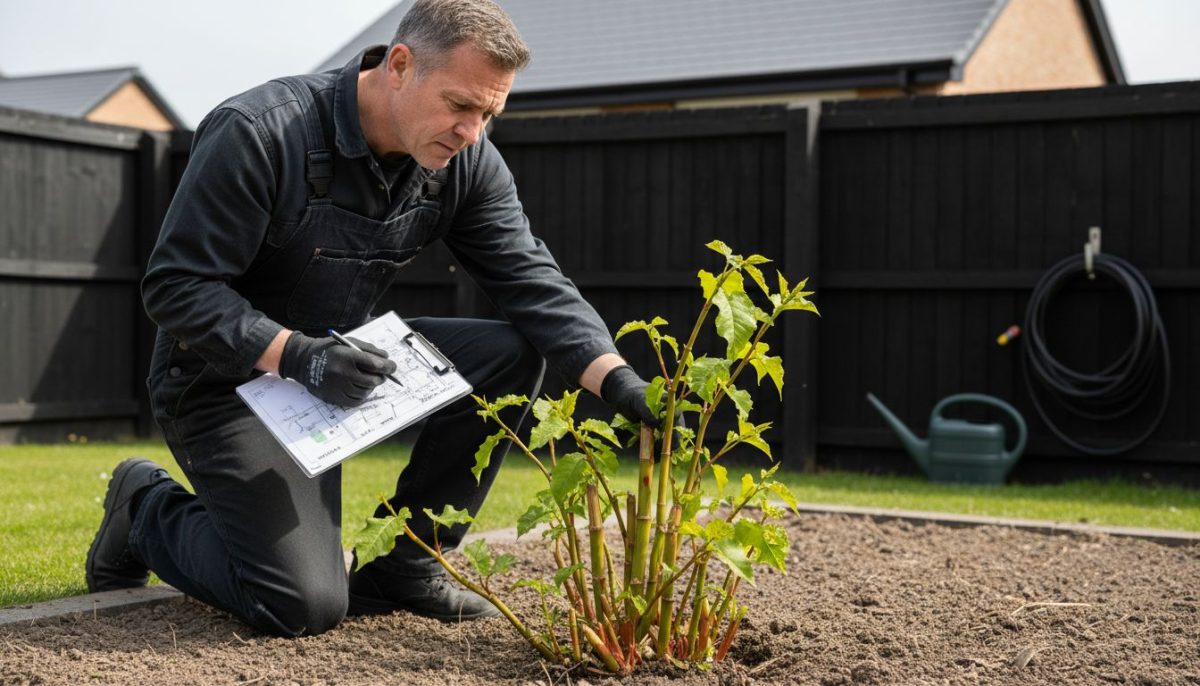
Step 1: Assess Infestation and Identify Affected Areas
Successfully removing knotweed starts with pinpointing exactly where this invasive plant has taken root. Your mission is to thoroughly inspect your property and understand the extent of the Japanese knotweed spread.
Identifying Japanese knotweed requires careful observation of specific characteristics. According to gov.uk, this plant can establish itself in diverse environments like roadsides, waste grounds, and riverbanks. Look for distinctive features: bamboo-like stems with distinctive zigzag growth patterns, bright green leaves, and reddish speckled shoots emerging in spring. Pay extra attention to areas with disturbed soil or near existing water sources.
Warning: Even tiny fragments as small as 1 cm can regenerate into a full plant. As outlined by Natural Resources Wales, spreading knotweed is actually a legal offense under the Wildlife and Countryside Act 1981. Careful documentation of the affected zones becomes crucial not just for removal but for potential legal compliance.
Tip: Create a detailed map of your property marking all knotweed locations. This will help track the infestation and plan your removal strategy systematically. Your next step involves preparing for targeted treatment based on these initial assessments.
Step 2: Prepare Garden and Ensure Safe Access
Before diving into knotweed removal, you must create a strategic plan to protect your garden and prevent unintentional plant spread. This step is all about smart preparation and minimizing potential risks during treatment.
According to gov.uk, proper preparation involves clearing the area of debris and securing the site to prevent accidental knotweed propagation. Start by creating a clear work zone around the infestation. Remove any loose materials, garden tools, or objects that might interfere with your treatment process. Mark off the affected area with visible barriers or warning tape to prevent accidental contact or movement through the space.
Warning: As highlighted by Natural Resources Wales, never attempt to strim, flail, or mow Japanese knotweed. These actions can catastrophically spread the plant, turning a contained problem into a widespread nightmare. Carefully plan your access routes to minimize soil disturbance and prevent fragmenting the plant.
Tip: Wear protective clothing like disposable coveralls and rubber boots that can be cleaned or discarded after working in the infested area. This prevents accidentally carrying knotweed fragments to other parts of your garden. Your next step will involve selecting the most appropriate removal method based on your specific garden conditions.
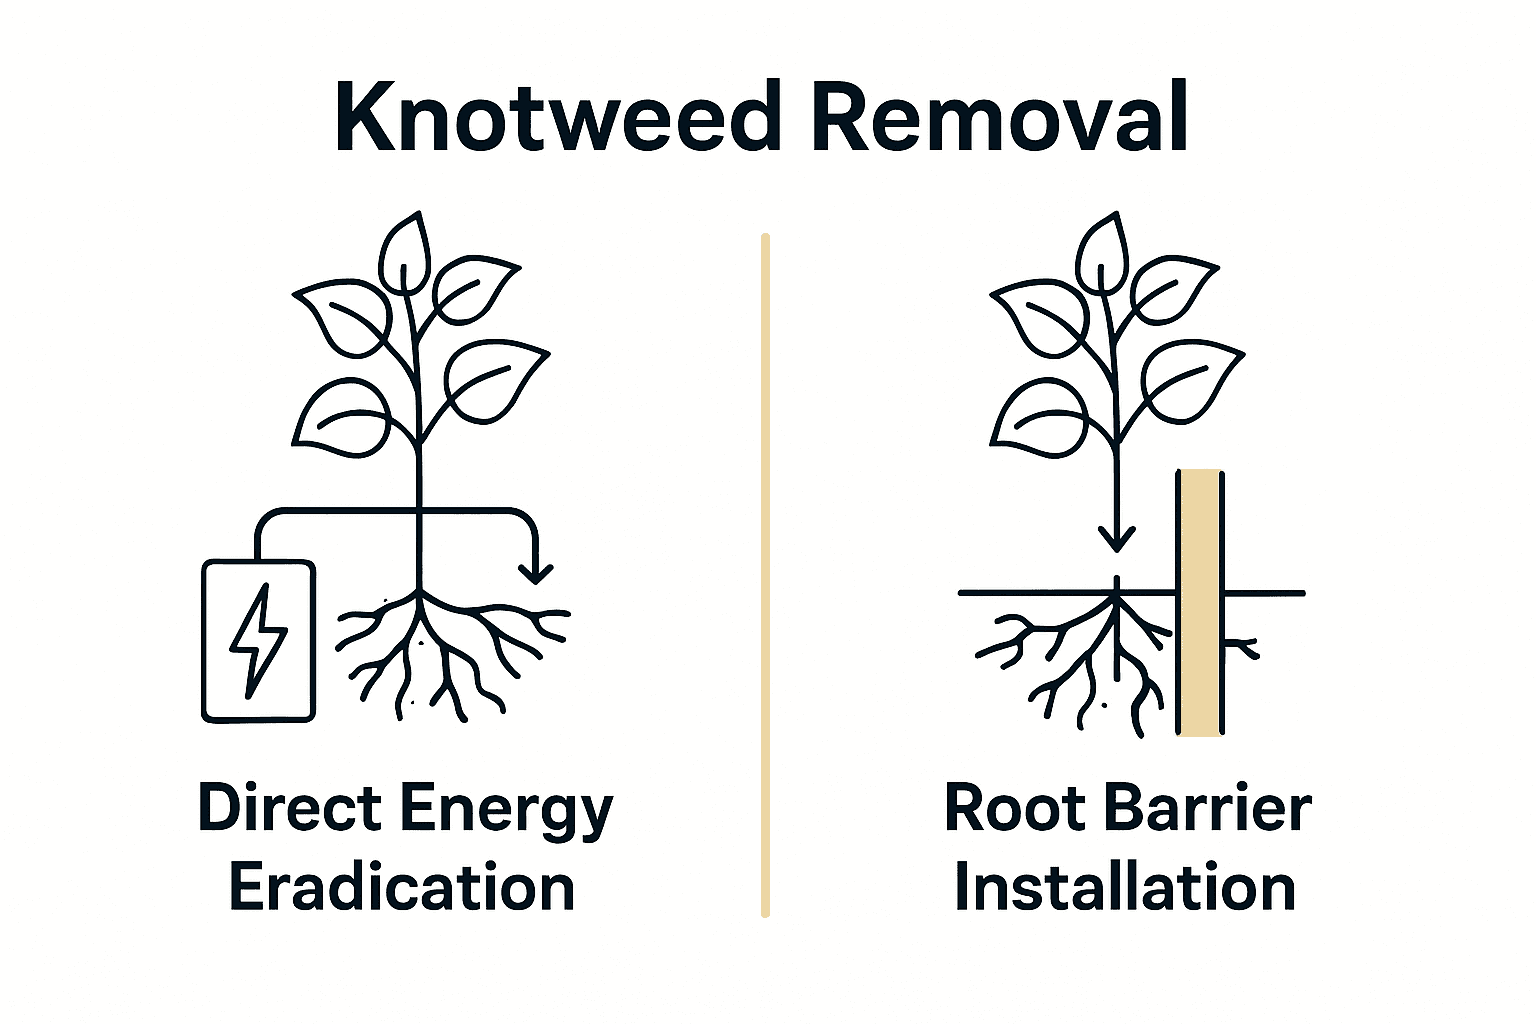
Step 3: Apply Direct Energy Eradication Techniques
Your battle against Japanese knotweed reaches its critical phase with direct energy eradication. This innovative technique will systematically destroy the invasive plant without harming surrounding vegetation or contaminating the soil.
According to HOA, the Japanese Knotweed Agency has developed a cutting-edge thermo-electric treatment that applies up to 5000 volts directly to the plant. This powerful method destroys the knotweed’s cellular structure, effectively killing the entire root system. The process involves carefully positioning specialized equipment to deliver precise electrical energy, targeting the plant’s internal network and preventing any potential regrowth.
The North Wales Wildlife Trust highlights a significant advantage of this approach: the Roots Reset method allows for rapid ecosystem recovery. Unlike chemical treatments, this technique permits native replanting within just five days, minimizing environmental disruption and accelerating landscape restoration.
Warning: While the process sounds straightforward, precision is key. Ensure you have professional guidance or training before attempting direct energy eradication. Your next step involves monitoring the treated area and preparing for potential follow-up treatments to guarantee complete knotweed elimination.
Step 4: Install Root Barriers for Long-Term Control
Root barriers represent your final defensive strategy against Japanese knotweed, creating a permanent underground shield that prevents future reinfestation. This critical step will help you contain and control the plant’s aggressive underground spread.
According to gov.uk, root barriers must be constructed from robust, impermeable materials and installed vertically to an adequate depth. These barriers work by physically blocking the knotweed’s rhizome network, essentially creating an underground wall that prevents lateral growth. Careful installation requires precise measurements and strategic positioning around the affected area, ensuring no potential gaps or weak points exist where the plant might penetrate.
Install our specialized root barrier with meticulous attention to detail. The barrier should extend at least 2 meters deep and create a complete perimeter around the contaminated zone. Professional installation ensures maximum effectiveness, preventing any potential underground migration of knotweed rhizomes that could restart the infestation.
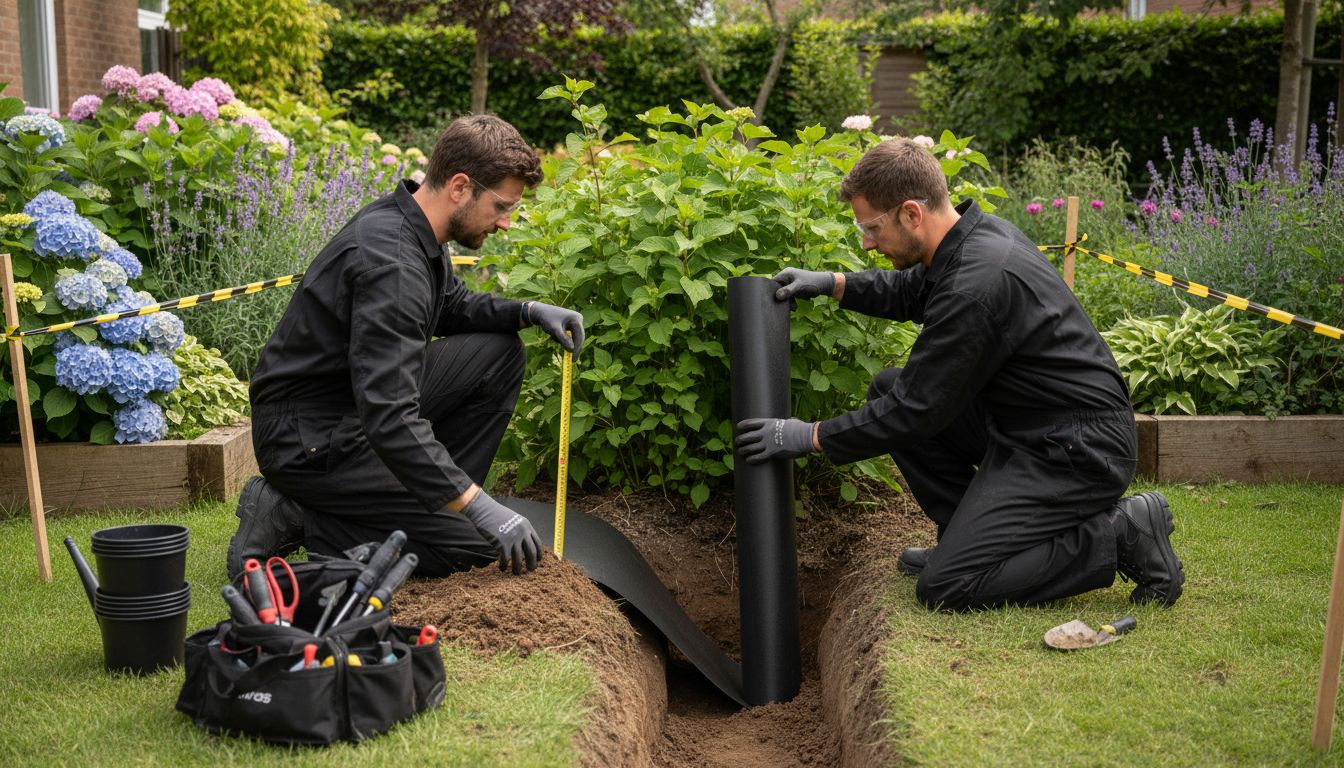
Warning: Improper installation can render the entire barrier ineffective. Even the smallest gap or puncture can allow knotweed to exploit and continue its spread. Your next step involves monitoring the barrier and maintaining the treated area to ensure long term success in knotweed eradication.
Step 5: Verify Complete Removal and Monitor Regrowth
With your previous treatment complete, the final phase of knotweed eradication involves vigilant monitoring and confirmation of total plant elimination. Your goal is to ensure that no surviving fragments can regenerate and restart the infestation.
According to gov.uk, comprehensive monitoring requires systematic inspection over at least two complete growing seasons. This means carefully examining the treated area multiple times throughout spring, summer, and early autumn for any signs of potential regrowth. Look for distinctive bamboo-like shoots, unusual soil disturbances, or any emerging green vegetation that matches knotweed characteristics.
The Natural Resources Wales emphasizes the critical nature of post treatment surveillance. Document your findings meticulously mark any suspicious areas and be prepared to take immediate action if even the smallest indication of knotweed reappearance emerges.
Warning: Premature celebration can be dangerous. Even a tiny root fragment can potentially regenerate into a full infestation. Your persistent attention during these monitoring periods will determine the ultimate success of your knotweed removal strategy.
Take Control of Japanese Knotweed in Your Garden with Expert Help
Removing Japanese knotweed naturally is a tough challenge. You need to be careful to avoid spreading tiny root fragments while ensuring total eradication. The step-by-step guide you just read highlights key issues like careful site assessment, protecting your garden, applying safe energy treatments, installing root barriers, and constant monitoring. These steps demand precision and persistence to win the battle against this invasive plant.
You do not have to face this alone. At Japanese Knotweed Agency, we specialize in chemical free treatments that deliver up to 5000 volts of direct energy to destroy knotweed at its roots safely and effectively. We also provide expert root barrier installations and property surveys to prevent future reinfestation. Trust the pioneers in safe Japanese knotweed removal and let us help you reclaim your garden.
Are you ready to stop knotweed from taking over your property for good?
Get your personalized property survey and treatment plan today by visiting Japanese Knotweed Agency. Discover how our proven, eco-friendly methods support lasting knotweed control and make your garden a safe place again. Take action now before new shoots appear and the problem grows worse.
Frequently Asked Questions
How can I identify Japanese knotweed in my garden?
You can identify Japanese knotweed by looking for its bamboo-like stems, zigzag growth patterns, bright green leaves, and reddish speckled shoots in spring. Carefully inspect your property, especially areas with disturbed soil or near water sources, and take notes on all identified locations to aid in removal efforts.
What precautions should I take when preparing for knotweed removal?
Before starting knotweed removal, clear the area of debris and mark the affected zone with visible barriers to prevent accidental contact. Wear protective clothing, such as disposable coveralls and rubber boots, to avoid carrying fragments to other areas in your garden.
What is direct energy eradication, and how does it work?
Direct energy eradication involves applying electrical energy directly to Japanese knotweed to destroy its root system without harming surrounding plants. Follow professional guidelines and equipment instructions closely to deliver precise energy and effectively eliminate the invasive plant.
How deep should root barriers be installed for effective knotweed control?
Root barriers should be installed to a minimum depth of 2 meters to effectively block the spread of knotweed rhizomes. Ensure the barriers are positioned vertically around the affected area, checking for any gaps or weak points that could allow the plant to penetrate.
How long should I monitor the treated area for signs of knotweed regrowth?
Monitor the treated area for at least two growing seasons to confirm complete removal of Japanese knotweed. Regularly check in spring, summer, and early autumn for any new shoots or signs of regrowth, and be ready to take action if you spot any resurgence.
What should I do if I spot signs of regrowth after treatment?
If you detect signs of regrowth, take immediate action to cut or treat the affected area again to prevent further spread. Maintain thorough documentation of these observations to adjust your eradication plan and ensure that all remnants are addressed quickly.