

Japanese Knotweed often creates anxiety for homeowners in England, Wales, and Ireland—especially when a property sale or purchase depends on formal treatment plans. Tackling this invasive plant without chemicals shields your garden’s biodiversity and meets lender requirements during transactions. This guide shows how to accurately identify the weed, protect your surroundings, and apply chemical-free eradication methods that keep your home and its value secure.
Table of Contents
- Step 1: Assess Infestation and Identify Weed Species
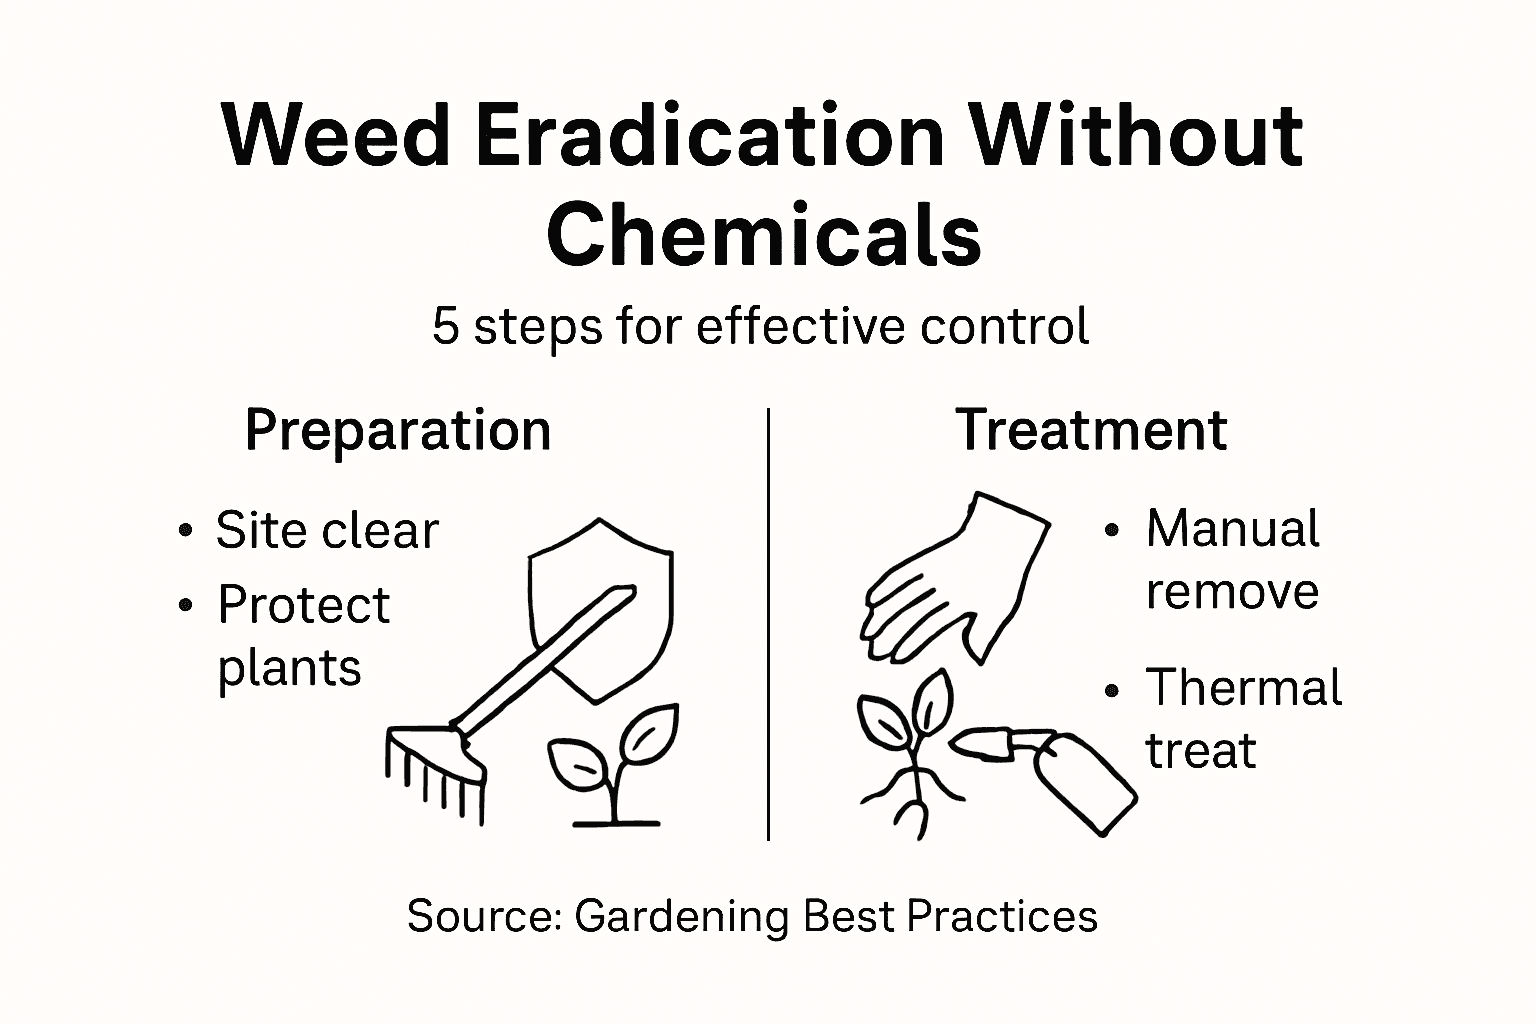
- Step 2: Prepare Site and Protect Surroundings
- Step 3: Apply Targeted Chemical-Free Treatment
- Step 4: Install Root Barriers and Monitor Progress
- Step 5: Verify Eradication and Plan Ongoing Checks
Quick Summary
| Key Point | Explanation |
|---|---|
| 1. Identify Weed Species Accurately | Correctly identifying weed species is essential for choosing the right eradication method and documenting infestation severity. |
| 2. Prepare the Site Thoroughly | Clear the work area and protect surrounding plants to ensure effective treatment and prevent environmental damage. |
| 3. Apply Targeted Chemical-Free Methods | Use manual removal or targeted thermal treatment based on the infestation size and plant species to eliminate weeds without chemicals. |
| 4. Install Root Barriers After Treatment | Prevent regrowth by installing physical or biological barriers, especially against invasive species that can regenerate from root fragments. |
| 5. Verify and Schedule Ongoing Checks | Regularly inspect treated areas and plan further checks to ensure weeds have not regrown and to maintain effective management. |
Step 1: Assess Infestation and Identify Weed Species
Before you tackle any weed problem, you need to understand exactly what you’re dealing with. Identifying the specific weed species and assessing how severely it has spread across your property is the foundation for choosing the right chemical-free eradication approach.
Start by walking your entire property systematically, looking for visible signs of invasive plants. Pay attention to areas where weeds commonly establish themselves: garden beds, fence lines, pathways, and disturbed soil. Note where the plants are most densely clustered and where isolated growth appears.
Documenting your infestation means recording the location, density, and extent of affected areas. Take photos from multiple angles to create a visual record. This information becomes invaluable later when you’re planning your treatment strategy.
To identify weed species accurately, examine key characteristics:
- Leaf structure: Shape, size, colour, and texture
- Growth pattern: Whether the plant grows vertically, sprawls horizontally, or forms dense clusters
- Stem appearance: Colour, thickness, and any distinctive markings
- Flowers or seed heads: When present, these are highly distinctive
- Root system: Whether visible roots appear fibrous or form deep taproots
For plants you cannot identify visually, access the invasive species identification resources which cover over 2000 non-native species established in Britain, including distribution maps and biological information. The Natural History Museum’s identification guides also provide expert support for recognising common pest species and understanding their ecology.
Here’s a comparison of common weed identification resources and their unique advantages:
| Resource | Coverage | Best For |
|---|---|---|
| Invasive species identification projects | 2,000+ non-native species | Accurate mapping and biological details |
| Natural History Museum guides | Common pest and native species | Ecological insights and visual recognition |
| Local nursery or gardening expert | Regional weed variations | Immediate advice and sample confirmation |
Pay particular attention to Japanese Knotweed if you’re selling a property or arranging a mortgage. Lenders typically require formal surveys and treatment plans before approving finance. Even if you don’t recognise the plant, unusual growth patterns warrant closer investigation.
Accurate species identification at this stage determines your entire treatment approach, so take your time getting this right.
If you’re uncertain about what you’ve found or suspect Japanese Knotweed or other invasive species, professional surveys provide definitive identification and mapping of the entire infestation. This becomes especially critical for property transactions where legal and financial obligations depend on accurate assessment.
Pro tip: Take your photos and leaf samples to a local nursery or gardening expert for a second opinion before committing to any treatment plan, especially if the infestation is extensive or you’re selling your property.
Step 2: Prepare Site and Protect Surroundings
Before you begin any weed eradication work, you need to prepare your site carefully and protect everything around the affected area. This ensures your treatment is safe, effective, and doesn’t harm nearby plants, wildlife, or structures.
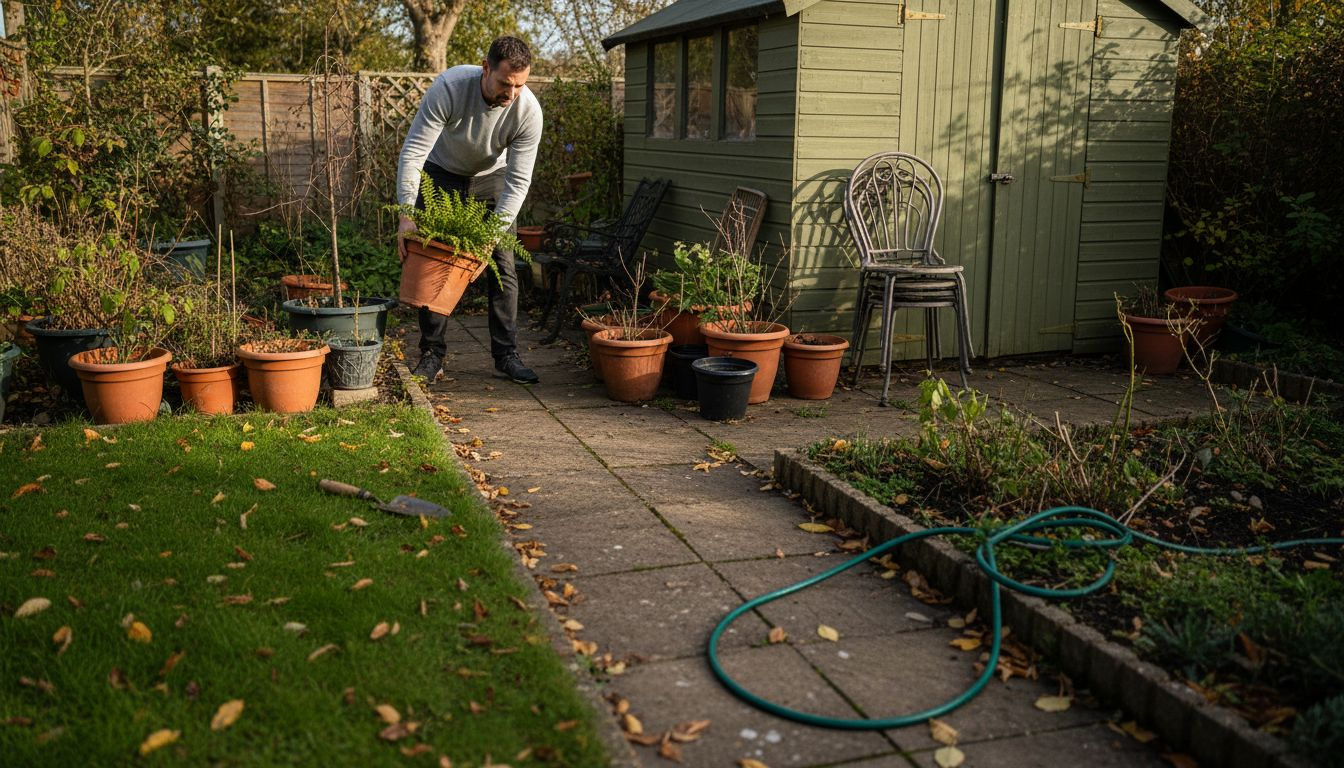
Start by clearing the immediate work area of obstacles and debris. Remove garden furniture, decorative items, and anything else that could be damaged or get in your way. If weeds are growing near fences, walls, or other structures you want to preserve, note these boundaries clearly.
Next, identify what needs protection. Nearby plants you wish to keep should be marked and, if possible, shielded from your treatment activities. Check whether the area contains desirable vegetation, water features, or habitats that require special care during the process.
Physical barriers play a crucial role in site preparation:
- Lay cardboard or heavy-duty plastic sheeting to protect soil and surrounding plants
- Create buffer zones around sensitive areas with temporary fencing or marked boundaries
- Use wooden boards to define treatment zones and prevent accidental damage
- Install screens if you’re using thermo-electric treatment to contain any debris or heat dispersal
According to nature-friendly guidance, preparing sites using physical barriers to shield surrounding habitats during weed control activities is essential for protecting biodiversity. Similarly, community-led weed management approaches emphasize using safety criteria to protect surroundings whilst preparing sites for safe removal.
Check your local conditions as well. If the area has recently been watered or had heavy rain, the ground may be too soft for safe access. If there’s been a dry spell, dust control becomes important during removal work.
Proper site preparation prevents costly mistakes and ensures your chemical-free treatment works without damaging anything you want to keep.
For Japanese Knotweed or other invasive species on your property, professional surveys provide site assessments that identify all areas requiring protection and recommend the safest approach for your specific situation.
Pro tip: Take photographs of the prepared site and any nearby plants you’re protecting before you start work, creating a record of what you’re trying to preserve and making it easier to confirm you haven’t caused unintended damage.
Step 3: Apply Targeted Chemical-Free Treatment
Now that you’ve identified your weeds and prepared your site, it’s time to apply your chosen chemical-free treatment method. The approach you select depends on the weed species, infestation size, and your property’s specific conditions.
Manual removal remains one of the most accessible chemical-free methods for many homeowners. This labour-intensive approach works best for smaller infestations or isolated plants. Dig down to remove entire root systems, particularly for deep-rooted species like dandelions or thistles.
For larger areas, targeted thermal treatment offers a powerful alternative. This method applies concentrated heat directly to weeds, causing internal cell damage without chemicals. Thermo-electric treatment delivers energy through the plant tissue, disrupting growth and depleting the energy reserves stored in root systems.
Below is a summary of main chemical-free weed treatment methods and their ideal use cases:
| Treatment Method | Optimal Situation | Key Benefit |
|---|---|---|
| Manual removal | Small or isolated patches | Root system extraction |
| Targeted thermal treatment | Large infestations | No chemical residue |
| Physical root barriers | Persistent invasive weeds | Prevents underground spread |
Key steps for applying targeted treatment include:
- Apply treatment directly to the target plant, avoiding nearby desirable vegetation
- Work methodically across the infestation, treating each plant thoroughly
- Document treated areas to avoid overlap and ensure complete coverage
- Allow adequate time between treatments for results to develop
- Monitor treated plants for signs of die-off or regrowth
Targeted chemical-free treatment methods such as manual weeding are slower and labour-intensive but avoid environmental impact entirely, making them ideal for exclusion zones and sensitive areas where chemical use is restricted.
Timing matters significantly. Treating weeds when they’re actively growing yields better results than targeting dormant plants. Spring and early summer work well for most species, as plants direct energy into growth rather than storage.
Consistent, targeted application ensures you’re using your effort efficiently and maximising the chances of complete eradication.
If your infestation involves Japanese Knotweed or other invasive species, professional treatment provides access to specialised equipment and expertise that accelerates results compared to manual methods alone.
Pro tip: Keep detailed records of each treatment session, including dates, weather conditions, and plant responses, so you can refine your approach and identify which methods work best for your specific weed species and site conditions.
Step 4: Install Root Barriers and Monitor Progress
After applying your initial treatment, installing root barriers prevents weeds from regrowing or spreading to new areas. Combined with ongoing monitoring, this dual approach creates a comprehensive defence against reinfestation.
Root barriers are physical or biological structures that block weed roots from penetrating soil or expanding horizontally. These work particularly well for invasive species like Japanese Knotweed, which can regenerate from tiny root fragments.
Common barrier materials include:
- Heavy-duty plastic sheeting installed vertically in the soil
- Reinforced geotextile membranes designed for root penetration resistance
- Concrete or metal edging for permanent installations
- Biological barriers such as cover crops that suppress weed establishment
Physical root barriers and biological monitoring prevent weed root spread whilst allowing sustainable land management, representing innovations in long-term weed control strategies.
When installing barriers, dig down to the root zone depth of your target weed species. For Japanese Knotweed, this means going at least 60 centimetres deep. Position the barrier vertically, overlapping seams by at least 30 centimetres to prevent roots from bypassing the material.
Monitoring progress means checking your treated areas regularly for signs of regrowth or new infestations. Continuous monitoring helps evaluate progress, adjust practices, and maintain soil health whilst suppressing weed invasion across your property.
Establish a monitoring schedule starting weekly after treatment, then gradually increasing intervals to monthly checks. Document what you observe through photographs and written notes. Look for new shoots, changing plant colour, or signs of die-off.
Persistent monitoring catches problems early before weeds reestablish themselves, making future control far easier.
For Japanese Knotweed or large infestations, professional monitoring services provide expert assessment of whether barriers are functioning correctly and whether additional treatment is needed.
Pro tip: Mark monitored areas with discrete stakes or flagging tape so you revisit the same locations each time, ensuring consistent observation points and making it easier to track whether specific plants are actually dying back or just changing seasonally.
Step 5: Verify Eradication and Plan Ongoing Checks
Once you’ve applied treatment and installed barriers, verification becomes critical. You need to confirm that weeds are genuinely dead and establish a long-term monitoring schedule to prevent reinfestation from occurring.
Verification means checking whether your eradication efforts have actually succeeded. This isn’t a single inspection but rather a series of observations over several months. True eradication means no regrowth from roots or seeds, not simply removing visible plants.
Follow these verification steps:
- Inspect treated areas monthly for the first six months after treatment
- Look for new shoots, root fragments, or any signs of plant recovery
- Photograph the same spots each time to track visual changes
- Document soil condition, noting whether it remains stable or shows disturbance from regrowing roots
- Continue checking into the second growing season to ensure complete eradication
According to risk management approaches for invasive species, evaluating eradication feasibility regularly and prioritising actions based on effectiveness and practicality informs planning for ongoing checks and control measures.
Planning ongoing checks means creating a sustainable schedule you can actually maintain. Many properties benefit from structured volunteer-led teams performing multiple weeding rounds throughout the growing season to maintain satisfactory conditions and prevent reinfestation.
Consider establishing quarterly inspections after the first six months, then shifting to twice yearly once you’re confident the infestation is gone. Mark these dates in your calendar now so you don’t forget when months pass between checks.
Verified eradication combined with scheduled monitoring transforms an ongoing problem into a controlled maintenance task.
For Japanese Knotweed, professional verification services provide definitive confirmation of eradication success. This becomes particularly important if you’re planning to sell your property, as lenders require documented evidence that invasive species have been eliminated.
Pro tip: Create a simple spreadsheet or digital record with inspection dates, observations, photographs, and any maintenance work completed, so you have concrete evidence of your eradication efforts if needed for property sales or mortgage applications.
Take Control of Weed Eradication Without Chemicals Today
Struggling with persistent invasive weeds despite careful manual removal and site preparation can be frustrating and overwhelming. The article highlights the importance of targeted chemical-free treatments and root barriers to achieve lasting results while protecting your property and the environment. If you want to move beyond labour-intensive methods and ensure thorough eradication, the solution lies in expert intervention tailored to your needs.
At Japanese Knotweed Agency, we specialise in delivering advanced chemical-free treatments that use up to 5000 volts of direct energy to damage invasive plants at the cellular level, including extensive rhizome systems. Combined with our professional property surveys for invasive weeds, root barrier installations, and excavation works, we offer a comprehensive approach to weed management across England, Wales and Ireland. Secure your property and protect your investment with proven, eco-friendly methods now. Visit our website to discover how we can assist you in achieving permanent weed eradication.
Frequently Asked Questions
How do I assess the level of weed infestation in my garden?
To assess weed infestation, walk your property systematically, looking for visible signs of invasive plants. Document the locations, density, and extent of the affected areas to inform your treatment strategy.
What are the best chemical-free methods for weed removal?
The best chemical-free methods include manual removal for small infestations and targeted thermal treatment for larger areas. For plants like dandelions, dig down to remove the entire root system; for wider infestations, apply heat directly to the weeds.
How can I protect surrounding plants while removing weeds?
To protect surrounding plants, clear the immediate work area of obstacles, mark desirable vegetation, and use physical barriers like cardboard or plastic sheeting. This helps ensure that only the targeted weeds are affected during treatment.
What should I do after applying a chemical-free treatment?
After treatment, install root barriers to prevent weeds from regrowing and regularly monitor the areas for regrowth. Establish a monitoring schedule, checking monthly for new shoots or signs of recovery, to maintain effective control over time.
How can I verify that my weed eradication efforts have been successful?
To verify success, regularly inspect treated areas for new growth over several months. Document any changes, such as root fragments or plant recovery, and continue monitoring into the next growing season for complete assurance of eradication.
Recommended
- Knotweed Eradication Workflow: Effective Chemical-Free Solutions
- Invasive Weed Treatments – Chemical Vs. Eco Methods
- Evolution of Weed Control Methods for UK Homes
- Role of Agencies in Weed Control: Eco Solutions
- 7 Eco-Friendly Carpet Cleaning Solutions for Yarra Valley Homes – Yarra Valley Carpet Cleaning