
TL;DR:
- Rhizome networks of Japanese Knotweed can extend several meters deep and wide underground.
- Incomplete assessment risks missing underground rhizomes, leading to regrowth and spread.
- Proper mapping, documentation, and safety protocols are essential for effective control and legal compliance.
Japanese Knotweed may appear straightforward to manage above ground, but the real challenge lies beneath your feet. Its rhizome network, a dense, interconnected system of root-like stems growing several metres deep and wide, is the primary engine of the plant’s persistence and spread. When homeowners treat only what they can see at surface level, they leave the underground network largely intact, virtually guaranteeing regrowth. This guide will show you how to recognise, map, and verify rhizome spread accurately, equipping you with the knowledge to plan effective, lasting control across your property.
Table of Contents
- Why assessing rhizome networks matters
- Tools and requirements for effective rhizome assessment
- Step-by-step guide to mapping a rhizome network
- Common mistakes and safety considerations
- How to confirm a thorough assessment
- Why most DIY assessments fall short—and what makes the difference
- Get expert help with rhizome assessment and treatment planning
- Frequently asked questions
Key Takeaways
| Point | Details |
|---|---|
| Thorough assessment is essential | Missing rhizome fragments leads to recurring Japanese Knotweed and legal complications. |
| Use the right tools | Proper equipment and PPE make assessment safer and more effective. |
| Follow a proven process | Step-by-step mapping ensures no rhizomes are left undetected. |
| Avoid common mistakes | Careful handling and full documentation reduce regrowth and help with legal compliance. |
Why assessing rhizome networks matters
Rhizomes are not roots in the conventional sense. They are modified stems that store energy and generate new shoots from any surviving fragment. This biology is precisely why incomplete assessments cause such persistent problems. A single fragment the size of your thumb, left in undisturbed soil, can produce a fully established plant within a single growing season.
The consequences extend well beyond your garden. Lenders, surveyors, and solicitors now scrutinise Japanese Knotweed status closely during property transactions. Properties with confirmed, untreated infestations face reduced valuations, mortgage refusals, and protracted conveyancing delays. Understanding your legal obligations for knotweed is therefore essential, not only to protect your land, but to avoid potential liability when the infestation spreads to adjoining properties.
Key risks of unassessed rhizome networks include:
- Undetected lateral spread beneath pathways, driveways, and building foundations
- Regrowth following surface-level treatment, as the rhizome network remains energised below ground
- Neighbour disputes and legal action if spread crosses property boundaries
- Mortgage and sale complications arising from undisclosed or unverified infestation
- Structural damage as rhizomes exploit cracks in concrete, drainage pipes, and retaining walls
“Rhizome fragments can regenerate new growth, making incomplete removal risky.”
Learning to assess rhizomes accurately is not merely a precaution. It is the essential first step in any credible control strategy. Proper spotting of rhizome damage informs every decision that follows, from treatment method selection to waste disposal planning.
Tools and requirements for effective rhizome assessment
Good preparation separates a useful assessment from a wasted afternoon. Before breaking ground, it is important to gather the right tools and ensure your working conditions are safe. Reliable site assessment tools improve rhizome detection accuracy significantly, and cutting corners here risks missing critical sections of the network.
Essential tools for rhizome assessment
| Tool | Purpose | Notes |
|---|---|---|
| Spade or border fork | Exposing rhizome systems at depth | Clean thoroughly between sites |
| Measuring tape (5m+) | Recording spread distances | Log to nearest 10cm |
| Waterproof camera or smartphone | Photographic documentation | Date-stamp all images |
| Survey grid paper or app | Mapping rhizome extent | Graph paper works well |
| Sealable specimen bags | Collecting fragments for identification | Label clearly with location |
| PPE kit | Personal safety | See below |
Personal protective equipment is not optional. Rhizome excavation disturbs soil that may carry fragments capable of re-establishing growth if inadvertently tracked onto clean ground. Wear:
- Sturdy, waterproof boots with no soil-trapping treads
- Disposable gloves changed between sampling points
- Overalls or protective clothing that can be washed immediately
- Eye protection when digging in dry or compacted conditions
Pro Tip: Keep a dedicated pair of boots and a set of tools used only for knotweed work. Washing equipment on site before moving to other areas of the garden is one of the most effective ways to prevent accidental spread.
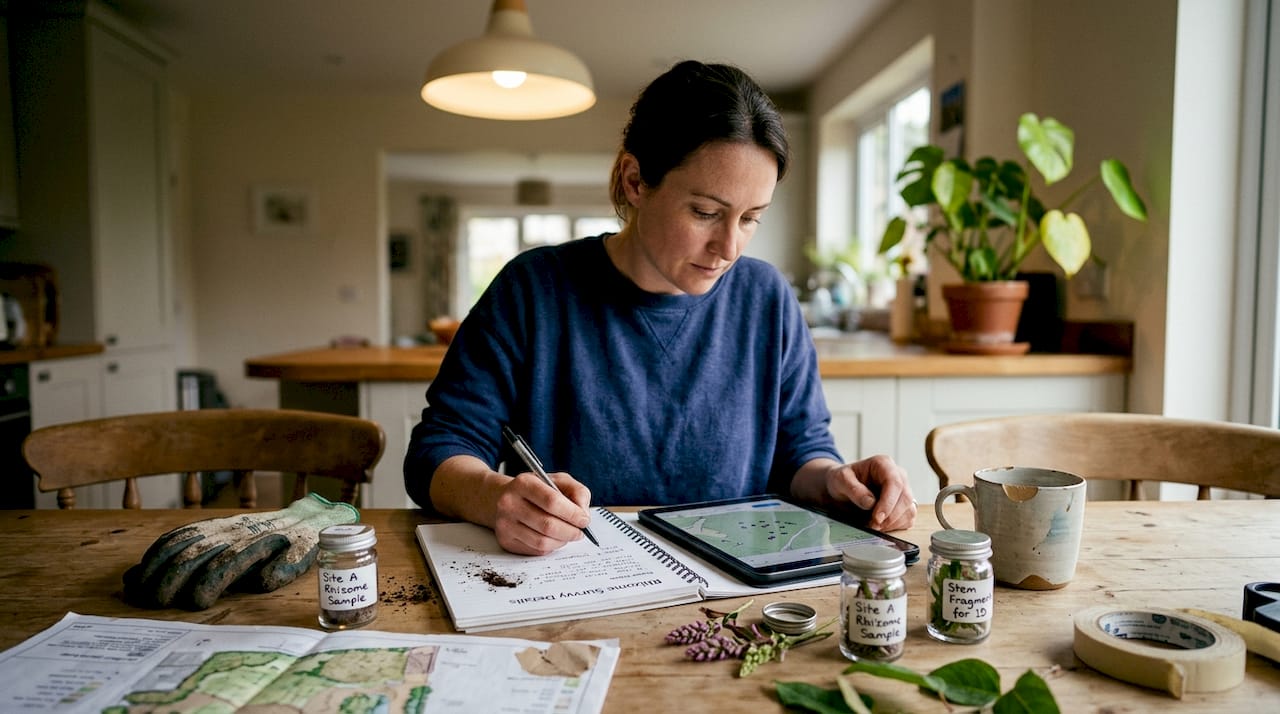
Logging your findings systematically is equally important. A rough sketch may feel sufficient in the moment, but detailed records with measurements and photographs are what support treatment planning, professional surveys, and legal disclosures later. Using a numbered grid system tied to fixed reference points on your property makes it far easier to revisit and update your records across treatment seasons.
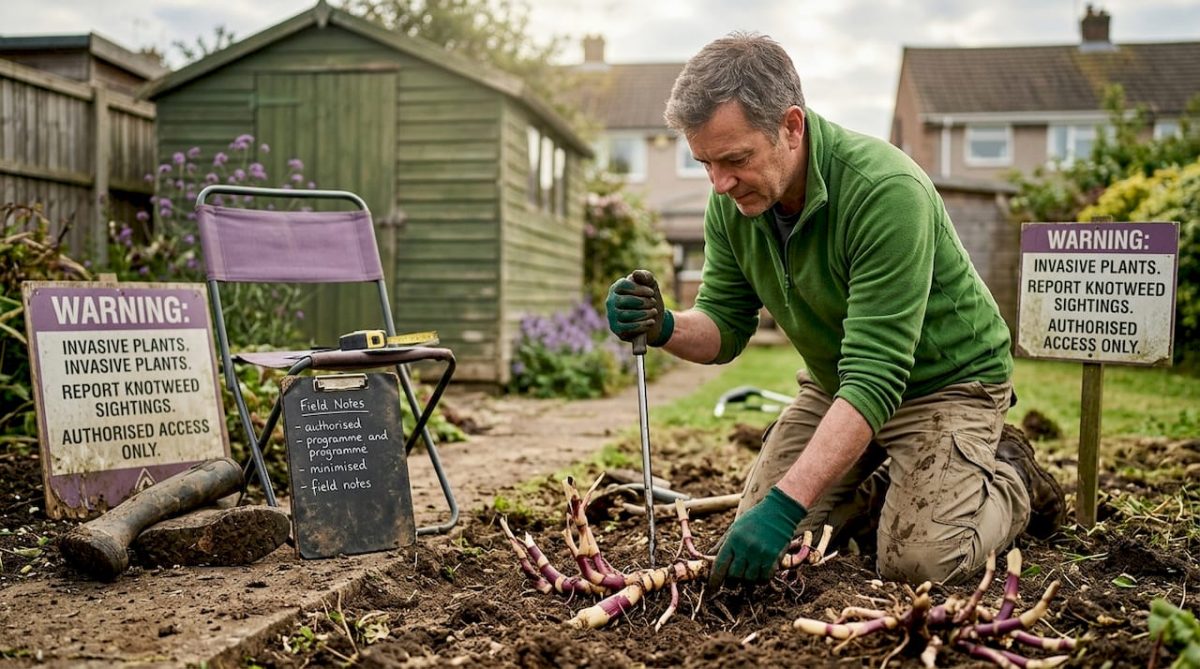
Step-by-step guide to mapping a rhizome network
With your tools assembled and safety arrangements in place, you are ready to carry out the assessment itself. The following process is designed to give you a thorough picture of the rhizome network’s extent, depth, and condition. This approach aligns with the mapping and measuring methods used in professional reporting.
The assessment process
-
Identify and mark all visible above-ground growth. Place canes or flags at every visible shoot or stem cluster. This establishes your starting points for the underground survey. Shoots can appear several metres from the rhizome mass that feeds them, so mark all of them regardless of apparent connection.
-
Lay out a survey grid. Using rope, string, or spray marker, divide your survey area into one-metre squares from a fixed reference point such as a fence post or corner of a building. This grid becomes the co-ordinate system for logging all finds.
-
Begin digging at each marked shoot location. Dig carefully inward and downward from each stem, following the rhizome rather than pulling at it. Look for the characteristic orange-brown interior, which becomes visible when the rhizome is snapped or cut, along with the creamy-white outer surface and nodular branching points.
-
Trace lateral runs. Follow each rhizome outward in all directions. Note changes in thickness, which may indicate older, more established sections, and record any branching. Mark the endpoint of each traced run on your grid.
-
Record depth at each dig point. Use your measuring tape to note how far below the surface each section of rhizome was found. Depths of 1 to 2 metres are common in established infestations, and some rhizome systems extend down to 3 metres in undisturbed ground.
-
Photograph everything in context. Take images of rhizome sections in situ before removal, alongside a ruler or measuring tape for scale. Photograph the open excavation to show depth and the surrounding soil profile.
-
Update your grid map in real time. Do not rely on memory. Mark each find on your survey grid immediately, noting depth, approximate thickness, and whether the rhizome appeared live or desiccated.
-
Backfill each excavation carefully. Replace excavated soil in reverse order to minimise disturbance. Keep any removed rhizome material bagged and sealed for appropriate disposal.
For homeowners considering a more thorough approach, understanding chemical-free rhizome assessment options and excavation methods provides useful context for deciding how far to extend your initial investigation. Preparing for excavation properly also prevents common logistical errors that slow progress significantly.
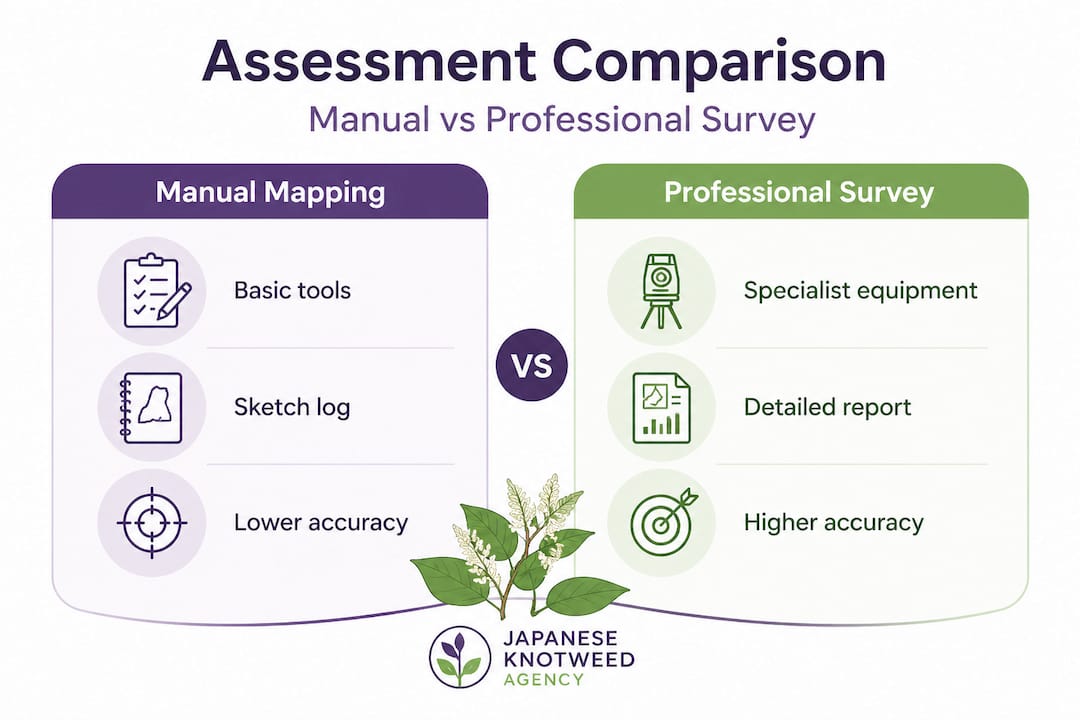
Manual mapping vs. professional survey: a comparison
| Factor | Manual mapping | Professional survey |
|---|---|---|
| Equipment required | Basic hand tools | Specialist detection equipment |
| Detection accuracy | Moderate, varies with skill | Up to 95% with professional methods |
| Documentation quality | Variable | Structured, legally defensible |
| Time required | Several hours to days | Typically one visit |
| Suitability for legal use | Limited | Fully appropriate |
| Cost | Low direct cost | Professional fee applies |
Pro Tip: The optimal time for rhizome assessment is late winter to early spring, before above-ground growth obscures sight lines and while the soil is workable but not waterlogged. Rhizomes are most visible in freshly turned, moist soil and easier to trace before the growing season draws energy reserves upward into new shoots.
Common mistakes and safety considerations
Even well-intentioned assessments go wrong. Knowing where DIY attempts most frequently fail allows you to avoid the same pitfalls before they become costly problems.
The most common errors include:
- Underestimating rhizome depth. Many homeowners dig to 30 or 40 centimetres and conclude the network is shallow, when in reality the main mass may lie 1 to 2 metres down. Always check deeper than you expect.
- Disposing of excavated soil carelessly. Soil containing rhizome fragments is classified as controlled waste under current regulations. Moving it to other areas of your garden, or placing it in general skip waste, risks spreading the infestation and may breach legislation.
- Failing to clean tools between dig points. Transferring soil on a spade from an infested area to an adjacent clean area can introduce fragments where none existed before.
- Disturbing the network without documenting it. Digging and refilling without recording what you found leaves you with no baseline for future comparison or treatment planning.
- Stopping at visible stems. Rhizome networks rarely correspond to above-ground growth patterns. Always continue tracing beyond the last visible shoot.
“Even small rhizome fragments left in the soil can cause regrowth.”
Over 90% of regrowth cases following treatment are attributable to missed rhizome fragments, which underlines why methodical survey work is the foundation of any successful management plan. Rushing the assessment phase is the single greatest contributor to long-term failure.
On the legal side, improper handling and disposal of knotweed material can constitute an offence under the Wildlife and Countryside Act 1981 and associated environmental regulations. Guidance on preventing knotweed spread is readily available and should be reviewed before undertaking any excavation, however small.
How to confirm a thorough assessment
Completing your survey is not the same as confirming it is complete. A structured review process ensures nothing critical has been overlooked before you commit to a treatment plan.
Work through the following checklist to verify your assessment:
- All visible above-ground shoots have been individually mapped and cross-referenced with underground finds
- Rhizome runs have been traced to a definitive endpoint, not just abandoned at the limit of comfortable digging
- Depth measurements are recorded for each dig point, providing a three-dimensional picture of the network
- Photographic evidence is dated and geographically referenced on your site grid
- All excavated material is correctly classified and stored pending appropriate disposal
- Adjacent areas beyond the visible infestation boundary have been checked for lateral spread
If your review reveals gaps, revisit those areas before drawing conclusions. Partial data is often more misleading than no data at all, because it creates a false sense that the survey is finished.
Detailed documentation supports treatment planning and property transactions in equal measure. When selecting the most appropriate intervention, whether thermo-electric treatment, root barrier installation, or full excavation, the quality of your underlying survey data directly determines the quality of the decision. Consult removal best practices to understand how assessment data translates into practical action. Where uncertainty remains, professional knotweed surveys provide the definitive clarity that DIY assessment cannot reliably deliver.
Why most DIY assessments fall short—and what makes the difference
We have worked across hundreds of sites in England, Wales, and Ireland, and one observation holds consistently true: the difference between a controlled infestation and a recurring problem almost always traces back to the quality of the initial assessment, not the treatment applied.
Most homeowners who attempt their own rhizome assessment approach it as a garden task rather than a structured survey. They dig where the problem is visible, confirm it looks serious, and move on to treatment. The network they did not see, the lateral runs beneath the patio, the deep mass below the shed base, or the section that crossed the boundary before they noticed it, continues to function and eventually re-establishes growth.
What separates a genuinely effective assessment from a partial one is not specialist equipment alone. It is methodology, patience, and a willingness to keep digging past the point of discomfort. Rhizome networks do not respect fences, structures, or the boundary of where you expected them to stop. Applying the same systematic grid approach that professional surveyors use, even in a simplified form, dramatically improves outcomes.
Documentation is the other factor consistently undervalued by homeowners. A structured comprehensive reporting guide approach means that every treatment session is informed by what was found previously, every future survey has a baseline to compare against, and any legal or commercial need that arises can be met without scrambling to reconstruct what was actually found and when.
The reality is that thorough assessment is slow, methodical work. It does not lend itself to a single Saturday afternoon. Properties with established infestations often require a phased assessment approach, revisiting and extending the surveyed area as new information emerges. That patience is precisely what produces lasting results.
Get expert help with rhizome assessment and treatment planning
Understanding the extent of a rhizome network is the essential first step, but translating that knowledge into an effective, lasting control strategy requires both expertise and the right tools.
Japanese Knotweed Agency provides professional property surveys for invasive weeds across England, Wales, and Ireland, backed by highly accurate detection methods and structured reporting designed to support both treatment planning and legal requirements. Our eradication plan for homeowners sets out a clear, chemical-free pathway tailored to your specific site conditions, whether you are dealing with an active infestation or investigating dormant knotweed that may re-emerge without warning. Contact us to arrange a site assessment and receive expert guidance specific to your property.
Frequently asked questions
How deep do Japanese Knotweed rhizomes usually grow?
Rhizomes can reach depths of 2 to 3 metres and extend horizontally several metres from visible shoots, making thorough assessment essential since rhizomes spread well beyond the above-ground plant.
Can I assess a rhizome network without professional help?
You can carry out a preliminary assessment yourself, but 95% accuracy is consistently achieved through professional surveys, which provide a far more complete and legally reliable picture of the network’s extent.
What should I do if I cannot find all rhizome parts?
Document everything you have found and contact a knotweed specialist immediately, as reporting and documentation of partial findings still forms a valuable baseline for professional follow-up inspection.
What are the legal risks of leaving rhizomes untreated?
Failing to manage knotweed actively can create serious legal problems, including potential fines, civil liability for neighbouring property damage, and complications in property sales.