
Japanese Knotweed can slash property values by up to 10% if left unmanaged, yet many homeowners struggle to monitor and control this invasive species effectively. Early detection paired with systematic quarterly checks prevents costly structural damage and legal complications. This guide walks you through each stage of monitoring and eradication, from initial identification through to legal clearance, using both chemical free and traditional methods tailored to your property’s needs.
Table of Contents
- Prerequisites And What You Need Before Starting
- Step 1: Identification And Mapping
- Step 2: Treatment Planning And Execution
- Step 3: Ongoing Monitoring And Reporting
- Step 4: Common Mistakes And Troubleshooting
- Step 5: Expected Timelines And Outcomes
- Get Expert Help With Invasive Weed Control
- Frequently Asked Questions
Key takeaways
| Point | Details |
|---|---|
| Identification and mapping | Recognise knotweed’s seasonal traits and map above and below ground spread using GPS and photos for accurate treatment planning. |
| Treatment options | Choose between thermo-electric non-chemical methods, root barriers, selective herbicides, or excavation based on infestation severity and legal requirements. |
| Quarterly monitoring | Conduct surveys every three months during growing seasons to track shoot emergence, treatment efficacy, and detect regrowth early. |
| Common mistakes | Avoid irregular monitoring, incomplete rhizome removal, and illegal disposal practices that cause up to 40% of treatment failures. |
| Realistic timelines | Expect a minimum three year commitment with sustained treatments until zero new shoots appear across consecutive growing seasons. |
Prerequisites and what you need before starting
Before tackling Japanese Knotweed, you need to recognise its distinctive features at different growth stages. Basic identification skills are essential for spotting early spring shoots and mature summer foliage. Understanding your legal obligations to comply with regulations prevents accidental spread and costly penalties.
Gather essential tools before your first site visit. You’ll need a GPS device or smartphone app to record precise locations, a camera for timestamped progress photos, a sturdy notebook for field observations, and protective gear including thick gloves and long sleeves. Property boundary maps help you track whether rhizomes extend beyond your land, which triggers additional legal duties.
Safety equipment protects you during monitoring and treatment phases. Wear boots with ankle support when walking through dense vegetation. Eye protection shields against contact with plant sap, which can irritate skin in some individuals. Keep a first aid kit nearby during site visits.
Pro Tip: Create a dedicated monitoring folder on your phone to store GPS coordinates, photos, and voice notes from each survey. This builds a chronological record that proves invaluable when assessing treatment progress or providing evidence to solicitors.
Essential monitoring toolkit
| Item | Purpose | Notes |
|---|---|---|
| GPS device | Record exact infestation coordinates | Smartphone apps work well |
| Camera | Document growth stages and treatment response | Date stamp all images |
| Protective clothing | Prevent skin contact with sap | Long sleeves, gloves, boots |
| Notebook | Log shoot counts and observations | Weatherproof preferred |
| Boundary map | Track spread towards property lines | Ordnance Survey maps ideal |
Check your understanding of knotweed laws thoroughly before starting any treatment. You must contain the plant within your property boundaries and use licensed waste carriers if disposal becomes necessary. Familiarise yourself with knotweed identification guidance from reputable sources to avoid confusing it with similar looking plants like Russian Vine or Dogwood.
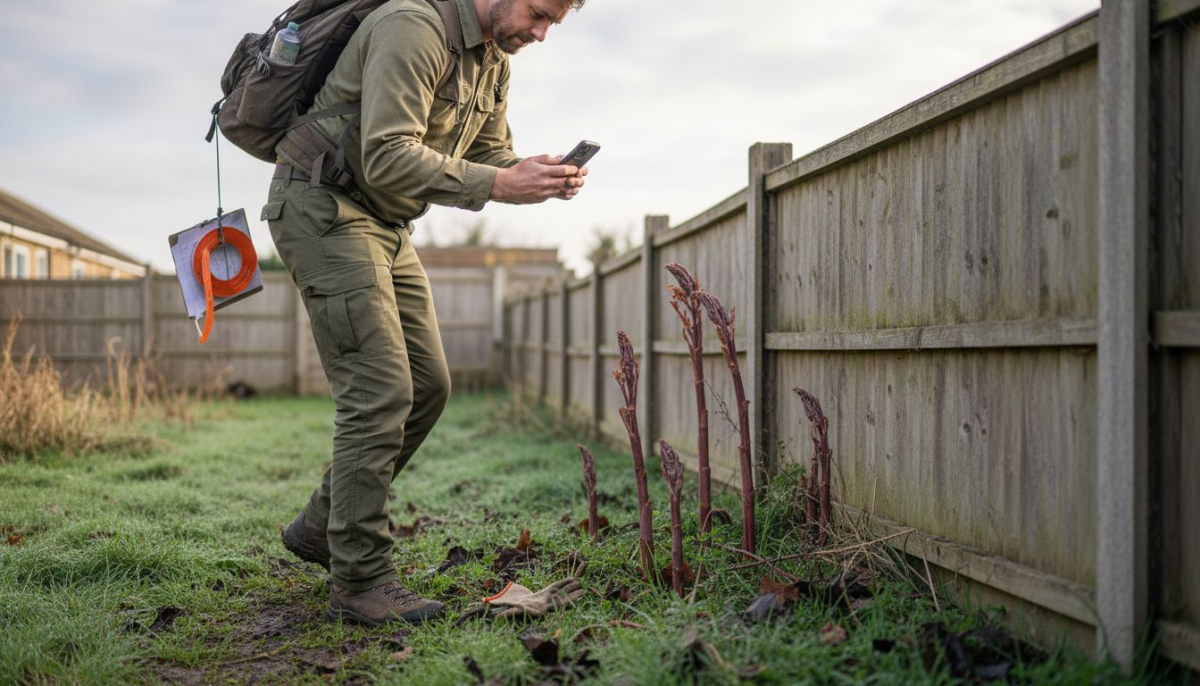
Step 1: identification and mapping
Spring identification begins when reddish-purple shoots resembling asparagus emerge from March through May. These shoots grow rapidly, sometimes reaching 10 cm per day in optimal conditions. Within weeks, they develop into hollow bamboo like stems with distinctive purple flecks.
Summer foliage provides the clearest identification markers. Leaves grow in a zig-zag pattern along stems, each roughly 14 cm long with a flat base and pointed tip. Small creamy white flowers appear in late summer, forming drooping clusters. Winter die back leaves behind brittle brown canes that persist until spring.
Mapping requires recording both visible growth and estimating underground rhizome extent. Walk the entire property perimeter, marking each knotweed stand with GPS coordinates. Photograph from multiple angles, including close ups of leaves and stems. Rhizomes typically extend three metres beyond visible shoots but can reach seven metres in established infestations.
Using GPS and photos improves mapping accuracy by creating verifiable records of spread patterns over time. Plot each location on a site map, noting distances to buildings, boundaries, and drainage systems. This spatial data reveals whether rhizomes threaten foundations or cross property lines.
Initial risk assessment informs treatment urgency. Knotweed within seven metres of structures poses high risk, as rhizomes exploit cracks in concrete and tarmac. Proximity to watercourses increases spread potential through fragment transport. Dense stands covering more than 50 square metres typically require professional intervention.
Pro Tip: Mark each knotweed stand with a discrete physical marker like a small bamboo cane during your initial survey. This helps you relocate exact spots during quarterly checks, even when winter die back makes identification harder.
Growth stage identification guide
| Season | Appearance | Key identifiers |
|---|---|---|
| Spring | Reddish-purple shoots | Asparagus like spears, rapid growth |
| Summer | Green heart shaped leaves | Zig-zag stem pattern, 14 cm leaves |
| Autumn | Creamy white flowers | Drooping clusters, seed production |
| Winter | Brown dead canes | Brittle hollow stems, dormant rhizomes |
For detailed guidance on identifying and reporting infestations, review knotweed identification and reporting protocols. Learn to distinguish Japanese Knotweed from lookalikes by examining leaf arrangement, stem structure, and seasonal growth patterns using knotweed seasonal traits resources.
Step 2: treatment planning and execution
Non-chemical thermo-electric treatments offer an environmentally safe alternative to herbicides. Thermo-electric treatments delivering up to 5000 volts kill rhizomes by causing internal cell damage and depleting energy reserves. This method requires multiple applications over successive growing seasons but avoids chemical residues in soil.
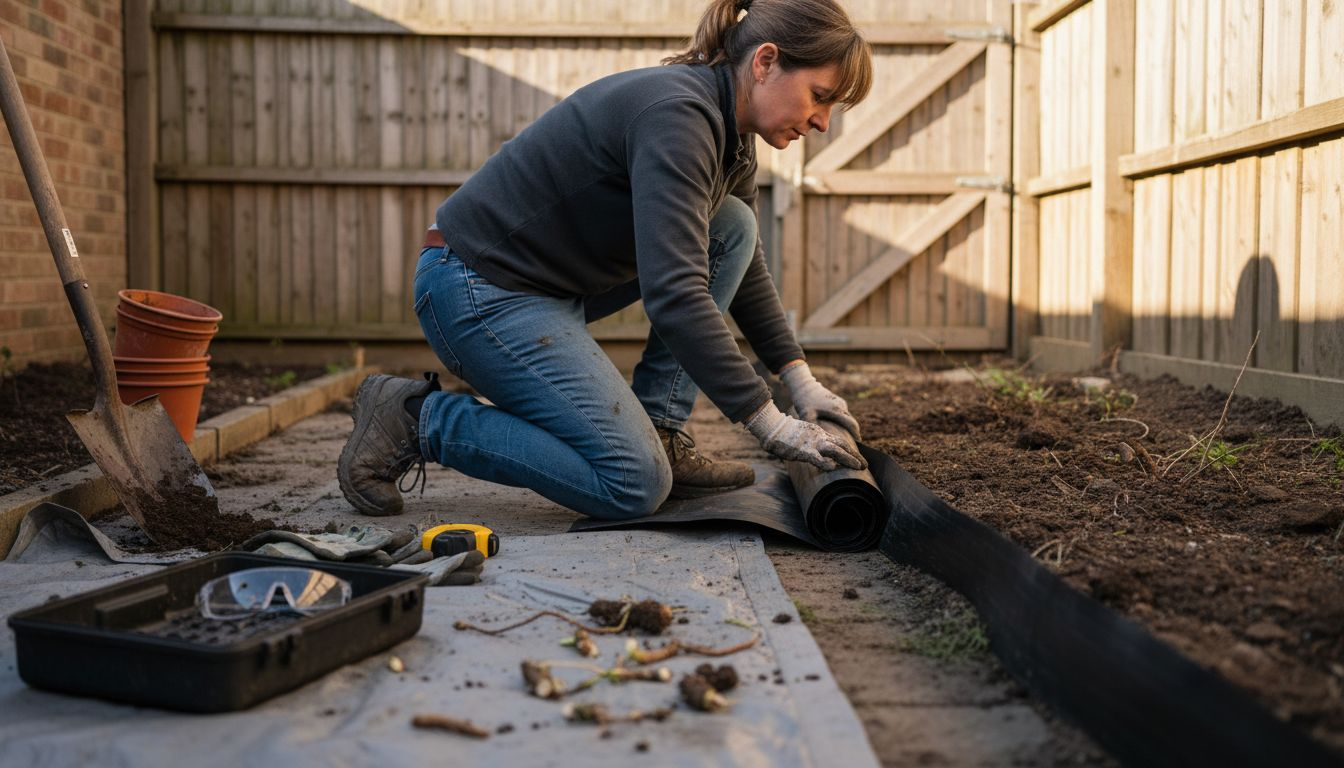
Root barriers provide physical containment when complete removal proves impractical. High density polyethylene membranes installed vertically around infestation perimeters block rhizome spread. Barriers must extend at least two metres deep and project 15 cm above ground to prevent shoots jumping over. They work best for protecting specific assets like buildings or neighbouring properties.
Selective herbicide application demands strict compliance with timing and safety regulations. Glyphosate based products applied in late summer when plants translocate nutrients to rhizomes achieve best results. You must hold appropriate certification and follow label instructions precisely. Never spray near watercourses or during windy conditions.
Excavation removes both shoots and rhizomes but requires licensed disposal at designated facilities. Dig at least three metres beyond visible growth and two metres deep to capture the entire rhizome network. All excavated material must be tracked through waste transfer notes to prevent illegal dumping. Soil screening removes small rhizome fragments that could regenerate.
Professional treatments often combine multiple methods for comprehensive control. Specialists assess site conditions, select optimal techniques, and provide insurance backed guarantees. DIY approaches save money but demand consistent effort and technical knowledge.
Pro Tip: Schedule herbicide applications for dry weather with temperatures between 15 and 25 degrees Celsius. Rhizomes absorb chemicals most effectively when plants actively grow, typically from late July through September.
Treatment comparison
| Method | Duration | Cost | Environmental impact | Effectiveness |
|---|---|---|---|---|
| Thermo-electric | 3-5 years | Medium | Very low | High with repeated treatments |
| Root barriers | Immediate containment | Medium-high | Low | Prevents spread, not eradication |
| Herbicides | 2-4 years | Low-medium | Moderate | High if timed correctly |
| Excavation | Weeks | High | Moderate | Very high if complete |
Explore chemical free knotweed treatment options that eliminate herbicide concerns while delivering proven results. For physical containment strategies, consult knotweed root barrier guidance covering installation depth, material specifications, and maintenance requirements. Review knotweed treatment protocols from research institutions for evidence based best practices.
Step 3: ongoing monitoring and reporting
Quarterly monitoring during spring to autumn detects regrowth before it establishes. Schedule surveys in April, July, and October to capture key growth phases. April checks catch early shoots, July assessments measure peak biomass, and October visits evaluate treatment effectiveness before dormancy.
Track specific metrics at each survey to quantify progress. Count individual shoots within each marked stand, measure the tallest stem heights, and assess overall plant vigour using a simple scale (weak, moderate, vigorous). Note any new growth areas beyond previously mapped boundaries. Photograph from identical positions each visit to enable direct visual comparison.
Record data systematically in a monitoring log. Create a simple spreadsheet with columns for date, location coordinates, shoot count, maximum height, vigour rating, and treatment applied. Add a notes column for observations like flowering, leaf discolouration, or signs of stress. This structured approach reveals trends that might otherwise go unnoticed.
Early regrowth detection enables prompt retreatment before rhizomes recover fully. Single shoots appearing in previously treated areas indicate surviving rhizome fragments. Immediate spot treatment prevents these fragments from rebuilding energy reserves. Delays of even one growing season can reverse months of progress.
Rhizomes can survive dormant for over 20 years, making long term vigilance essential. Continue quarterly checks for at least two full growing seasons after the last shoot appears. Only then can you confidently claim eradication. Some insurance policies and legal clearances require five years of documented absence.
Pro Tip: Set phone reminders for each quarterly survey date to maintain consistency. Missing even one monitoring window can allow undetected regrowth to gain a foothold, potentially adding a year to your eradication timeline.
Monitoring schedule
- April survey: Document shoot emergence and count new growth points
- July survey: Measure peak biomass and assess treatment impact
- October survey: Evaluate pre-dormancy condition and plan next season’s approach
- Record all observations with GPS coordinates, photos, and written notes
- Compare data year over year to track eradication progress
Use the knotweed monitoring checklist to ensure you capture all critical data points during site visits. Refer to knotweed monitoring schedules that align with plant biology for optimal detection timing.
Step 4: common mistakes and troubleshooting
Irregular monitoring allows regrowth to accelerate unchecked between visits. Inconsistent monitoring and incomplete removal cause up to 40% of failures. Skipping quarterly surveys means you might miss the narrow treatment window when herbicides work most effectively. Small shoots detected early require minimal intervention, whereas established growth demands full scale retreatment.
Leaving rhizome fragments underground guarantees regeneration. Even pieces as small as 0.7 grams can produce new plants. Excavation must extend well beyond visible growth to capture the entire network. Incomplete removal often results from underestimating rhizome spread, which typically reaches three metres but can extend seven metres in mature stands.
Ignoring legal disposal requirements risks substantial fines and criminal prosecution. All knotweed material qualifies as controlled waste requiring licensed transport and disposal at authorised facilities. Composting at home or dumping in general waste spreads the infestation. Some homeowners face five figure penalties for improper disposal.
Underestimating regrowth resilience disrupts eradication timelines. Knotweed rhizomes store enormous energy reserves that fuel rapid recovery after treatment. A single missed application or poorly timed herbicide spray can allow the plant to rebuild strength. This resilience explains why most successful programmes span three to five years.
Respond to treatment failures by revising your approach rather than abandoning efforts. Consult specialists who can identify specific issues like incorrect herbicide timing, insufficient application rates, or overlooked rhizome pockets. Sometimes switching from chemical to non-chemical methods or vice versa breaks the cycle of repeated failure.
Pro Tip: If shoots reappear in the same location across consecutive years despite treatment, the underlying rhizome network likely extends further than mapped. Expand your treatment zone by two metres in all directions.
“Persistence separates successful knotweed eradication from endless struggle. The plant’s biology favours those who maintain consistent pressure year after year, while sporadic efforts merely prune what will inevitably regrow.”
Review knotweed removal best practices to avoid typical pitfalls. Learn from documented common treatment errors that derail eradication programmes.
Step 5: expected timelines and outcomes
Knotweed eradication requires a minimum three year commitment with repeated treatments and quarterly monitoring. Year one focuses on reducing visible biomass through aggressive treatment. Year two targets surviving rhizomes that produce weakened regrowth. Year three confirms eradication through absence of new shoots.
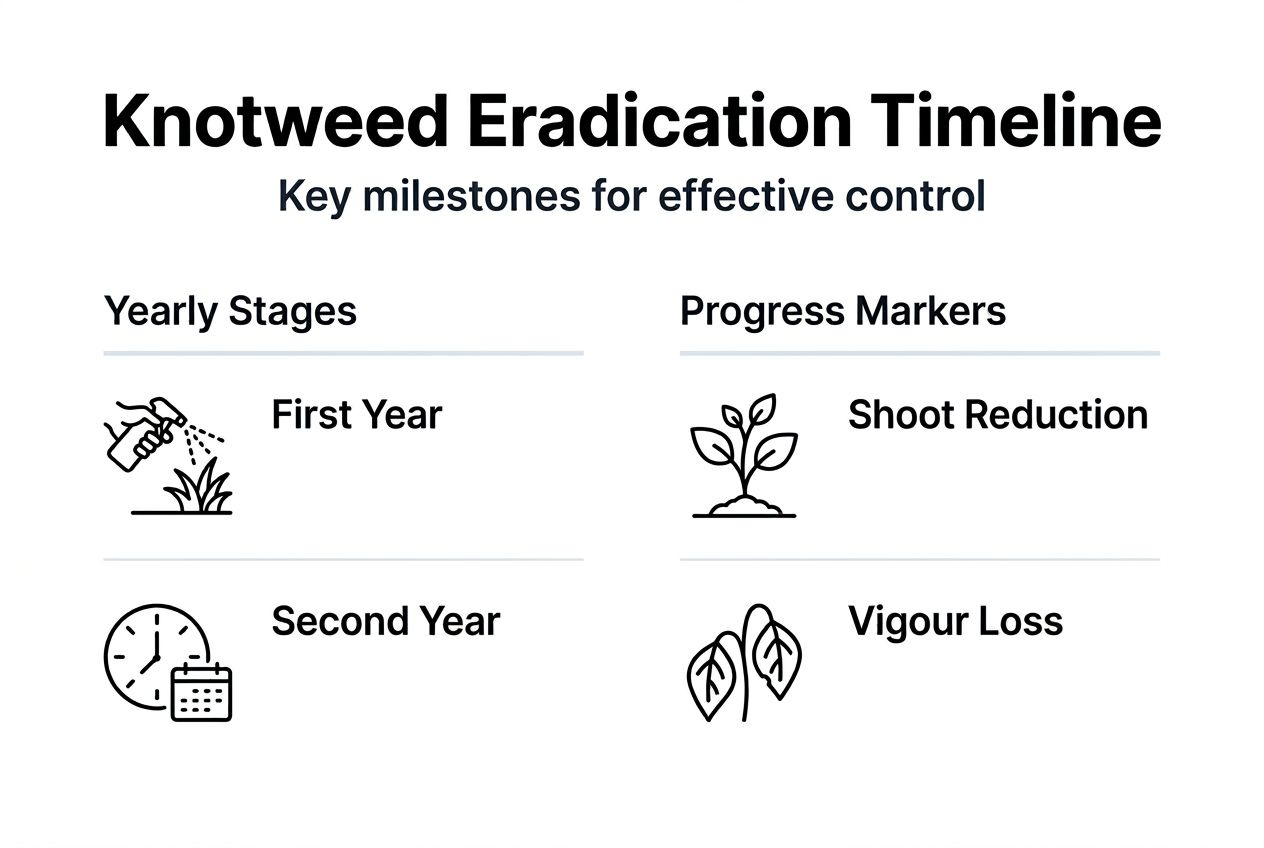
Success manifests as progressive reduction in shoot counts and vigour. Expect 60 to 70% biomass reduction after year one, 85 to 95% by year two, and near total elimination by year three. Shoots that do appear grow weaker each season, with thinner stems and smaller leaves indicating depleted rhizome energy.
Complete eradication requires zero new shoots across two consecutive growing seasons. This absence confirms that rhizome fragments either died or exhausted their energy reserves. Some programmes extend monitoring to three or five years for absolute certainty, particularly when legal clearance or property sale depends on documented proof.
Legal clearance or specialist certification provides formal confirmation of successful treatment. Some mortgage lenders and insurers require a Japanese Knotweed Management Plan with insurance backed guarantees. These documents specify treatment methods, monitoring schedules, and remediation commitments if regrowth occurs. Professional firms typically provide 10 year guarantees.
Long term vigilance protects property values and prevents future complications. Annual site inspections cost little but provide early warning if dormant fragments reactivate. Maintaining clear site photos and treatment records simplifies any future property transactions. Buyers increasingly request knotweed surveys, so documented absence adds tangible value.
Consult the knotweed compliance guide for current legal requirements and certification processes that satisfy lenders and conveyancers.
Get expert help with invasive weed control
Professional assistance ensures Japanese Knotweed eradication proceeds safely, legally, and efficiently. Specialists bring proven treatment protocols, commercial grade equipment, and insurance backed guarantees that protect your property investment. Whether you choose chemical or chemical free approaches, expert guidance eliminates costly mistakes and accelerates results.

Japanese Knotweed Agency pioneers non-chemical treatments delivering up to 5000 volts directly to rhizome networks, causing permanent cellular damage without herbicide residues. We also install root barriers, manage excavation projects, and conduct comprehensive property surveys across England, Wales, and Ireland. Explore our step by step invasive weed management programmes tailored to homeowner needs. Learn how our chemical free knotweed treatment process eliminates invasive species sustainably. Visit our knotweed FAQ for answers to common questions.
Frequently asked questions
How do I identify Japanese Knotweed early in spring?
Look for reddish-purple shoots resembling asparagus spears emerging from March through May. These distinctive shoots grow rapidly and develop into hollow stems with purple flecks within weeks. Leaves emerge later with characteristic zig-zag patterns that confirm identification.
What legal obligations do homeowners have regarding Japanese Knotweed?
Homeowners must prevent spreading knotweed beyond property boundaries and comply with disposal regulations. You must contain infestations, use licensed waste carriers for removal, and report to authorities when required. Failure to meet these obligations can result in criminal prosecution and substantial fines.
How long does it take to fully eradicate Japanese Knotweed?
Eradication requires a minimum of three years with repeat treatments and quarterly monitoring until confirmed absence. Success means zero new shoots for at least two consecutive growing seasons. Some insurance backed guarantees extend monitoring to five years for complete confidence.
Can I treat Japanese Knotweed myself or do I need professionals?
DIY treatment is possible if you understand identification, legal requirements, and treatment timing. However, professional services provide insurance backed guarantees, specialised equipment, and proven protocols that typically achieve faster results. Consider your time commitment, risk tolerance, and proximity to structures when deciding.
What happens if Japanese Knotweed spreads to my neighbour’s property?
You can face legal action if knotweed from your property causes damage or devaluation to neighbouring land. Contact your neighbour immediately, document the extent of spread, and arrange professional treatment. Some cases require formal Management Plans and financial compensation for remediation costs.