无化学处理原理:家庭园艺与生态除草全解析


TL;DR:

  • 无化学处理利用物理能量和生物提取物实现对入侵植物的安全根除。该方法保护土壤和水源,成本长期更具优势,受到生态保护意识提升的青睐。专业技术结合实践操作,可高效、安全地清除深根性植物,助力家庭园艺绿色升级。

许多人认为,不使用化学农药就无法彻底消灭入侵植物,这种观点在园艺领域根深蒂固,却与事实相去甚远。无化学处理原理正是针对这一误区而诞生的科学体系,它借助物理能量、植物提取物和生物技术,实现真正意义上的无毒、无害植物控制。近年来,随着生态保护意识的提升,越来越多的家庭和园艺爱好者开始寻求既高效又不伤害土壤与水源的处理方式。本文将系统梳理这一领域的核心原理、环保优势与实际操作方法。

目录

关键要点

要点 详情
物理能量是核心驱动力 高压电能可直接破坏植物根系细胞,实现无化学原料的根本性根除。
植物提取物具有实证效果 黄酮类等植物活性成分经科学验证,可有效抑制目标植物而不污染环境。
无毒技术保护土壤与水体 无化学处理方式避免农药渗入地下水,维持土壤微生物生态平衡。
与传统方法相比成本可控 无化学处理在长期维护成本和环境修复费用上明显优于传统化学除草。
家庭用户可参与实际操作 掌握正确工具和步骤,普通家庭完全可以实施有效的无化学处理方案。

无化学处理原理的核心技术与方法

理解无化学处理原理,首先需要认识到"无化学"并非意味着处理效果弱化,而是通过更精准的物理、生物机制实现同等乃至更强的控制效果。这一原理覆盖多个技术层面,每种方式都有其适用场景和作用机制。

物理法:热能与电能的直接作用

物理处理技术以能量为核心手段,直接作用于植物细胞层面。热处理通过高温破坏植物组织中的蛋白质结构,使细胞失去功能;而电能处理则更为精准,通过向植物根系输送高压电流,造成内部细胞不可逆损伤。Japaneseknotweedagency采用的热电处理技术,可向现场输送高达5000伏的直流电能,直接耗竭日本虎杖等入侵植物地下根茎网络中储存的能量,这是目前业内最具技术深度的无化学处理方式之一。

膜过滤技术同样属于物理范畴。超滤膜技术通过分子筛分,在常温下不添加任何化学物质,即可精准分离目标分子,这一原理在植物处理领域同样具有参考价值。

植物提取物:天然活性成分的定向作用

植物自然处理是另一条重要技术路线,其核心在于利用植物本身的生物活性成分。富含黄酮类物质的植物提取液,黄酮含量达到80%以上时,能对目标有机物产生显著抑制效果,且不产生有害残留。这种无化学原料的处理方式,特别适合对土壤生态敏感的家庭园艺场景。

家用厨房自制植物除草剂

天然植物提取物还能发挥渗透分解的作用,将有害分子转化为水和二氧化碳,而非仅仅掩盖表面问题。这与传统化学处理中"毒杀"目标的逻辑截然不同,是真正意义上的根本性治理。

微生物与光催化技术

微生物处理利用特定菌种分解植物根系或抑制其生长,是无毒处理技术的前沿方向。纳米矿物材料与光催化技术通过晶体结构持续释放催化作用,实现对目标物质的主动捕捉与分解,避免二次污染,在空气净化和植物控制领域均有应用。

以下是三类主要技术的优缺点对比:

  • 热电处理:根除彻底,适合大面积入侵植物,设备要求较高,需要专业操作
  • 植物提取物法:安全性极高,适合家庭小面积应用,大规模根除需多次处理
  • 微生物法:生态友好,但起效周期较长,受环境温湿度影响显著

专业提示: 对于日本虎杖等根系深度超过3米的入侵植物,单纯依赖植物提取物效果有限。热电处理结合根系清除才是最可靠的无化学处理方案组合。

环保优势与无化学安全性分析

如何无化学处理同时保障生态安全,是许多家庭用户最关心的问题。无化学安全性不仅体现在人体健康层面,更体现在整个生态系统的保护上。

环保处理原理的核心逻辑是"无负担输入",即处理过程中不向环境输入任何外来有毒物质。这与传统草甘膦等化学除草剂的作用方式形成鲜明对比。具体优势体现在以下几个方面:

  • 土壤微生物保护:化学农药会大规模破坏土壤中的有益微生物群落,而无化学处理对微生物无干扰,土壤肥力得以持续维持
  • 水体安全:化学除草剂随雨水渗入地下水的风险长期存在,无化学处理方式从源头消除了这一风险
  • 非目标物种安全:传统化学方法会伤害周边植物、昆虫和小型动物,无化学技术的作用范围更为精准
  • 处理后无需隔离期:化学处理后通常需要等待数天乃至数周才能安全进入处理区域,无化学处理完成后即可正常使用场地

使用玉米淀粉和小苏打交替浸泡,可去除94%以上的农药残留,这一日常生活中的实例直观说明了无化学辅助原理的实际效力,其背后的吸附与分解机制与大规模无化学处理的核心逻辑完全一致。

无排放处理剂在生产与使用过程中不产生有害气体或化学排放,这一特性在城市住宅区和敏感生态区域的植物控制中尤为重要。对于有儿童或宠物的家庭,无化学安全性不是加分项,而是基本要求。

无化学处理与传统化学方法比较

将无化学处理与传统化学除草方法进行直接对比,有助于读者在实际决策中做出更明智的选择。以下表格从五个关键维度进行系统比较:

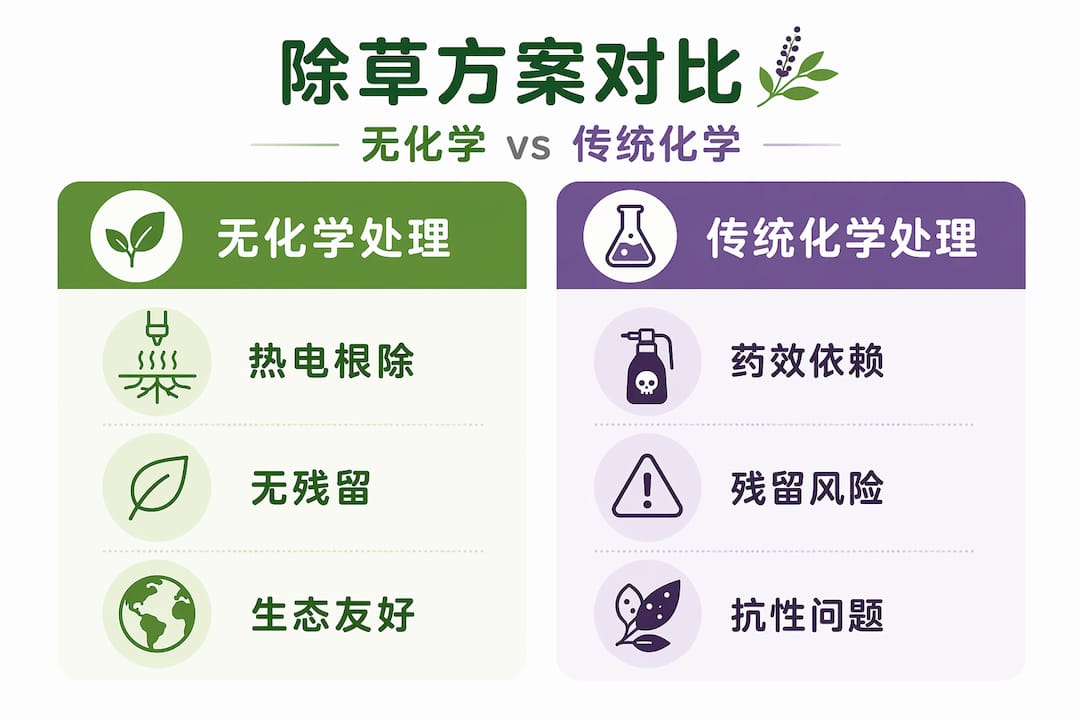
环保除草方式与传统化学除草方法对比图解

比较维度 无化学处理 传统化学处理
根除彻底性 热电技术可实现永久根除,不依赖毒素积累 依赖药效持续,抗性风险随使用频次增加
环境影响 无残留,不污染土壤与水体 存在土壤和地下水污染风险
人体安全性 处理后即可安全使用场地 需严格遵守隔离期,操作人员需防护装备
长期成本 初期设备投入较高,后续维护成本低 化学品采购持续产生成本,土壤修复费用高
法规合规性 符合日益严格的环保法规要求 部分化学品在英国及欧盟正面临使用限制

传统化学处理的一个隐性代价是抗性问题。长期使用同类除草剂会导致目标植物产生耐药性,迫使用户不断提高剂量或更换药物,形成恶性循环。无化学处理从机制上彻底规避了这一问题,因为物理能量或生物活性成分的作用模式不依赖特定化学靶点,植物不存在进化出"抗性"的路径。

免化学处理技术在计算机制版领域已实现物理或无化学显影,这一跨领域案例说明,无化学原理在不同行业中均已验证其技术可行性,并非仅限于园艺除草。

专业提示: 在选择处理方案前,建议委托专业机构进行现场勘察,明确入侵植物的根系深度和扩散范围。这一步骤直接决定无化学处理方案的选择和处理频次,避免资源浪费。

家庭与园艺中的实际应用步骤

掌握了无化学处理原理之后,如何将其转化为家庭园艺中的实际行动是关键所在。以下流程适用于大多数家庭花园中的入侵植物处理场景。

实施步骤如下:

  1. 现场评估:识别目标植物种类,记录生长范围和密度,判断根系可能的深度。日本虎杖等顽固性植物的根系可穿透地面3米以上,单纯地面处理效果有限。
  2. 工具准备:根据处理方式准备相应工具,热电处理需要专业设备,植物提取物法则需要高浓度黄酮类提取液和喷雾装置。
  3. 首次处理:在植物生长旺季(春末至夏季)实施首次处理,此时植物代谢活跃,能量传导最为高效,处理效果最为显著。
  4. 效果跟踪:处理后4至6周进行效果评估,记录植物状态变化,判断是否需要补充处理。
  5. 根系屏障安装:对于已根除区域,安装根系屏障防止周边根系重新侵入,这是防止复发的关键物理措施。
  6. 后续监测:在接下来的两个生长季节保持定期检查,一旦发现新芽立即处理,防止根系重新建立能量储备。

预防复发的有效方法包括:

  • 在清除区域种植竞争性植被,通过生态竞争抑制入侵植物重新定植
  • 保持土壤覆盖物厚度不低于10厘米,抑制光照到达地表
  • 定期检查边界区域,特别是与邻近地块接壤的位置

了解无化学除草的具体步骤根系清除注意事项,能帮助家庭用户在专业指导下安全完成整个处理流程,避免常见操作失误。

我对无化学处理技术未来的看法

从我在这一行业多年的实际经验来看,无化学处理原理正处于一个关键的转折点。技术已经成熟,但认知还没有跟上。我见过太多房主因为相信"不用农药就无法根除日本虎杖"这一说法,而一再推迟处理,最终让根系扩散到更难控制的程度。

我认为,目前最被低估的趋势是热电技术的精准化。当我们能够将5000伏的电能准确输送到根茎网络的核心位置时,我们实际上做到了传统化学方法从未真正做到的事情:从根本上耗竭植物的能量储备,而不是简单地毒杀地面可见部分。这种处理方式不留化学残留,不伤害周边土壤,完成后场地立即可以安全使用。

我也想纠正一个常见误区:有人认为无化学处理成本更高,因此只适合预算宽裕的用户。事实上,如果将传统化学处理的长期复发成本、土壤修复费用以及潜在的法律责任一并计算,无化学方案的总体经济账其实更为合算。家庭用户参与生态保护,不是一种奢侈的选择,而是一种越来越现实和必要的决定。对于从事这一领域的专业人士,我建议将技术教育列为服务的核心组成部分,因为客户理解原理,才能做出真正有效的长期决策。

— Alan

Japaneseknotweedagency 的无化学处理专业方案

https://japaneseknotweedagency.co.uk

Japaneseknotweedagency 是英国无化学处理入侵植物领域的先驱机构,专注于日本虎杖及其他入侵物种的无毒根除。我们的热电处理技术每次可输送高达5000伏电能,直接破坏根茎网络的细胞结构,实现持久根除而不对周边生态造成任何化学负担。除技术处理外,我们还提供根系屏障安装、挖掘作业以及覆盖英格兰、威尔士和爱尔兰的专业现场勘察服务。如果你正在寻找经过验证的无化学侵入植物方案,或希望详细了解我们服务的技术细节,请访问我们的常见问题解答页面获取完整信息和专业建议。

常见问题解答

无化学处理真的能彻底根除日本虎杖吗?

可以。Japaneseknotweedagency采用的热电处理技术成功率达95%,通过持续耗竭根茎能量储备实现永久根除,无需依赖任何化学物质。

无化学处理方式对儿童和宠物安全吗?

完全安全。无化学处理完成后场地无需隔离,不留任何有毒残留,与传统化学除草剂需要严格隔离期的特性形成根本区别。

植物提取物能单独用于大面积入侵植物控制吗?

对于浅根性杂草效果显著,但对于日本虎杖等深根性入侵植物,植物提取物建议作为辅助手段配合物理处理使用,单独使用难以触及3米以下的根茎网络。

无化学处理需要多少次才能见效?

取决于入侵植物的种类和根系深度,一般需要2至4次热电处理周期,每次间隔4至6周。处理期间配合根系屏障可显著提升最终效果并防止复发。

如何判断家中是否需要专业无化学处理服务?

如果在花园中发现竹节状茎干、宽大心形叶片或大规模地下根系,建议立即委托专业机构进行现场勘察,因为自行处理不当可能导致根系进一步扩散,增加后续处理难度和成本。

推荐

Understanding energy-based weed removal: a 2026 guide


TL;DR:

  • Energy-based weed removal employs high-voltage electrical pulses that target plant vascular systems, destroying roots without soil disturbance. It uses significantly less energy than thermal methods and preserves soil health, making it an environmentally friendly alternative. Proper application involves dry conditions, pre-treatment mowing, and multiple passes for invasive species, with advanced AI technology improving targeting precision.

When chemical herbicides carry increasing regulatory scrutiny and thermal flaming struggles with fuel costs, understanding energy-based weed removal becomes a genuinely useful skill for homeowners and landscapers alike. Electrical weed control works by driving high-voltage current through a plant’s vascular system, causing internal cell damage that kills both foliage and root structures without disturbing a single gram of soil. This guide covers how energy pulses affect plant physiology, why this method outperforms traditional approaches on several measurable fronts, how to apply it correctly, and what the latest technology advances mean for invasive species management.

Table of Contents

Key takeaways

Point Details
Energy efficiency advantage Electrical weed control uses 10 to 20 times less energy than thermal methods such as flaming or steaming.
Soil biology is preserved Unlike mechanical or chemical control, electrical treatment leaves soil microbiology intact, protecting nematodes, fungi, and beneficial bacteria.
Dry conditions are non-negotiable Surface moisture causes current to short-circuit across the plant exterior, so weeds must be dry for electrical treatment to be lethal.
Pre-treatment mowing matters Mowing before treatment improves weed kill efficacy by approximately 72% by improving electrode contact and energy penetration.
AI is reshaping precision AI-driven pulsed power systems now achieve up to 95% targeting accuracy, making energy weed control viable for high-value and sensitive sites.

Understanding energy-based weed removal: how pulses affect plants

The core principle is straightforward. When a high-voltage electrical current is applied to a weed through direct electrode contact, it travels down through the plant’s stem and into the vascular system, following the path of least resistance toward the root network. The current disrupts cellular membranes, causes protein denaturation, and collapses internal fluid pressure at a cellular level. The result is systemic damage that kills both above-ground growth and the root structure beneath.

This is what separates energy-based weed control from surface treatments. Most thermal and chemical methods address the canopy but leave root systems largely intact, which is precisely why perennial weeds and invasive species like Japanese Knotweed regenerate so aggressively. Electrical treatment aims to deplete the energy reserves held within the root and rhizome network, not merely scorch what is visible above ground.

Several factors govern how effectively energy pulses affect weeds:

  • Voltage and pulse frequency: Higher voltages increase the depth of current penetration. Pulse frequency determines how rapidly cell damage accumulates across successive treatment passes.
  • Electrode contact quality: The current must enter the plant through physical contact. Poor contact reduces efficacy significantly, which is why mowing dense or tall weed growth prior to treatment is so beneficial.
  • Moisture conditions: Surface moisture reduces lethality by causing current to travel over the plant exterior rather than through its vascular tissue. Weeds must be dry to allow internal current flow.
  • Travel speed: Slower speeds of 0.3 to 0.6 mph allow sufficient electrode contact time to transfer lethal energy into the root zone.

Pro Tip: Treat weeds during a dry spell of at least 24 hours, ideally in the morning before dew has had chance to settle on foliage. This single preparation step can be the difference between superficial damage and genuine root kill.

Compared to thermal methods, electrical control offers a far more targeted pathway into the plant. Flaming heats surface cells but rarely penetrates deep enough to kill established roots. Steaming requires substantial water and energy input, and mechanical removal risks both soil disturbance and rhizome fragmentation, which can spread invasive species further.

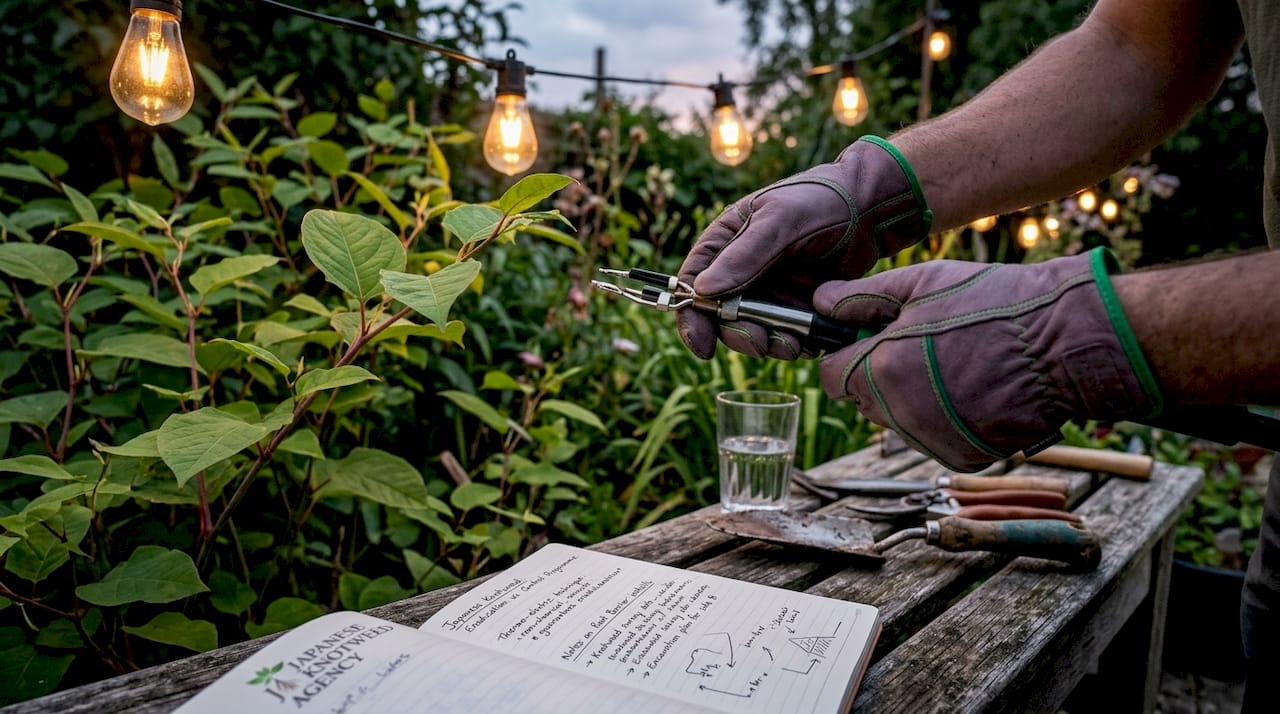
Hands adjusting weed control equipment outdoors

Energy use and environmental impact compared

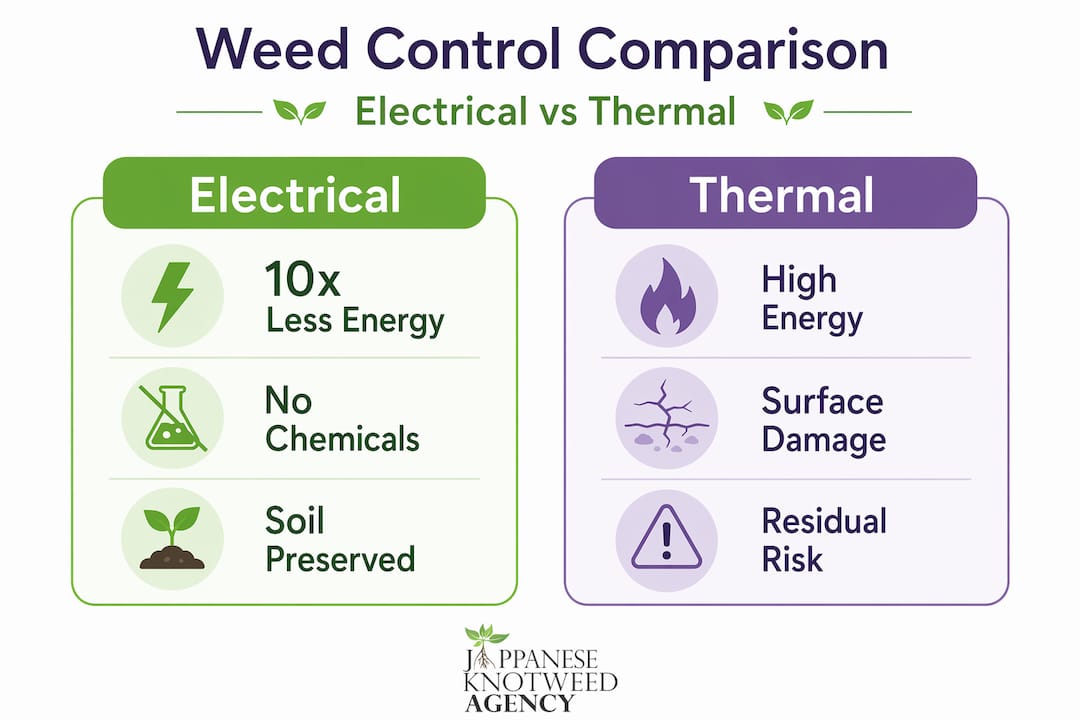
One of the most striking findings in recent research is the sheer difference in energy consumption between electrical and thermal weed control. Electrical methods use 10 to 20 times less energy than flaming or steaming to achieve comparable weed mortality. For a landscaper treating a large site repeatedly across a growing season, that difference is not marginal. It translates directly into operating costs, carbon output, and fuel logistics.

The table below places the main weed control approaches side by side across three dimensions that matter most to environmentally aware practitioners:

Method Energy consumption Soil impact Chemical residue risk
Electrical treatment Very low None. No soil disturbance None
Thermal flaming High (10 to 20x electrical) Low. Minor surface heating None
Steam treatment Very high Low to moderate None
Mechanical removal Moderate High. Tillage and compaction None
Chemical herbicide Very low Low directly, but cumulative High. Leaching and residue risk

Electrical treatment preserves the soil ecosystem in a way that no other method fully replicates. Research confirms that soil biology including nematodes, bacteria, and fungi remains undisturbed because the current targets only the weed without chemical leaching or physical ground disruption. For homeowners focused on garden biodiversity or landscapers working on organic certification, this is a genuinely significant distinction.

Infographic comparing electrical and thermal weed removal methods

It is worth acknowledging one limitation. Electrical weed control is non-selective by nature, meaning it will damage any plant the electrode contacts. Proper equipment configuration, including booms, shields, and appropriate electrode spacing, is the standard approach to protecting desirable plants on mixed sites.

Best practices for effective application

Getting the most from energy weed control techniques depends on preparation, conditions, and operational discipline. The method is effective when applied correctly and markedly less so when shortcuts are taken. Follow this sequence for consistent results:

  1. Assess weed density and height. Dense or tall weed growth requires pre-treatment mowing. Mowing prior to electrical treatment reduces above-ground biomass and dramatically improves electrode-to-stem contact, producing approximately 72% greater weed kill than treating unmowed growth.
  2. Confirm dry conditions. Check that weeds and soil surface are genuinely dry. Waterlogged or saturated soil diverts current laterally rather than into the plant. Avoid treatment within 24 hours of significant rainfall.
  3. Set electrode height and spacing correctly. Electrodes should make firm, consistent contact with weed stems. Incorrect height creates missed contact points and partial energy delivery, leaving roots viable.
  4. Operate at the correct speed. Forward speed critically affects mortality. Work at 0.3 to 0.6 mph to pass sufficient electrical energy through the plant. Faster operation is tempting on large sites but produces poor root-level results.
  5. Plan for multiple passes on perennial species. Two passes at moderate speed can match the efficacy of a single slow pass and are often more practical on larger areas. Perennial and invasive species with deep rhizome networks benefit from repeated treatment cycles to deplete stored energy reserves.
  6. Configure equipment for site-specific protection. Where desirable plants are nearby, use equipment shields and spacing settings to minimise off-target contact.

Pro Tip: Treat young, actively growing weeds where possible. Younger plants have higher water content within their vascular tissue, which supports better electrical conductance and deeper root penetration. Treating mature, woody-stemmed weeds with thicker bark requires higher voltage settings to achieve the same internal effect.

For a detailed operational walkthrough, Japaneseknotweedagency has published practical guidance on chemical-free invasive weed management that covers both field preparation and treatment sequencing.

Advanced technology: AI, pulsed power, and what is next

The most significant recent development in energy weed control techniques is the integration of artificial intelligence with high-voltage pulsed power delivery. In early 2026, I-Pulse launched the iTerra system, which uses AI-driven camera detection to identify individual weed plants and deliver precisely timed electrical pulses of approximately five milliseconds to each target. The system achieves up to 95% targeting accuracy without disturbing soil or leaving herbicide residues.

This matters beyond the headline figure. The integration of AI with pulsed power addresses several persistent limitations of earlier electrical systems:

  • Herbicide-resistant species: AI-targeted pulsing sidesteps resistance entirely, as electrical damage is a physical process not susceptible to biological adaptation.
  • Energy waste reduction: Rather than energising a full boom continuously, the system fires only when a weed is detected, cutting unnecessary energy expenditure on clear ground.
  • Precision in mixed plantings: AI detection allows treatment within crop rows or alongside desirable garden plants where a continuous electrical boom would cause collateral damage.
  • Data and mapping: Detection systems log weed location and density across passes, supporting longer-term management planning and treatment scheduling.

The challenge for widespread commercial adoption remains cost and the operational training required to maintain sophisticated pulsed power equipment. For professional invasive species contractors and larger landscaping operations, the technology is already commercially viable. For individual homeowners, the more immediate relevance lies in the chemical-free knotweed eradication services now offered by specialist contractors equipped with high-voltage delivery systems.

My perspective on energy-based weed control

I have worked in invasive species management long enough to recognise the pattern. A new control method generates genuine interest, and the first question is always whether it will hold up in practice on difficult species. With energy-based electrical treatment, the honest answer is: yes, when applied correctly, and with clear-eyed expectations about what repeated treatment means for deep rhizome networks.

What I find compelling about this approach is not only the environmental credentials, though the absence of chemical residue and the preservation of soil biology are genuinely significant. It is the fact that electrical treatment attacks the energy reserves within the rhizome directly. Japanese Knotweed’s ability to push through tarmac and concrete reflects the extraordinary energy reserves stored underground. Depleting those reserves systematically, treatment by treatment, is a fundamentally sound strategy.

Where I see homeowners and landscapers underestimate the method is in expecting single-treatment results on established invasive species. This is not a reflection of the technology’s limits. It reflects the biology of the target. Multiple treatment cycles across growing seasons are standard, not exceptional. In my view, the best practices for chemical-free eradication all share one characteristic: they work with the plant’s biology rather than expecting a one-time solution to override years of root establishment.

The regulatory and mortgage context also matters increasingly. Lenders and surveyors now scrutinise invasive weed management plans closely, and a documented, repeatable, chemical-free treatment programme carries real weight in property transactions across England, Wales, and Ireland.

— Alan

How Japaneseknotweedagency can help

If you have identified invasive weeds on your property or surrounding land, the first step is always a professional survey to assess extent, risk, and the most appropriate management route.

https://japaneseknotweedagency.co.uk

Japaneseknotweedagency delivers direct energy of up to 5,000 volts on site, targeting the rhizome network of Japanese Knotweed and other invasive species without chemicals or soil disruption. Their chemical-free knotweed removal service achieves a 95% success rate and is designed to meet the documentation requirements of lenders and surveyors. Root barrier installation and excavation services are also available for complex or high-risk sites. To explore your options, book a property survey and receive a professional assessment of your invasive weed risk. For common homeowner questions, the Japaneseknotweedagency FAQ page covers treatment options, timescales, and mortgage considerations in plain terms.

FAQ

What is energy-based weed removal?

Energy-based weed removal uses high-voltage electrical current delivered through direct electrode contact to cause internal cell damage within a plant’s vascular system, killing both foliage and root structures without soil disturbance or chemical application.

Why do energy pulses affect weeds differently from surface treatments?

Electrical pulses travel through the plant’s vascular tissue into the root and rhizome network, depleting stored energy reserves. Surface methods such as flaming treat only above-ground growth, leaving roots intact and allowing regrowth.

Does electrical weed control damage soil?

No. Research confirms that soil microbiology including nematodes, bacteria, and fungi remains undisturbed because electrical treatment does not involve soil tillage or chemical leaching.

How many treatments does Japanese Knotweed require?

Japanese Knotweed typically requires multiple treatment cycles across consecutive growing seasons. Each electrical treatment depletes rhizome energy reserves progressively, and the number of treatments needed depends on the extent and maturity of the root network.

Is electrical weed control safe near garden plants?

Electrical weed control is non-selective, meaning any plant the electrode contacts may be affected. Using equipment shields, correct electrode spacing, and targeted application protects desirable plants when the system is properly configured.

房产买卖杂草检测指南:购房者必读


TL;DR:

  • 杂草问题在房产交易中风险巨大,尤其是入侵性植物可能导致房产价值下降和法律纠纷。完整的检测应涵盖范围划定、时间选择、样本采集和详细记录,以确保风险掌控。制定科学治理方案并签订明确合同,是保障购房安全和法律权益的关键措施。

在房产交易中,杂草问题往往是最容易被忽视却代价最高的风险之一。许多购房者直到入住后才发现地块上存在入侵性植物,届时已面临结构损坏、法律纠纷或巨额清除费用。本文将为您提供一份完整的房产买卖杂草检测指南,从检测前准备、现场操作流程,到处理计划制定与法律合规审查,帮助您在签订合同前全面掌握风险,保障房产价值与交易安全。

目录

关键要点

要点 详情
检测先于交易 在签订购房合同前完成专业杂草检测,可有效规避后期纠纷与额外费用。
书面记录至关重要 要求卖方提供书面杂草检测报告,口头承诺不具有法律约束力。
入侵杂草影响房产价值 日本结缕草等入侵植物可导致房产市值下降15%以上。
非化学治理效果持久 科学的无化学方案可在5年内将根茎活性降低90%以上,长期效果显著。
合规保障权益 合同中明确杂草处理责任与时间节点,是保障买卖双方权益的法律基础。

房产买卖杂草检测的准备工作

在开展任何现场检测之前,充分的准备工作决定了检测结果的准确性与可靠性。许多购房者在这一阶段投入不足,导致关键区域遗漏或检测报告缺乏法律效力。

确定检测范围与重点区域

您需要首先获取完整的地块平面图,标注花园边界、围墙、车道及排水系统等区域。入侵性杂草往往沿围墙、铁路边界或河道附近生长,这些位置是检测的高风险地带。如果相邻地块存在已知杂草问题,您的检测范围还应延伸至边界线两侧各数米。

以下是检测前需要了解的常见入侵性杂草种类:

  • 日本结缕草(Japanese Knotweed):茎中空、节间明显,叶片呈心形,春季茎干呈紫红色
  • 虎杖:外形与日本结缕草相似,常见于河岸地带
  • 大猪草(Giant Hogweed):伞形花序,茎秆高大,接触皮肤可引发严重灼伤
  • 喜马拉雅香脂花(Himalayan Balsam):粉紫色花朵,种子可弹射传播,常见于湿地边缘

选择最佳检测时间

杂草的季节性特征对检测效果影响显著。日本结缕草在每年4月至10月地上部分最为明显,是视觉识别的最佳窗口期。冬季茎干枯萎后,识别难度大幅上升。如果您在冬季购房,务必要求卖方提供上一个生长季节拍摄的历史照片或专业检测记录。

专业提示: 如果您正在办理房屋抵押贷款,部分贷款机构要求提供经认可机构出具的杂草检测报告。在提交贷款申请前,提前确认银行的具体要求可以为您节省大量时间。

检测准备项目 说明
地块平面图 标注所有边界、建筑物及水系位置
历史航拍图像 通过公开卫星图查看地块历史植被变化
邻居情况了解 询问周边地块是否有已记录的入侵杂草问题
检测工具清单 手套、标记桩、相机及土壤探针

现场检测的具体步骤

掌握系统的检测流程是提升准确率的核心。根据专业检测标准,高标准杂草检测的准确率可达95%以上,关键在于步骤的完整执行。

  1. 外围目视扫描:从地块外围开始,观察边界线两侧是否存在异常植被密集区。日本结缕草常以"丛"的形态出现,单株极为罕见。
  2. 系统性网格行走:将地块划分为若干网格区域,逐一步行检查,确保无遗漏。每个网格不超过5米乘5米,可借助绳索或标记桩辅助划分。
  3. 地面及地下检查:挖取少量土壤样本,检查是否存在根茎(rhizome)碎片。日本结缕草的根茎呈橙黄色,截面清晰可辨,即便是直径不足1厘米的碎片也具有再生能力。
  4. 记录地理坐标:使用手机GPS或专业设备记录每处疑似杂草的精确位置,便于后续复查与报告撰写。
  5. 拍摄多角度照片:每处发现点至少拍摄近景、中景与全景三张照片,记录植株形态、茎干颜色和叶片特征。
  6. 采集植物样本:如现场无法确认植物种类,可采集茎叶样本带回,提交给专业机构进行实验室鉴定。

识别日本结缕草的关键特征

日本结缕草是房产交易中最常见也最具破坏性的入侵植物之一。成株高度可达3米,茎节呈竹节状,夏末开白色细小花簇。更重要的是,其根茎网络可向地下延伸超过3米,向地表外延伸超过7米,混凝土地基和排水管道均无法阻挡其生长。了解日本结缕草的识别特征对购房者来说是基础中的基础。

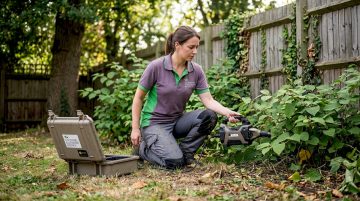
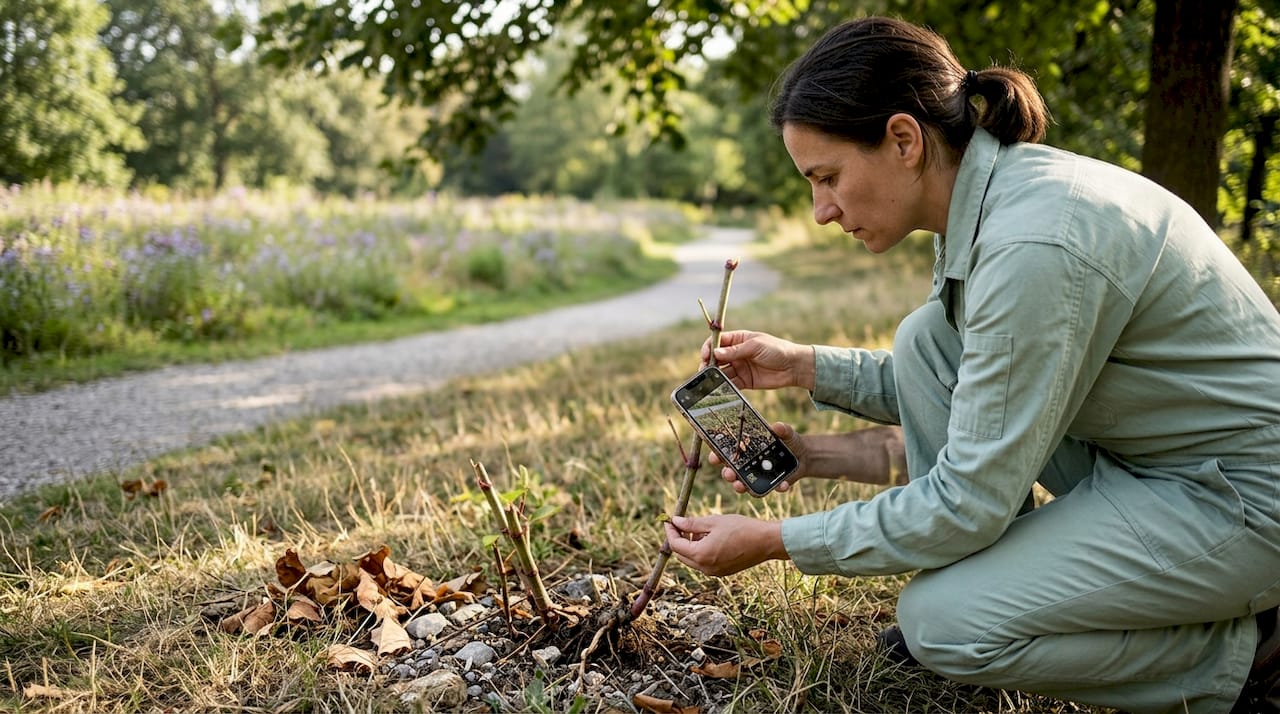
园林工作人员正在拍照记录日本结缕草的生长特点。

专业提示: 不要仅凭外形判断植物种类。多种常见园艺植物与日本结缕草高度相似,误判会导致不必要的处理费用或真实风险被遗漏。如有疑问,请务必联系专业机构进行鉴定。


制定科学的杂草处理方案

检测只是第一步。一旦确认地块存在入侵性杂草,制定有效的处理计划是保障房产交易顺利推进的前提。处理方案的选择直接影响治理成本、时间周期和法律合规性。

非化学治理与化学治理的比较

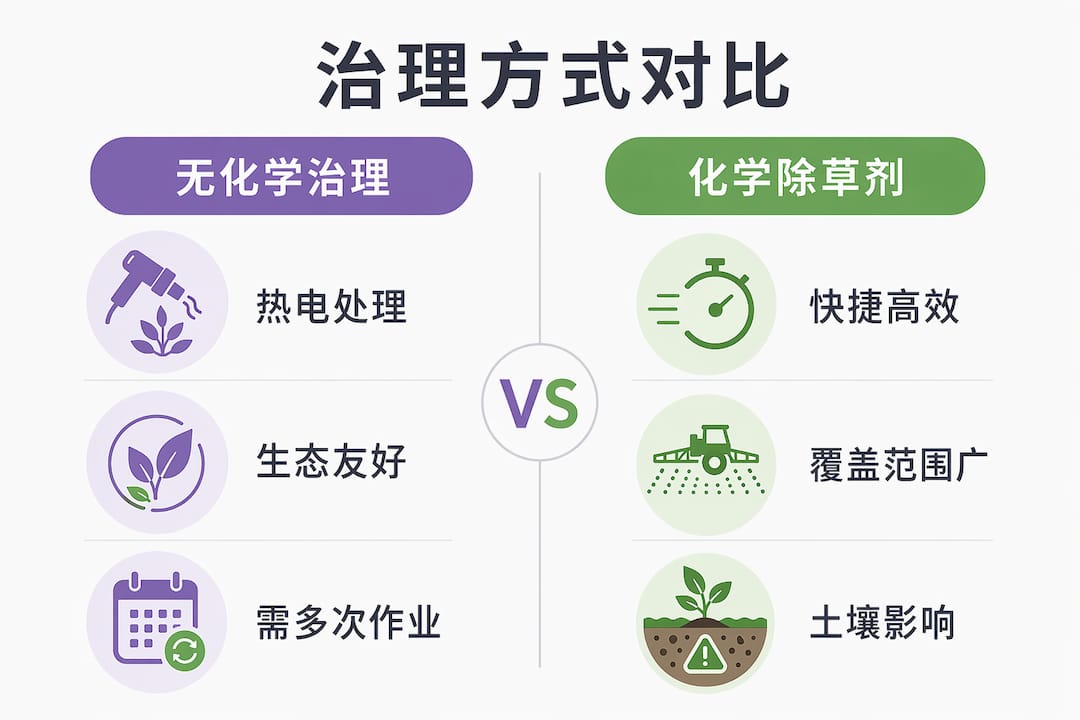
治理模式对比一目了然信息图

治理方式 优势 局限性
热电处理(无化学) 对周边生态系统无影响,可持续作业 需要多次处理,周期较长
化学除草剂 单次作业覆盖面广 可能影响土壤健康,部分地区有使用限制
根障安装 有效阻隔根茎横向扩散 需专业施工,成本较高
挖掘清除 物理清除彻底 土方量大,弃土需专项处理

Japaneseknotweedagency 在无化学治理领域处于行业前沿。其专有的热电处理技术可向植株根茎网络输送高达5000伏的直流电,直接破坏细胞结构并耗尽根茎储存的能量,实现深层杀灭而不污染土壤或地下水。根据专业防治数据,科学的5年防治方案可将根茎活性降低90%以上。

防止扩散的长期维护策略

处理完成后,防止杂草二次扩散同样至关重要。以下措施需在合同或物业管理协议中明确约定:

  • 定期季度复查,确认杂草未重新萌发
  • 对挖掘或施工区域进行土壤监测,防止根茎碎片再生
  • 安装物理根障,阻隔来自相邻地块的地下根茎侵入
  • 保留每次处理记录和复查报告,形成完整的处理档案

检测结果验证与法律合规审查

在房产买卖中,杂草问题不仅是生态问题,更是具有明确法律后果的合同事项。杂草检测是房产交易安全的必要环节,忽视这一点可能导致严重的产权纠纷。

法律合规中的关键要求

购房者在签订合同前,需重点审查以下几项内容:

  • 披露义务:卖方有义务在合同签订前披露已知的杂草问题。草害披露的法律地位与房屋结构安全评估同等重要,口头说明不具备法律约束力。
  • 合同补充条款:在购房合同中明确写明杂草检测结果、处理责任方、完成时间节点及违约赔偿条款。合同书面约定是日后维权的核心依据。
  • 律师审核介入:专业律师审核杂草相关条款,可有效防范因隐瞒杂草信息引发的产权纠纷与合同违约。
  • 独立检测报告:主动要求卖方提供由认可机构出具的书面检测报告,而非依赖中介或卖方的口头说明。

“购房者应主动要求提供书面杂草检测报告,避免仅凭口头说明导致产权风险。合同中含糊不清的条款是引发纠纷的重要因素。”

后续复查与确认程序

完成初步处理后,正式交房前需进行至少一次独立的后续复查,以书面形式确认杂草已达到约定的清除标准。复查报告应包含检测日期、检测人员资质、检查范围及结论,并由买卖双方签字存档。这份文件在任何后续法律纠纷中都将发挥关键证明作用。


我在这一行的真实看法

多年来,我见过太多购房者在入住数月后才发现花园地下存在大面积根茎网络,处理费用远超他们预期的购房预算。这类案例有一个共同点:买方在签约前从未要求进行独立的杂草检测。

人们往往低估了合同模糊条款带来的法律风险。"地块状况良好"这样的表述在法律上几乎毫无约束力,卖方完全可以辩称自己并不知情。我见过的纠纷中,有相当一部分就是因为这类措辞引起的。真正有效的保护只有一种形式:独立检测加书面报告加具体合同条款。

我还想指出一个常被忽视的风险点。相邻地块的杂草同样可以通过地下根茎侵入您的产权范围,而此时法律责任的归属往往模糊。提前在边界安装根障,并在购房合同中约定邻地杂草责任条款,是目前最有效的预防手段。

买房是大多数人一生中最大的一笔支出。花几百英镑委托专业机构进行一次系统性杂草调查,相比于日后数万英镑的清除与修复费用,这笔钱花得非常值得。

— Alan


专业检测服务助力安心置业

https://japaneseknotweedagency.co.uk

如果您正在购房或办理房屋抵押,Japaneseknotweedagency 提供覆盖英格兰、威尔士及爱尔兰的专业入侵杂草房产调查服务。调查报告符合贷款机构要求,可直接用于合同谈判与法律备案。除调查外,Japaneseknotweedagency 还提供热电无化学治理、根障安装及挖掘清除等全套处理方案,并附持续跟踪保障,确保专业治理效果长期稳定。如需了解日本结缕草及其他入侵植物的详细解答,请访问我们的常见问题页面获取更多支持。


常见问题

日本结缕草真的会影响房产价值吗?

是的。入侵性杂草可使房产市值下降15%以上,且部分贷款机构在确认存在日本结缕草前会拒绝批准抵押贷款。

购房前必须做杂草检测吗?

法律上并无强制要求,但强烈建议这样做。主动进行买房前杂草检测可以保护您的投资,并为合同谈判提供重要依据。

杂草检测报告需要多长时间出具?

标准检测通常在现场勘察后3至5个工作日内出具书面报告,紧急情况下部分机构可提供24至48小时加急服务。

卖方隐瞒杂草问题是否违法?

是的。法律要求卖方披露已知的重大房产缺陷,包括杂草问题。故意隐瞒可能构成合同欺诈,买方有权追偿。

无化学治理方法与传统除草剂相比效果如何?

科学数据显示,采用专业非化学根茎治理方案在5年周期内可将根茎活性降低90%以上,且对土壤生态和周边植被无负面影响。

推荐

Step by step excavation process for home projects


TL;DR:

  • Proper site assessment, utility marking, and soil analysis are vital for safe, stable residential excavation projects. Skipping these steps can lead to utility strikes, foundation failure, and legal liabilities, costing much more than the initial savings. Investing in expert surveys, drainage planning, and thorough testing ensures long-term stability and safety of the constructed foundation.

Residential excavation goes wrong more often than most homeowners expect. Skipping a single stage of the step by step excavation process can result in collapsed trenches, utility strikes, waterlogged foundations, or costly structural remediation that dwarfs the original project budget. The consequences are not merely inconvenient. They can delay planning sign-off, void insurance cover, and create long-term instability beneath your property. This guide walks you through every stage of a properly managed excavation project, from initial site assessment through to final inspection, so you can approach the work with confidence and avoid the pitfalls that catch unprepared homeowners out.

Table of Contents

Key takeaways

Point Details
Assess before you dig Commission a registered surveyor and arrange soil testing before any ground is broken.
Utility marking is non-negotiable Mechanical equipment must never be used within 18–24 inches of marked utility lines.
Compaction must meet specification Fill material compacted in lifts no greater than 200 mm achieves the density required for safe foundation work.
Drainage planning protects foundations Improper drainage is one of the leading causes of long-term foundation failure and erosion.
Professional sign-off prevents problems Structural and geotechnical engineers must verify formation levels before any concrete is placed.

Site assessment and preparation before excavation begins

No responsible excavation steps guide begins at the machine. It begins weeks earlier, with a thorough site assessment that establishes what lies beneath your land, where your boundaries sit, and what consents you need before a single bucket of soil is moved.

Commissioning a registered surveyor is the logical starting point. A topographic survey establishes accurate ground levels and boundary positions, both of which directly influence excavation design. Without this, contractors are working to assumptions rather than data, and assumptions in excavation are expensive.
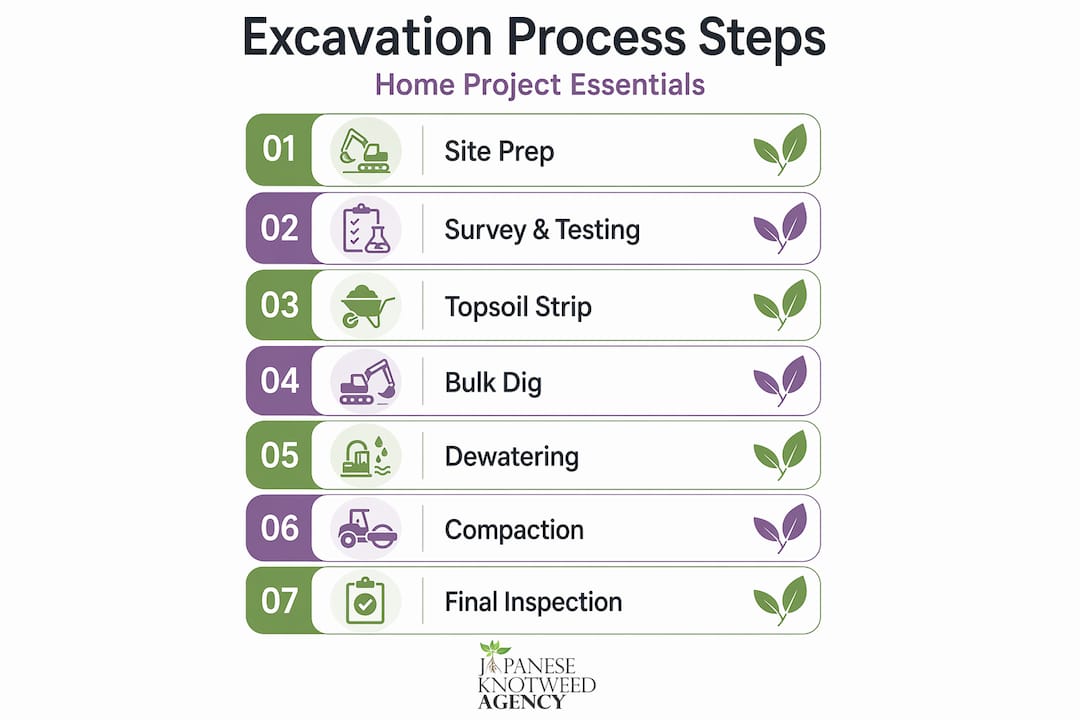
Vertical flow infographic of excavation process steps

Geotechnical and soil analysis should follow. Soil type governs everything from excavation technique to shoring requirements to compaction method. Clay-rich soils retain water and are prone to heave. Loose granular soils may require sheet piling at depth. A ground investigation report provides the data your structural engineer needs to design a safe excavation.

Key preparation steps before work begins include:

  • Locating all underground utilities by contacting your local authority and using a professional cable and pipe detection service
  • Obtaining the relevant council approvals, including planning permission where required and, in England, Building Regulations approval for foundations
  • Securing environmental consents where the site is near watercourses or contains invasive species such as Japanese Knotweed
  • Installing site hoarding, welfare facilities, and temporary erosion controls such as silt fencing along site boundaries
  • Briefing the full contractor team on site-specific hazards, including the location of all utility corridors

Pro Tip: Before submitting any planning application, arrange an invasive plant survey for your site. Knotweed or other invasive species discovered mid-excavation can halt works entirely and trigger regulatory obligations that add significant cost.

Skipping comprehensive site assessments leads directly to improper foundation stability and unforeseen utility conflicts. The assessment stage is not an administrative formality. It is the foundation upon which every subsequent excavation decision rests.

Clearing the site and stripping topsoil

With assessments complete and consents in place, the physical work of preparing the ground can begin. Site clearance and topsoil stripping are the first active stages of the excavation process overview, and they must be carried out methodically.

  1. Remove all above-ground vegetation, including grass, scrub, and garden planting, using appropriate machinery scaled to site size and access constraints.
  2. Treat any confirmed invasive species, such as Japanese Knotweed, in accordance with current legislation before disturbing the ground. Moving contaminated soil without treatment can spread rhizome material and carries legal risk.
  3. Carry out stump removal for all trees scheduled for clearance, maintaining buffer zones where tree root systems may affect adjacent structures or boundary walls.
  4. Demolish any existing surface structures, including sheds, driveways, or concrete slabs, and remove all rubble from site before excavation machinery is positioned.
  5. Strip topsoil to a minimum depth of 150 to 300 mm, depending on organic content, across the entire excavation footprint. Organic-rich topsoil has no place in a foundation subgrade. It compresses under load and promotes biological decay.
  6. Stockpile stripped topsoil in a designated, clearly marked area away from the excavation zone. Where topsoil is clean and uncontaminated, it can be retained for later landscaping use rather than removed from site at cost.

The discipline in this stage lies in not rushing. Contractors who strip too quickly or inconsistently leave organic pockets in the subgrade that compromise compaction results later. A clean, homogeneous stripped surface is the correct starting point for bulk excavation.

Bulk excavation and trench excavation

This is the stage most people associate with excavation: the machinery, the soil displacement, and the shaping of the ground to meet structural drawings. A sound stepwise excavation method here requires both the right equipment and strict adherence to safety protocol.

Equipment selection is determined by site access, excavation volume, and soil conditions. A 360-degree tracked excavator suits most residential bulk digs. Where access is restricted, a 13-tonne midi excavator or even a tracked dumper arrangement may be required. Choosing machinery that is too large for site conditions causes unnecessary ground disturbance and access damage.

Key principles governing the bulk and trench excavation phase include:

  • Maintaining correct batter slopes on open-faced excavations, typically 1:1 or as specified by the geotechnical engineer, to prevent slope failure
  • Installing shoring, trench boxes, or sheet piling for any trench exceeding 1.5 metres in depth, in line with Health and Safety Executive guidance
  • Leaving a hand-trim allowance of 50 to 100 mm above the specified formation level to prevent over-excavation. Loose backfill cannot replicate undisturbed native soil density and creates a weak point beneath the slab or foundation
  • Cutting utility trenches to the exact widths and depths specified on structural and services drawings, with appropriate bedding allowances for pipe diameter
  • Maintaining a mandatory hand-dig buffer zone of 450 to 600 mm either side of all marked utility lines. Mechanical equipment must not enter this zone under any circumstances

Safety note: Trench collapses are among the most serious hazards in construction. Trenches deeper than 5 feet require engineered protection as a legal obligation, not a recommendation. Never allow operatives to enter an unshored trench of this depth.

Collaborative planning among surveyors, engineers, and contractors is what keeps this stage safe and on programme. Ground movement monitoring, particularly for deeper residential basements, should be active throughout.

Dewatering, compaction, and subgrade preparation

Once bulk excavation reaches formation level, attention turns to water management and ground preparation. These stages are frequently underestimated by homeowners managing their own excavation project planning, yet they are what separates a durable foundation from one that will move and crack within a decade.
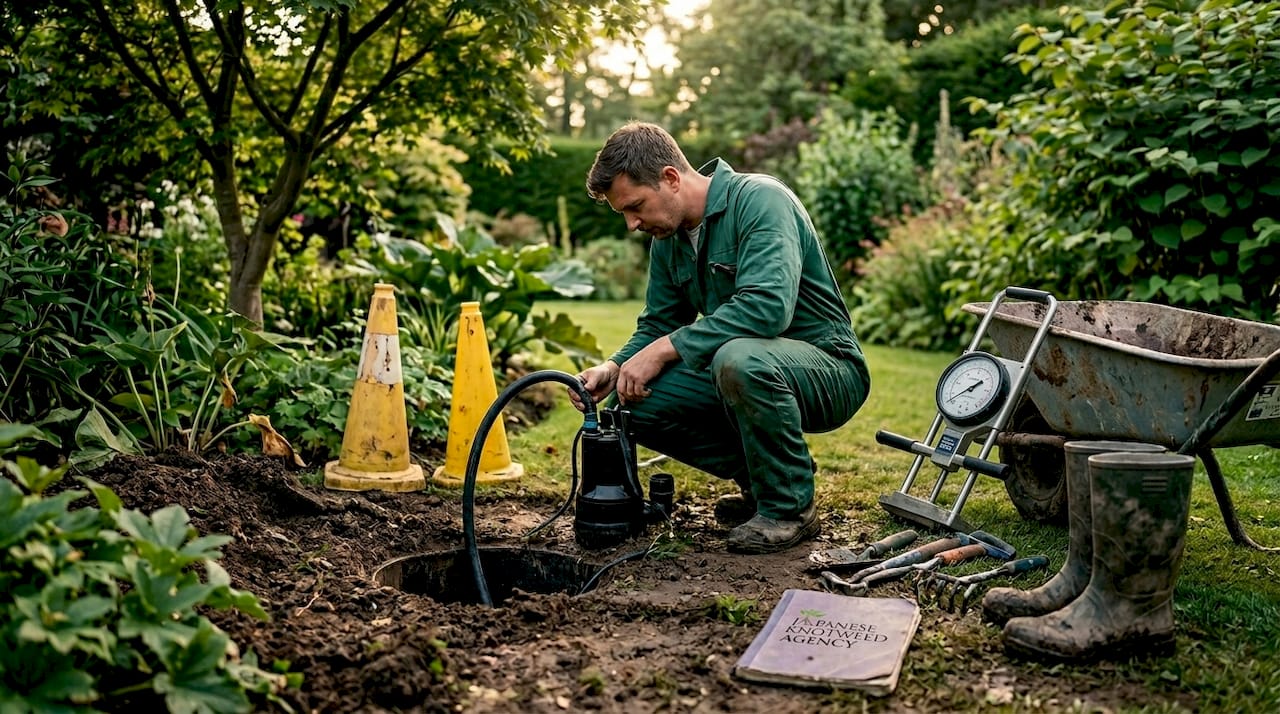
Worker inspecting sump pit and pump in backyard

Standing or seeping groundwater must be removed before compaction begins. Submersible pumps positioned in a sump pit at the lowest point of the excavation are the standard approach. Where groundwater ingress is continuous, a wellpoint dewatering system around the excavation perimeter may be necessary. Attempting to compact saturated soil produces no meaningful improvement in bearing capacity.

Stage Method Acceptance standard
Dewatering Sump pumping or wellpoint system Formation level free-draining before compaction
Compaction Vibrating roller or plate compactor in 200 mm lifts 95 to 98% Proctor dry density
Testing Nuclear density gauge or dynamic cone penetrometer Test results recorded and passed to engineer
Sub-base Granular type 1 MOT stone laid and compacted Minimum 150 mm depth, tested and approved
Blinding 50 mm lean mix concrete Level, continuous, and cured before reinforcement

Fill material must be compacted in lifts no greater than 200 mm, with compaction testing carried out at each lift before the next is placed. This is not optional. It is the only way to verify that your subgrade is performing to specification.

Pro Tip: Request a copy of every compaction test result from your contractor. These records are part of your building file and may be required by your structural engineer, building inspector, or future mortgage lender when assessing the property.

Final inspection and verifying readiness

The final stage of the excavation steps guide is verification. Before any concrete, reinforcement, or pipe bedding is placed, a structured inspection must confirm that the excavation meets the dimensions, levels, and compaction standards specified in the design.

The roles involved in this sign-off typically include:

  • The structural engineer, who checks formation levels, trench widths, and bearing capacity against design assumptions
  • The geotechnical engineer or specialist, where ground conditions were complex or varied from the original investigation
  • The building control inspector, who must formally approve the excavation before foundations are poured under Building Regulations

Common problems identified at this stage include over-excavation of trench bases, inadequate compaction results, and standing water that was not fully removed before testing. Each of these has a remediation route, but catching them at inspection costs far less than discovering them after concrete has been placed.

Water damage from improper drainage is described by structural engineers as a slow and silent threat. Drainage must be actively designed to divert surface and groundwater away from the foundation zone, not managed reactively once problems appear. Effective grading during excavation is one of the most frequently overlooked details, yet it is what keeps water away from your foundations for the life of the structure.

The inspection stage also provides the opportunity to confirm that all utility trenches have been backfilled in 200 to 300 mm lifts with compaction at every stage. Failure here leads to settlement, pipe separation, and surface cracking that can take years to manifest but is costly to remedy.

My perspective on residential excavation

What I have observed, working alongside surveyors and contractors on residential excavation projects across England and Wales, is that the vast majority of problems are entirely preventable. They are not caused by bad contractors or poor ground conditions. They are caused by homeowners and developers who underestimate the importance of the preparation stages and move too quickly toward the visible, tangible work.

In my experience, the utility survey and the soil investigation are the two stages most commonly skipped or reduced in scope when budgets are under pressure. This is precisely backwards. These are the stages that determine everything downstream. Discovering an uncharted gas main at 1.2 metres depth during bulk excavation is not a minor inconvenience. It can halt the project for weeks.

I have also seen drainage planning treated as an afterthought. Grading is designed on paper and then not verified on site as excavation progresses. Water finds its way into every unintended void, and a foundation sitting in intermittently saturated ground will move. The cost of correcting that movement, whether through underpinning or remedial drainage, is always far greater than the cost of getting it right during excavation.

What I tell every homeowner I work with is this: invest in the survey, follow the process, and do not make concessions on compaction testing or drainage design. The savings from cutting those corners are illusory.

— Alan

How Japaneseknotweedagency supports your excavation project

Excavation on residential land in England and Wales carries one risk that a standard structural survey will not identify: the presence of Japanese Knotweed or other invasive species within the excavation zone. Moving contaminated soil without specialist assessment and treatment is a legal and financial liability that can affect your ability to sell or mortgage the property.

https://japaneseknotweedagency.co.uk

Japaneseknotweedagency provides professional property surveys for invasive weeds across England, Wales, and Ireland, carried out before excavation begins to identify and manage any contamination risk. Where knotweed is present, Japaneseknotweedagency’s chemical-free knotweed solutions achieve a 95% success rate using thermo-electric treatment, root barrier installation, and controlled excavation, without the environmental risks associated with herbicide-based approaches. You can also book a survey to protect your project before groundworks commence.

FAQ

What is the first step in a residential excavation project?

The first step is a thorough site assessment, including a topographic survey, geotechnical soil investigation, and underground utility mapping. Starting without this information significantly increases the risk of utility strikes and foundation instability.

How deep must a trench be before shoring is legally required?

Any trench exceeding 1.5 metres in depth in the UK requires protective measures such as shoring, sloping, or a trench box. Under Health and Safety Executive guidance, this is a legal obligation for all construction sites.

What compaction standard should excavated fill meet?

Fill material should achieve 95 to 98% Proctor dry density, compacted in lifts no greater than 200 mm and verified by a nuclear density gauge or dynamic cone penetrometer before each subsequent lift is placed.

Can I excavate near utility lines with machinery?

No. Mechanical excavation equipment must not be used within 18 to 24 inches of any marked utility line. This zone must be excavated by hand to prevent accidental damage to gas, water, or electrical services.

Does Japanese Knotweed affect residential excavation projects?

Yes. Knotweed rhizomes can extend up to 3 metres in depth and 7 metres horizontally from the visible plant. Disturbing the root system without specialist management spreads the plant and can create legal liability. A professional invasive species survey should be carried out before any knotweed excavation works begin.