无化学处理原理:家庭园艺与生态除草全解析


TL;DR:

  • 无化学处理利用物理能量和生物提取物实现对入侵植物的安全根除。该方法保护土壤和水源,成本长期更具优势,受到生态保护意识提升的青睐。专业技术结合实践操作,可高效、安全地清除深根性植物,助力家庭园艺绿色升级。

许多人认为,不使用化学农药就无法彻底消灭入侵植物,这种观点在园艺领域根深蒂固,却与事实相去甚远。无化学处理原理正是针对这一误区而诞生的科学体系,它借助物理能量、植物提取物和生物技术,实现真正意义上的无毒、无害植物控制。近年来,随着生态保护意识的提升,越来越多的家庭和园艺爱好者开始寻求既高效又不伤害土壤与水源的处理方式。本文将系统梳理这一领域的核心原理、环保优势与实际操作方法。

目录

关键要点

要点 详情
物理能量是核心驱动力 高压电能可直接破坏植物根系细胞,实现无化学原料的根本性根除。
植物提取物具有实证效果 黄酮类等植物活性成分经科学验证,可有效抑制目标植物而不污染环境。
无毒技术保护土壤与水体 无化学处理方式避免农药渗入地下水,维持土壤微生物生态平衡。
与传统方法相比成本可控 无化学处理在长期维护成本和环境修复费用上明显优于传统化学除草。
家庭用户可参与实际操作 掌握正确工具和步骤,普通家庭完全可以实施有效的无化学处理方案。

无化学处理原理的核心技术与方法

理解无化学处理原理,首先需要认识到"无化学"并非意味着处理效果弱化,而是通过更精准的物理、生物机制实现同等乃至更强的控制效果。这一原理覆盖多个技术层面,每种方式都有其适用场景和作用机制。

物理法:热能与电能的直接作用

物理处理技术以能量为核心手段,直接作用于植物细胞层面。热处理通过高温破坏植物组织中的蛋白质结构,使细胞失去功能;而电能处理则更为精准,通过向植物根系输送高压电流,造成内部细胞不可逆损伤。Japaneseknotweedagency采用的热电处理技术,可向现场输送高达5000伏的直流电能,直接耗竭日本虎杖等入侵植物地下根茎网络中储存的能量,这是目前业内最具技术深度的无化学处理方式之一。

膜过滤技术同样属于物理范畴。超滤膜技术通过分子筛分,在常温下不添加任何化学物质,即可精准分离目标分子,这一原理在植物处理领域同样具有参考价值。

植物提取物:天然活性成分的定向作用

植物自然处理是另一条重要技术路线,其核心在于利用植物本身的生物活性成分。富含黄酮类物质的植物提取液,黄酮含量达到80%以上时,能对目标有机物产生显著抑制效果,且不产生有害残留。这种无化学原料的处理方式,特别适合对土壤生态敏感的家庭园艺场景。

家用厨房自制植物除草剂

天然植物提取物还能发挥渗透分解的作用,将有害分子转化为水和二氧化碳,而非仅仅掩盖表面问题。这与传统化学处理中"毒杀"目标的逻辑截然不同,是真正意义上的根本性治理。

微生物与光催化技术

微生物处理利用特定菌种分解植物根系或抑制其生长,是无毒处理技术的前沿方向。纳米矿物材料与光催化技术通过晶体结构持续释放催化作用,实现对目标物质的主动捕捉与分解,避免二次污染,在空气净化和植物控制领域均有应用。

以下是三类主要技术的优缺点对比:

  • 热电处理:根除彻底,适合大面积入侵植物,设备要求较高,需要专业操作
  • 植物提取物法:安全性极高,适合家庭小面积应用,大规模根除需多次处理
  • 微生物法:生态友好,但起效周期较长,受环境温湿度影响显著

专业提示: 对于日本虎杖等根系深度超过3米的入侵植物,单纯依赖植物提取物效果有限。热电处理结合根系清除才是最可靠的无化学处理方案组合。

环保优势与无化学安全性分析

如何无化学处理同时保障生态安全,是许多家庭用户最关心的问题。无化学安全性不仅体现在人体健康层面,更体现在整个生态系统的保护上。

环保处理原理的核心逻辑是"无负担输入",即处理过程中不向环境输入任何外来有毒物质。这与传统草甘膦等化学除草剂的作用方式形成鲜明对比。具体优势体现在以下几个方面:

  • 土壤微生物保护:化学农药会大规模破坏土壤中的有益微生物群落,而无化学处理对微生物无干扰,土壤肥力得以持续维持
  • 水体安全:化学除草剂随雨水渗入地下水的风险长期存在,无化学处理方式从源头消除了这一风险
  • 非目标物种安全:传统化学方法会伤害周边植物、昆虫和小型动物,无化学技术的作用范围更为精准
  • 处理后无需隔离期:化学处理后通常需要等待数天乃至数周才能安全进入处理区域,无化学处理完成后即可正常使用场地

使用玉米淀粉和小苏打交替浸泡,可去除94%以上的农药残留,这一日常生活中的实例直观说明了无化学辅助原理的实际效力,其背后的吸附与分解机制与大规模无化学处理的核心逻辑完全一致。

无排放处理剂在生产与使用过程中不产生有害气体或化学排放,这一特性在城市住宅区和敏感生态区域的植物控制中尤为重要。对于有儿童或宠物的家庭,无化学安全性不是加分项,而是基本要求。

无化学处理与传统化学方法比较

将无化学处理与传统化学除草方法进行直接对比,有助于读者在实际决策中做出更明智的选择。以下表格从五个关键维度进行系统比较:

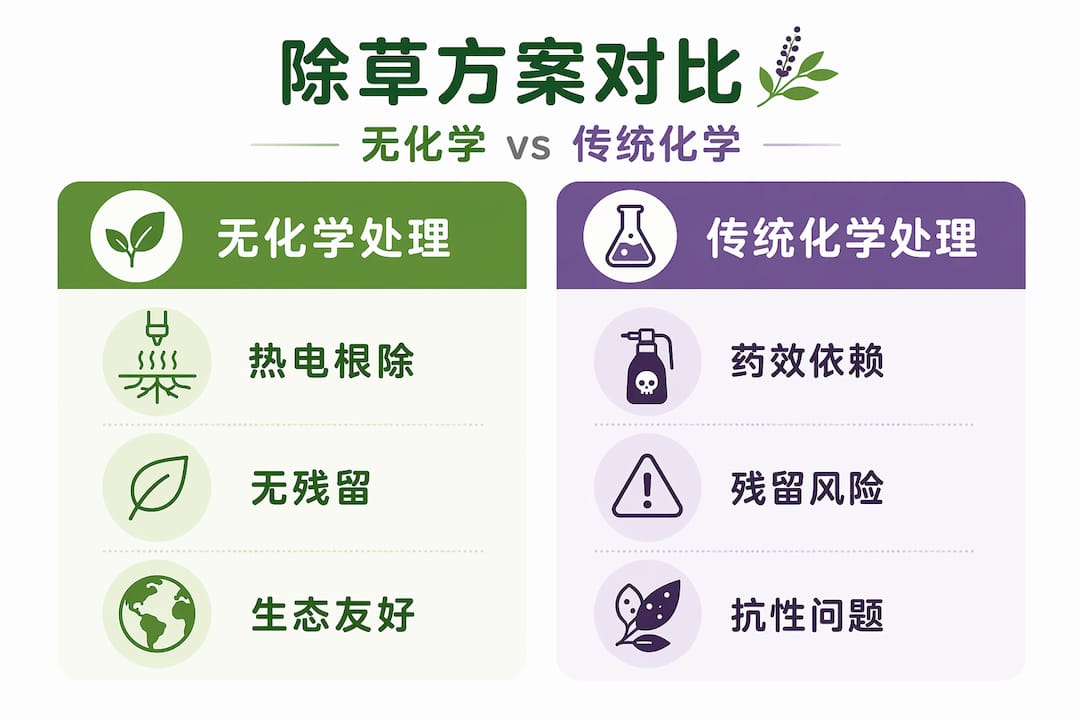
环保除草方式与传统化学除草方法对比图解

比较维度 无化学处理 传统化学处理
根除彻底性 热电技术可实现永久根除,不依赖毒素积累 依赖药效持续,抗性风险随使用频次增加
环境影响 无残留,不污染土壤与水体 存在土壤和地下水污染风险
人体安全性 处理后即可安全使用场地 需严格遵守隔离期,操作人员需防护装备
长期成本 初期设备投入较高,后续维护成本低 化学品采购持续产生成本,土壤修复费用高
法规合规性 符合日益严格的环保法规要求 部分化学品在英国及欧盟正面临使用限制

传统化学处理的一个隐性代价是抗性问题。长期使用同类除草剂会导致目标植物产生耐药性,迫使用户不断提高剂量或更换药物,形成恶性循环。无化学处理从机制上彻底规避了这一问题,因为物理能量或生物活性成分的作用模式不依赖特定化学靶点,植物不存在进化出"抗性"的路径。

免化学处理技术在计算机制版领域已实现物理或无化学显影,这一跨领域案例说明,无化学原理在不同行业中均已验证其技术可行性,并非仅限于园艺除草。

专业提示: 在选择处理方案前,建议委托专业机构进行现场勘察,明确入侵植物的根系深度和扩散范围。这一步骤直接决定无化学处理方案的选择和处理频次,避免资源浪费。

家庭与园艺中的实际应用步骤

掌握了无化学处理原理之后,如何将其转化为家庭园艺中的实际行动是关键所在。以下流程适用于大多数家庭花园中的入侵植物处理场景。

实施步骤如下:

  1. 现场评估:识别目标植物种类,记录生长范围和密度,判断根系可能的深度。日本虎杖等顽固性植物的根系可穿透地面3米以上,单纯地面处理效果有限。
  2. 工具准备:根据处理方式准备相应工具,热电处理需要专业设备,植物提取物法则需要高浓度黄酮类提取液和喷雾装置。
  3. 首次处理:在植物生长旺季(春末至夏季)实施首次处理,此时植物代谢活跃,能量传导最为高效,处理效果最为显著。
  4. 效果跟踪:处理后4至6周进行效果评估,记录植物状态变化,判断是否需要补充处理。
  5. 根系屏障安装:对于已根除区域,安装根系屏障防止周边根系重新侵入,这是防止复发的关键物理措施。
  6. 后续监测:在接下来的两个生长季节保持定期检查,一旦发现新芽立即处理,防止根系重新建立能量储备。

预防复发的有效方法包括:

  • 在清除区域种植竞争性植被,通过生态竞争抑制入侵植物重新定植
  • 保持土壤覆盖物厚度不低于10厘米,抑制光照到达地表
  • 定期检查边界区域,特别是与邻近地块接壤的位置

了解无化学除草的具体步骤根系清除注意事项,能帮助家庭用户在专业指导下安全完成整个处理流程,避免常见操作失误。

我对无化学处理技术未来的看法

从我在这一行业多年的实际经验来看,无化学处理原理正处于一个关键的转折点。技术已经成熟,但认知还没有跟上。我见过太多房主因为相信"不用农药就无法根除日本虎杖"这一说法,而一再推迟处理,最终让根系扩散到更难控制的程度。

我认为,目前最被低估的趋势是热电技术的精准化。当我们能够将5000伏的电能准确输送到根茎网络的核心位置时,我们实际上做到了传统化学方法从未真正做到的事情:从根本上耗竭植物的能量储备,而不是简单地毒杀地面可见部分。这种处理方式不留化学残留,不伤害周边土壤,完成后场地立即可以安全使用。

我也想纠正一个常见误区:有人认为无化学处理成本更高,因此只适合预算宽裕的用户。事实上,如果将传统化学处理的长期复发成本、土壤修复费用以及潜在的法律责任一并计算,无化学方案的总体经济账其实更为合算。家庭用户参与生态保护,不是一种奢侈的选择,而是一种越来越现实和必要的决定。对于从事这一领域的专业人士,我建议将技术教育列为服务的核心组成部分,因为客户理解原理,才能做出真正有效的长期决策。

— Alan

Japaneseknotweedagency 的无化学处理专业方案

https://japaneseknotweedagency.co.uk

Japaneseknotweedagency 是英国无化学处理入侵植物领域的先驱机构,专注于日本虎杖及其他入侵物种的无毒根除。我们的热电处理技术每次可输送高达5000伏电能,直接破坏根茎网络的细胞结构,实现持久根除而不对周边生态造成任何化学负担。除技术处理外,我们还提供根系屏障安装、挖掘作业以及覆盖英格兰、威尔士和爱尔兰的专业现场勘察服务。如果你正在寻找经过验证的无化学侵入植物方案,或希望详细了解我们服务的技术细节,请访问我们的常见问题解答页面获取完整信息和专业建议。

常见问题解答

无化学处理真的能彻底根除日本虎杖吗?

可以。Japaneseknotweedagency采用的热电处理技术成功率达95%,通过持续耗竭根茎能量储备实现永久根除,无需依赖任何化学物质。

无化学处理方式对儿童和宠物安全吗?

完全安全。无化学处理完成后场地无需隔离,不留任何有毒残留,与传统化学除草剂需要严格隔离期的特性形成根本区别。

植物提取物能单独用于大面积入侵植物控制吗?

对于浅根性杂草效果显著,但对于日本虎杖等深根性入侵植物,植物提取物建议作为辅助手段配合物理处理使用,单独使用难以触及3米以下的根茎网络。

无化学处理需要多少次才能见效?

取决于入侵植物的种类和根系深度,一般需要2至4次热电处理周期,每次间隔4至6周。处理期间配合根系屏障可显著提升最终效果并防止复发。

如何判断家中是否需要专业无化学处理服务?

如果在花园中发现竹节状茎干、宽大心形叶片或大规模地下根系,建议立即委托专业机构进行现场勘察,因为自行处理不当可能导致根系进一步扩散,增加后续处理难度和成本。

推荐

Understanding energy-based weed removal: a 2026 guide


TL;DR:

  • Energy-based weed removal employs high-voltage electrical pulses that target plant vascular systems, destroying roots without soil disturbance. It uses significantly less energy than thermal methods and preserves soil health, making it an environmentally friendly alternative. Proper application involves dry conditions, pre-treatment mowing, and multiple passes for invasive species, with advanced AI technology improving targeting precision.

When chemical herbicides carry increasing regulatory scrutiny and thermal flaming struggles with fuel costs, understanding energy-based weed removal becomes a genuinely useful skill for homeowners and landscapers alike. Electrical weed control works by driving high-voltage current through a plant’s vascular system, causing internal cell damage that kills both foliage and root structures without disturbing a single gram of soil. This guide covers how energy pulses affect plant physiology, why this method outperforms traditional approaches on several measurable fronts, how to apply it correctly, and what the latest technology advances mean for invasive species management.

Table of Contents

Key takeaways

Point Details
Energy efficiency advantage Electrical weed control uses 10 to 20 times less energy than thermal methods such as flaming or steaming.
Soil biology is preserved Unlike mechanical or chemical control, electrical treatment leaves soil microbiology intact, protecting nematodes, fungi, and beneficial bacteria.
Dry conditions are non-negotiable Surface moisture causes current to short-circuit across the plant exterior, so weeds must be dry for electrical treatment to be lethal.
Pre-treatment mowing matters Mowing before treatment improves weed kill efficacy by approximately 72% by improving electrode contact and energy penetration.
AI is reshaping precision AI-driven pulsed power systems now achieve up to 95% targeting accuracy, making energy weed control viable for high-value and sensitive sites.

Understanding energy-based weed removal: how pulses affect plants

The core principle is straightforward. When a high-voltage electrical current is applied to a weed through direct electrode contact, it travels down through the plant’s stem and into the vascular system, following the path of least resistance toward the root network. The current disrupts cellular membranes, causes protein denaturation, and collapses internal fluid pressure at a cellular level. The result is systemic damage that kills both above-ground growth and the root structure beneath.

This is what separates energy-based weed control from surface treatments. Most thermal and chemical methods address the canopy but leave root systems largely intact, which is precisely why perennial weeds and invasive species like Japanese Knotweed regenerate so aggressively. Electrical treatment aims to deplete the energy reserves held within the root and rhizome network, not merely scorch what is visible above ground.

Several factors govern how effectively energy pulses affect weeds:

  • Voltage and pulse frequency: Higher voltages increase the depth of current penetration. Pulse frequency determines how rapidly cell damage accumulates across successive treatment passes.
  • Electrode contact quality: The current must enter the plant through physical contact. Poor contact reduces efficacy significantly, which is why mowing dense or tall weed growth prior to treatment is so beneficial.
  • Moisture conditions: Surface moisture reduces lethality by causing current to travel over the plant exterior rather than through its vascular tissue. Weeds must be dry to allow internal current flow.
  • Travel speed: Slower speeds of 0.3 to 0.6 mph allow sufficient electrode contact time to transfer lethal energy into the root zone.

Pro Tip: Treat weeds during a dry spell of at least 24 hours, ideally in the morning before dew has had chance to settle on foliage. This single preparation step can be the difference between superficial damage and genuine root kill.

Compared to thermal methods, electrical control offers a far more targeted pathway into the plant. Flaming heats surface cells but rarely penetrates deep enough to kill established roots. Steaming requires substantial water and energy input, and mechanical removal risks both soil disturbance and rhizome fragmentation, which can spread invasive species further.

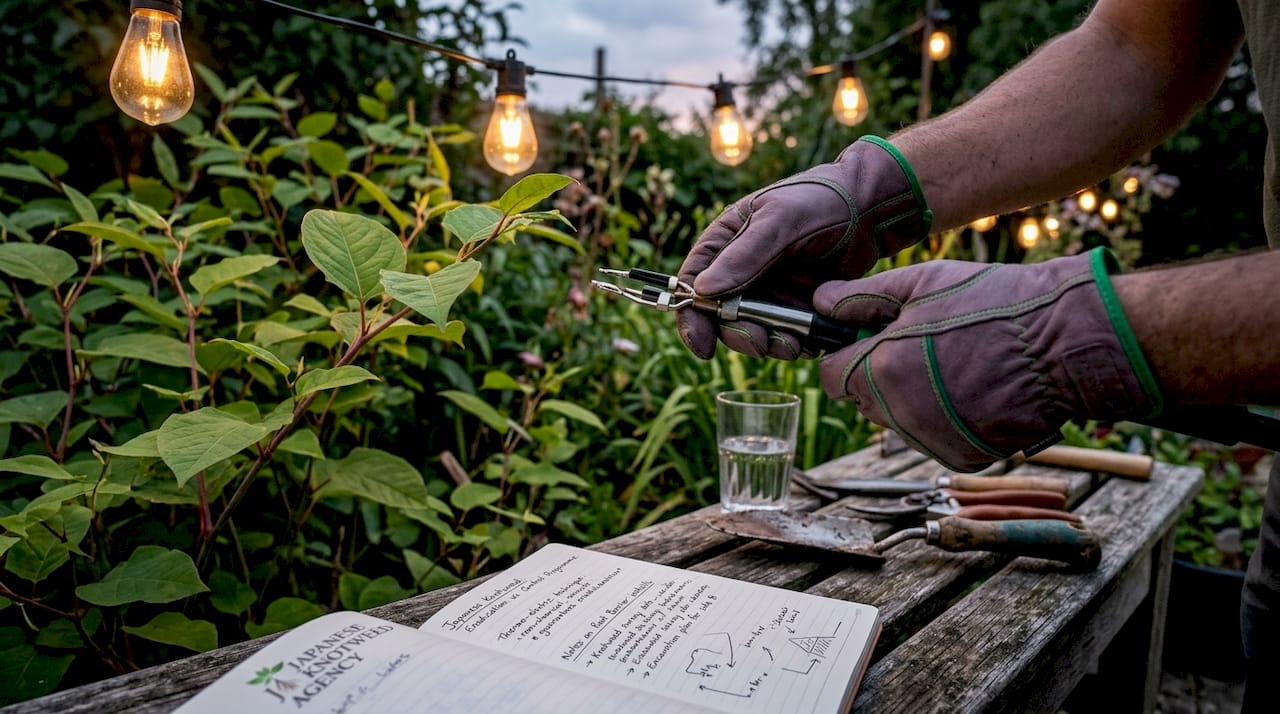
Hands adjusting weed control equipment outdoors

Energy use and environmental impact compared

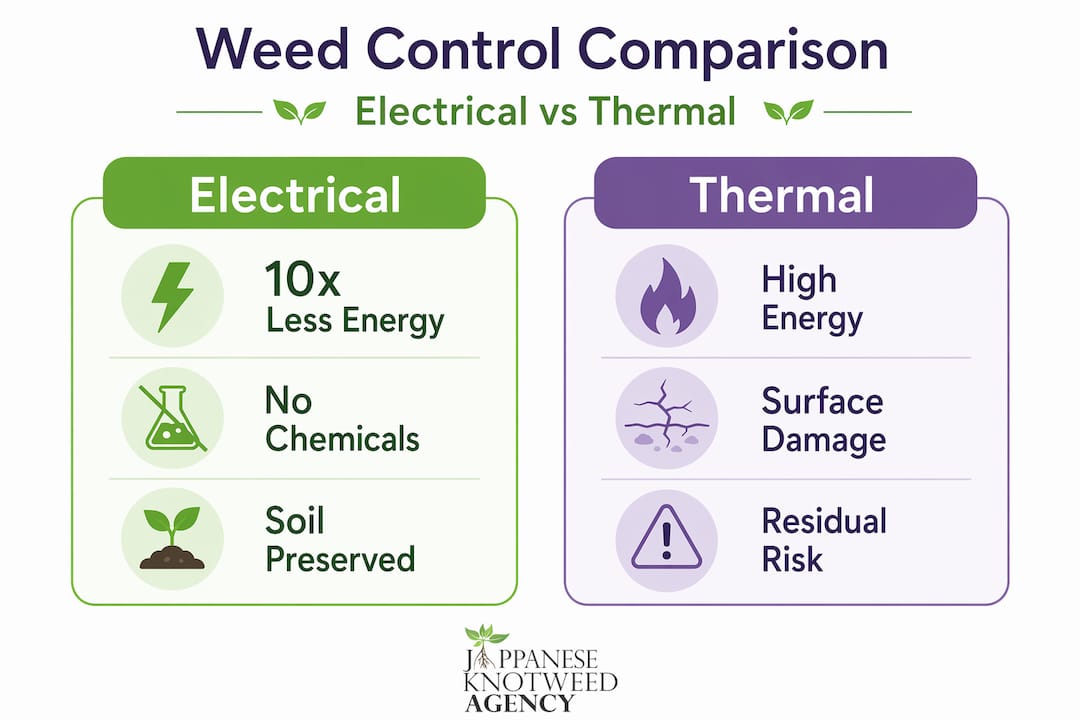
One of the most striking findings in recent research is the sheer difference in energy consumption between electrical and thermal weed control. Electrical methods use 10 to 20 times less energy than flaming or steaming to achieve comparable weed mortality. For a landscaper treating a large site repeatedly across a growing season, that difference is not marginal. It translates directly into operating costs, carbon output, and fuel logistics.

The table below places the main weed control approaches side by side across three dimensions that matter most to environmentally aware practitioners:

Method Energy consumption Soil impact Chemical residue risk
Electrical treatment Very low None. No soil disturbance None
Thermal flaming High (10 to 20x electrical) Low. Minor surface heating None
Steam treatment Very high Low to moderate None
Mechanical removal Moderate High. Tillage and compaction None
Chemical herbicide Very low Low directly, but cumulative High. Leaching and residue risk

Electrical treatment preserves the soil ecosystem in a way that no other method fully replicates. Research confirms that soil biology including nematodes, bacteria, and fungi remains undisturbed because the current targets only the weed without chemical leaching or physical ground disruption. For homeowners focused on garden biodiversity or landscapers working on organic certification, this is a genuinely significant distinction.

Infographic comparing electrical and thermal weed removal methods

It is worth acknowledging one limitation. Electrical weed control is non-selective by nature, meaning it will damage any plant the electrode contacts. Proper equipment configuration, including booms, shields, and appropriate electrode spacing, is the standard approach to protecting desirable plants on mixed sites.

Best practices for effective application

Getting the most from energy weed control techniques depends on preparation, conditions, and operational discipline. The method is effective when applied correctly and markedly less so when shortcuts are taken. Follow this sequence for consistent results:

  1. Assess weed density and height. Dense or tall weed growth requires pre-treatment mowing. Mowing prior to electrical treatment reduces above-ground biomass and dramatically improves electrode-to-stem contact, producing approximately 72% greater weed kill than treating unmowed growth.
  2. Confirm dry conditions. Check that weeds and soil surface are genuinely dry. Waterlogged or saturated soil diverts current laterally rather than into the plant. Avoid treatment within 24 hours of significant rainfall.
  3. Set electrode height and spacing correctly. Electrodes should make firm, consistent contact with weed stems. Incorrect height creates missed contact points and partial energy delivery, leaving roots viable.
  4. Operate at the correct speed. Forward speed critically affects mortality. Work at 0.3 to 0.6 mph to pass sufficient electrical energy through the plant. Faster operation is tempting on large sites but produces poor root-level results.
  5. Plan for multiple passes on perennial species. Two passes at moderate speed can match the efficacy of a single slow pass and are often more practical on larger areas. Perennial and invasive species with deep rhizome networks benefit from repeated treatment cycles to deplete stored energy reserves.
  6. Configure equipment for site-specific protection. Where desirable plants are nearby, use equipment shields and spacing settings to minimise off-target contact.

Pro Tip: Treat young, actively growing weeds where possible. Younger plants have higher water content within their vascular tissue, which supports better electrical conductance and deeper root penetration. Treating mature, woody-stemmed weeds with thicker bark requires higher voltage settings to achieve the same internal effect.

For a detailed operational walkthrough, Japaneseknotweedagency has published practical guidance on chemical-free invasive weed management that covers both field preparation and treatment sequencing.

Advanced technology: AI, pulsed power, and what is next

The most significant recent development in energy weed control techniques is the integration of artificial intelligence with high-voltage pulsed power delivery. In early 2026, I-Pulse launched the iTerra system, which uses AI-driven camera detection to identify individual weed plants and deliver precisely timed electrical pulses of approximately five milliseconds to each target. The system achieves up to 95% targeting accuracy without disturbing soil or leaving herbicide residues.

This matters beyond the headline figure. The integration of AI with pulsed power addresses several persistent limitations of earlier electrical systems:

  • Herbicide-resistant species: AI-targeted pulsing sidesteps resistance entirely, as electrical damage is a physical process not susceptible to biological adaptation.
  • Energy waste reduction: Rather than energising a full boom continuously, the system fires only when a weed is detected, cutting unnecessary energy expenditure on clear ground.
  • Precision in mixed plantings: AI detection allows treatment within crop rows or alongside desirable garden plants where a continuous electrical boom would cause collateral damage.
  • Data and mapping: Detection systems log weed location and density across passes, supporting longer-term management planning and treatment scheduling.

The challenge for widespread commercial adoption remains cost and the operational training required to maintain sophisticated pulsed power equipment. For professional invasive species contractors and larger landscaping operations, the technology is already commercially viable. For individual homeowners, the more immediate relevance lies in the chemical-free knotweed eradication services now offered by specialist contractors equipped with high-voltage delivery systems.

My perspective on energy-based weed control

I have worked in invasive species management long enough to recognise the pattern. A new control method generates genuine interest, and the first question is always whether it will hold up in practice on difficult species. With energy-based electrical treatment, the honest answer is: yes, when applied correctly, and with clear-eyed expectations about what repeated treatment means for deep rhizome networks.

What I find compelling about this approach is not only the environmental credentials, though the absence of chemical residue and the preservation of soil biology are genuinely significant. It is the fact that electrical treatment attacks the energy reserves within the rhizome directly. Japanese Knotweed’s ability to push through tarmac and concrete reflects the extraordinary energy reserves stored underground. Depleting those reserves systematically, treatment by treatment, is a fundamentally sound strategy.

Where I see homeowners and landscapers underestimate the method is in expecting single-treatment results on established invasive species. This is not a reflection of the technology’s limits. It reflects the biology of the target. Multiple treatment cycles across growing seasons are standard, not exceptional. In my view, the best practices for chemical-free eradication all share one characteristic: they work with the plant’s biology rather than expecting a one-time solution to override years of root establishment.

The regulatory and mortgage context also matters increasingly. Lenders and surveyors now scrutinise invasive weed management plans closely, and a documented, repeatable, chemical-free treatment programme carries real weight in property transactions across England, Wales, and Ireland.

— Alan

How Japaneseknotweedagency can help

If you have identified invasive weeds on your property or surrounding land, the first step is always a professional survey to assess extent, risk, and the most appropriate management route.

https://japaneseknotweedagency.co.uk

Japaneseknotweedagency delivers direct energy of up to 5,000 volts on site, targeting the rhizome network of Japanese Knotweed and other invasive species without chemicals or soil disruption. Their chemical-free knotweed removal service achieves a 95% success rate and is designed to meet the documentation requirements of lenders and surveyors. Root barrier installation and excavation services are also available for complex or high-risk sites. To explore your options, book a property survey and receive a professional assessment of your invasive weed risk. For common homeowner questions, the Japaneseknotweedagency FAQ page covers treatment options, timescales, and mortgage considerations in plain terms.

FAQ

What is energy-based weed removal?

Energy-based weed removal uses high-voltage electrical current delivered through direct electrode contact to cause internal cell damage within a plant’s vascular system, killing both foliage and root structures without soil disturbance or chemical application.

Why do energy pulses affect weeds differently from surface treatments?

Electrical pulses travel through the plant’s vascular tissue into the root and rhizome network, depleting stored energy reserves. Surface methods such as flaming treat only above-ground growth, leaving roots intact and allowing regrowth.

Does electrical weed control damage soil?

No. Research confirms that soil microbiology including nematodes, bacteria, and fungi remains undisturbed because electrical treatment does not involve soil tillage or chemical leaching.

How many treatments does Japanese Knotweed require?

Japanese Knotweed typically requires multiple treatment cycles across consecutive growing seasons. Each electrical treatment depletes rhizome energy reserves progressively, and the number of treatments needed depends on the extent and maturity of the root network.

Is electrical weed control safe near garden plants?

Electrical weed control is non-selective, meaning any plant the electrode contacts may be affected. Using equipment shields, correct electrode spacing, and targeted application protects desirable plants when the system is properly configured.

房产买卖杂草检测指南:购房者必读


TL;DR:

  • 杂草问题在房产交易中风险巨大,尤其是入侵性植物可能导致房产价值下降和法律纠纷。完整的检测应涵盖范围划定、时间选择、样本采集和详细记录,以确保风险掌控。制定科学治理方案并签订明确合同,是保障购房安全和法律权益的关键措施。

在房产交易中,杂草问题往往是最容易被忽视却代价最高的风险之一。许多购房者直到入住后才发现地块上存在入侵性植物,届时已面临结构损坏、法律纠纷或巨额清除费用。本文将为您提供一份完整的房产买卖杂草检测指南,从检测前准备、现场操作流程,到处理计划制定与法律合规审查,帮助您在签订合同前全面掌握风险,保障房产价值与交易安全。

目录

关键要点

要点 详情
检测先于交易 在签订购房合同前完成专业杂草检测,可有效规避后期纠纷与额外费用。
书面记录至关重要 要求卖方提供书面杂草检测报告,口头承诺不具有法律约束力。
入侵杂草影响房产价值 日本结缕草等入侵植物可导致房产市值下降15%以上。
非化学治理效果持久 科学的无化学方案可在5年内将根茎活性降低90%以上,长期效果显著。
合规保障权益 合同中明确杂草处理责任与时间节点,是保障买卖双方权益的法律基础。

房产买卖杂草检测的准备工作

在开展任何现场检测之前,充分的准备工作决定了检测结果的准确性与可靠性。许多购房者在这一阶段投入不足,导致关键区域遗漏或检测报告缺乏法律效力。

确定检测范围与重点区域

您需要首先获取完整的地块平面图,标注花园边界、围墙、车道及排水系统等区域。入侵性杂草往往沿围墙、铁路边界或河道附近生长,这些位置是检测的高风险地带。如果相邻地块存在已知杂草问题,您的检测范围还应延伸至边界线两侧各数米。

以下是检测前需要了解的常见入侵性杂草种类:

  • 日本结缕草(Japanese Knotweed):茎中空、节间明显,叶片呈心形,春季茎干呈紫红色
  • 虎杖:外形与日本结缕草相似,常见于河岸地带
  • 大猪草(Giant Hogweed):伞形花序,茎秆高大,接触皮肤可引发严重灼伤
  • 喜马拉雅香脂花(Himalayan Balsam):粉紫色花朵,种子可弹射传播,常见于湿地边缘

选择最佳检测时间

杂草的季节性特征对检测效果影响显著。日本结缕草在每年4月至10月地上部分最为明显,是视觉识别的最佳窗口期。冬季茎干枯萎后,识别难度大幅上升。如果您在冬季购房,务必要求卖方提供上一个生长季节拍摄的历史照片或专业检测记录。

专业提示: 如果您正在办理房屋抵押贷款,部分贷款机构要求提供经认可机构出具的杂草检测报告。在提交贷款申请前,提前确认银行的具体要求可以为您节省大量时间。

检测准备项目 说明
地块平面图 标注所有边界、建筑物及水系位置
历史航拍图像 通过公开卫星图查看地块历史植被变化
邻居情况了解 询问周边地块是否有已记录的入侵杂草问题
检测工具清单 手套、标记桩、相机及土壤探针

现场检测的具体步骤

掌握系统的检测流程是提升准确率的核心。根据专业检测标准,高标准杂草检测的准确率可达95%以上,关键在于步骤的完整执行。

  1. 外围目视扫描:从地块外围开始,观察边界线两侧是否存在异常植被密集区。日本结缕草常以"丛"的形态出现,单株极为罕见。
  2. 系统性网格行走:将地块划分为若干网格区域,逐一步行检查,确保无遗漏。每个网格不超过5米乘5米,可借助绳索或标记桩辅助划分。
  3. 地面及地下检查:挖取少量土壤样本,检查是否存在根茎(rhizome)碎片。日本结缕草的根茎呈橙黄色,截面清晰可辨,即便是直径不足1厘米的碎片也具有再生能力。
  4. 记录地理坐标:使用手机GPS或专业设备记录每处疑似杂草的精确位置,便于后续复查与报告撰写。
  5. 拍摄多角度照片:每处发现点至少拍摄近景、中景与全景三张照片,记录植株形态、茎干颜色和叶片特征。
  6. 采集植物样本:如现场无法确认植物种类,可采集茎叶样本带回,提交给专业机构进行实验室鉴定。

识别日本结缕草的关键特征

日本结缕草是房产交易中最常见也最具破坏性的入侵植物之一。成株高度可达3米,茎节呈竹节状,夏末开白色细小花簇。更重要的是,其根茎网络可向地下延伸超过3米,向地表外延伸超过7米,混凝土地基和排水管道均无法阻挡其生长。了解日本结缕草的识别特征对购房者来说是基础中的基础。

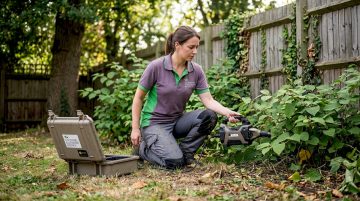
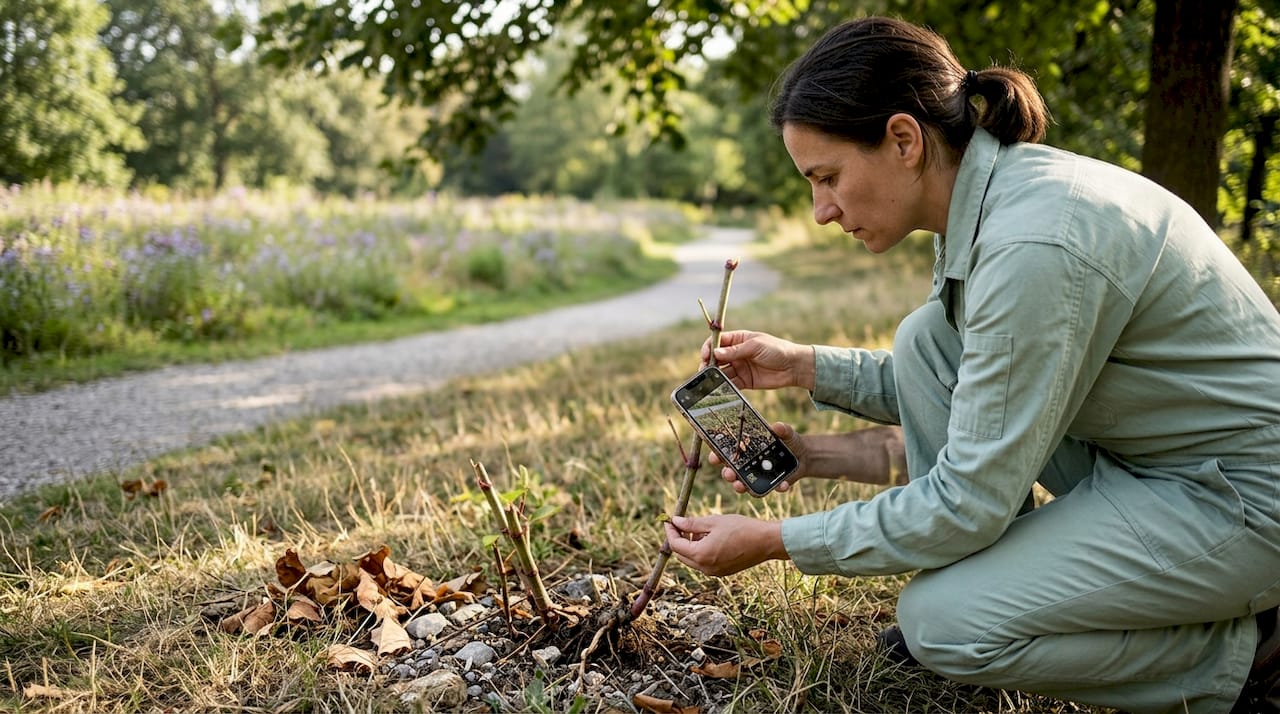
园林工作人员正在拍照记录日本结缕草的生长特点。

专业提示: 不要仅凭外形判断植物种类。多种常见园艺植物与日本结缕草高度相似,误判会导致不必要的处理费用或真实风险被遗漏。如有疑问,请务必联系专业机构进行鉴定。


制定科学的杂草处理方案

检测只是第一步。一旦确认地块存在入侵性杂草,制定有效的处理计划是保障房产交易顺利推进的前提。处理方案的选择直接影响治理成本、时间周期和法律合规性。

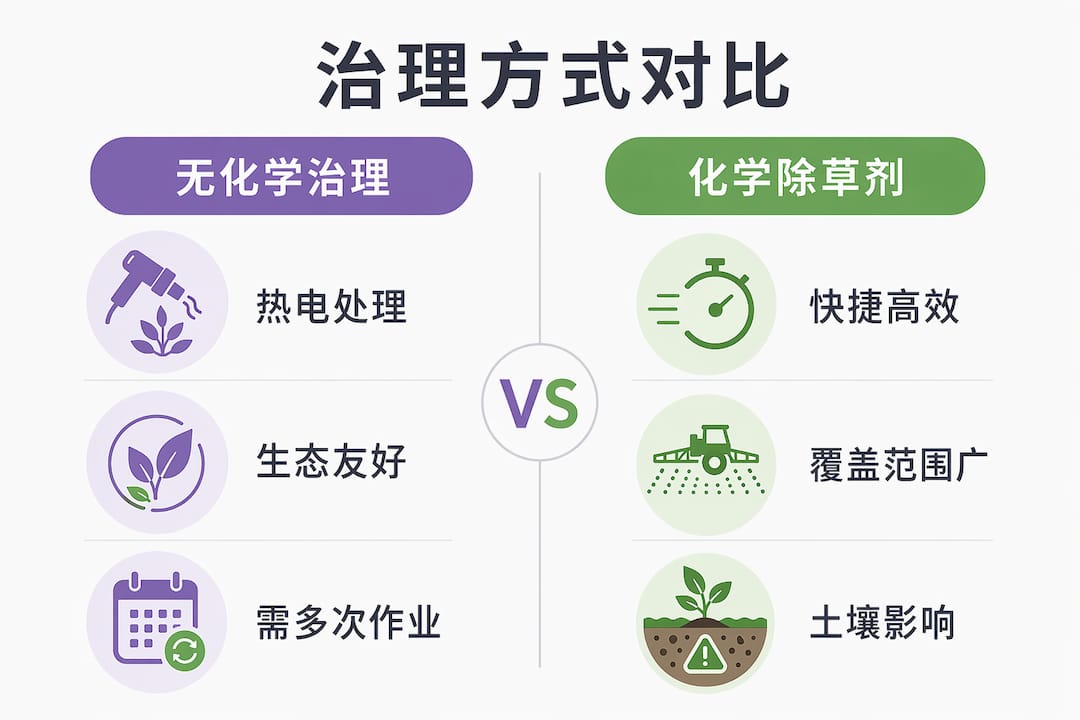
非化学治理与化学治理的比较

治理模式对比一目了然信息图

治理方式 优势 局限性
热电处理(无化学) 对周边生态系统无影响,可持续作业 需要多次处理,周期较长
化学除草剂 单次作业覆盖面广 可能影响土壤健康,部分地区有使用限制
根障安装 有效阻隔根茎横向扩散 需专业施工,成本较高
挖掘清除 物理清除彻底 土方量大,弃土需专项处理

Japaneseknotweedagency 在无化学治理领域处于行业前沿。其专有的热电处理技术可向植株根茎网络输送高达5000伏的直流电,直接破坏细胞结构并耗尽根茎储存的能量,实现深层杀灭而不污染土壤或地下水。根据专业防治数据,科学的5年防治方案可将根茎活性降低90%以上。

防止扩散的长期维护策略

处理完成后,防止杂草二次扩散同样至关重要。以下措施需在合同或物业管理协议中明确约定:

  • 定期季度复查,确认杂草未重新萌发
  • 对挖掘或施工区域进行土壤监测,防止根茎碎片再生
  • 安装物理根障,阻隔来自相邻地块的地下根茎侵入
  • 保留每次处理记录和复查报告,形成完整的处理档案

检测结果验证与法律合规审查

在房产买卖中,杂草问题不仅是生态问题,更是具有明确法律后果的合同事项。杂草检测是房产交易安全的必要环节,忽视这一点可能导致严重的产权纠纷。

法律合规中的关键要求

购房者在签订合同前,需重点审查以下几项内容:

  • 披露义务:卖方有义务在合同签订前披露已知的杂草问题。草害披露的法律地位与房屋结构安全评估同等重要,口头说明不具备法律约束力。
  • 合同补充条款:在购房合同中明确写明杂草检测结果、处理责任方、完成时间节点及违约赔偿条款。合同书面约定是日后维权的核心依据。
  • 律师审核介入:专业律师审核杂草相关条款,可有效防范因隐瞒杂草信息引发的产权纠纷与合同违约。
  • 独立检测报告:主动要求卖方提供由认可机构出具的书面检测报告,而非依赖中介或卖方的口头说明。

“购房者应主动要求提供书面杂草检测报告,避免仅凭口头说明导致产权风险。合同中含糊不清的条款是引发纠纷的重要因素。”

后续复查与确认程序

完成初步处理后,正式交房前需进行至少一次独立的后续复查,以书面形式确认杂草已达到约定的清除标准。复查报告应包含检测日期、检测人员资质、检查范围及结论,并由买卖双方签字存档。这份文件在任何后续法律纠纷中都将发挥关键证明作用。


我在这一行的真实看法

多年来,我见过太多购房者在入住数月后才发现花园地下存在大面积根茎网络,处理费用远超他们预期的购房预算。这类案例有一个共同点:买方在签约前从未要求进行独立的杂草检测。

人们往往低估了合同模糊条款带来的法律风险。"地块状况良好"这样的表述在法律上几乎毫无约束力,卖方完全可以辩称自己并不知情。我见过的纠纷中,有相当一部分就是因为这类措辞引起的。真正有效的保护只有一种形式:独立检测加书面报告加具体合同条款。

我还想指出一个常被忽视的风险点。相邻地块的杂草同样可以通过地下根茎侵入您的产权范围,而此时法律责任的归属往往模糊。提前在边界安装根障,并在购房合同中约定邻地杂草责任条款,是目前最有效的预防手段。

买房是大多数人一生中最大的一笔支出。花几百英镑委托专业机构进行一次系统性杂草调查,相比于日后数万英镑的清除与修复费用,这笔钱花得非常值得。

— Alan


专业检测服务助力安心置业

https://japaneseknotweedagency.co.uk

如果您正在购房或办理房屋抵押,Japaneseknotweedagency 提供覆盖英格兰、威尔士及爱尔兰的专业入侵杂草房产调查服务。调查报告符合贷款机构要求,可直接用于合同谈判与法律备案。除调查外,Japaneseknotweedagency 还提供热电无化学治理、根障安装及挖掘清除等全套处理方案,并附持续跟踪保障,确保专业治理效果长期稳定。如需了解日本结缕草及其他入侵植物的详细解答,请访问我们的常见问题页面获取更多支持。


常见问题

日本结缕草真的会影响房产价值吗?

是的。入侵性杂草可使房产市值下降15%以上,且部分贷款机构在确认存在日本结缕草前会拒绝批准抵押贷款。

购房前必须做杂草检测吗?

法律上并无强制要求,但强烈建议这样做。主动进行买房前杂草检测可以保护您的投资,并为合同谈判提供重要依据。

杂草检测报告需要多长时间出具?

标准检测通常在现场勘察后3至5个工作日内出具书面报告,紧急情况下部分机构可提供24至48小时加急服务。

卖方隐瞒杂草问题是否违法?

是的。法律要求卖方披露已知的重大房产缺陷,包括杂草问题。故意隐瞒可能构成合同欺诈,买方有权追偿。

无化学治理方法与传统除草剂相比效果如何?

科学数据显示,采用专业非化学根茎治理方案在5年周期内可将根茎活性降低90%以上,且对土壤生态和周边植被无负面影响。

推荐

Step by step excavation process for home projects


TL;DR:

  • Proper site assessment, utility marking, and soil analysis are vital for safe, stable residential excavation projects. Skipping these steps can lead to utility strikes, foundation failure, and legal liabilities, costing much more than the initial savings. Investing in expert surveys, drainage planning, and thorough testing ensures long-term stability and safety of the constructed foundation.

Residential excavation goes wrong more often than most homeowners expect. Skipping a single stage of the step by step excavation process can result in collapsed trenches, utility strikes, waterlogged foundations, or costly structural remediation that dwarfs the original project budget. The consequences are not merely inconvenient. They can delay planning sign-off, void insurance cover, and create long-term instability beneath your property. This guide walks you through every stage of a properly managed excavation project, from initial site assessment through to final inspection, so you can approach the work with confidence and avoid the pitfalls that catch unprepared homeowners out.

Table of Contents

Key takeaways

Point Details
Assess before you dig Commission a registered surveyor and arrange soil testing before any ground is broken.
Utility marking is non-negotiable Mechanical equipment must never be used within 18–24 inches of marked utility lines.
Compaction must meet specification Fill material compacted in lifts no greater than 200 mm achieves the density required for safe foundation work.
Drainage planning protects foundations Improper drainage is one of the leading causes of long-term foundation failure and erosion.
Professional sign-off prevents problems Structural and geotechnical engineers must verify formation levels before any concrete is placed.

Site assessment and preparation before excavation begins

No responsible excavation steps guide begins at the machine. It begins weeks earlier, with a thorough site assessment that establishes what lies beneath your land, where your boundaries sit, and what consents you need before a single bucket of soil is moved.

Commissioning a registered surveyor is the logical starting point. A topographic survey establishes accurate ground levels and boundary positions, both of which directly influence excavation design. Without this, contractors are working to assumptions rather than data, and assumptions in excavation are expensive.
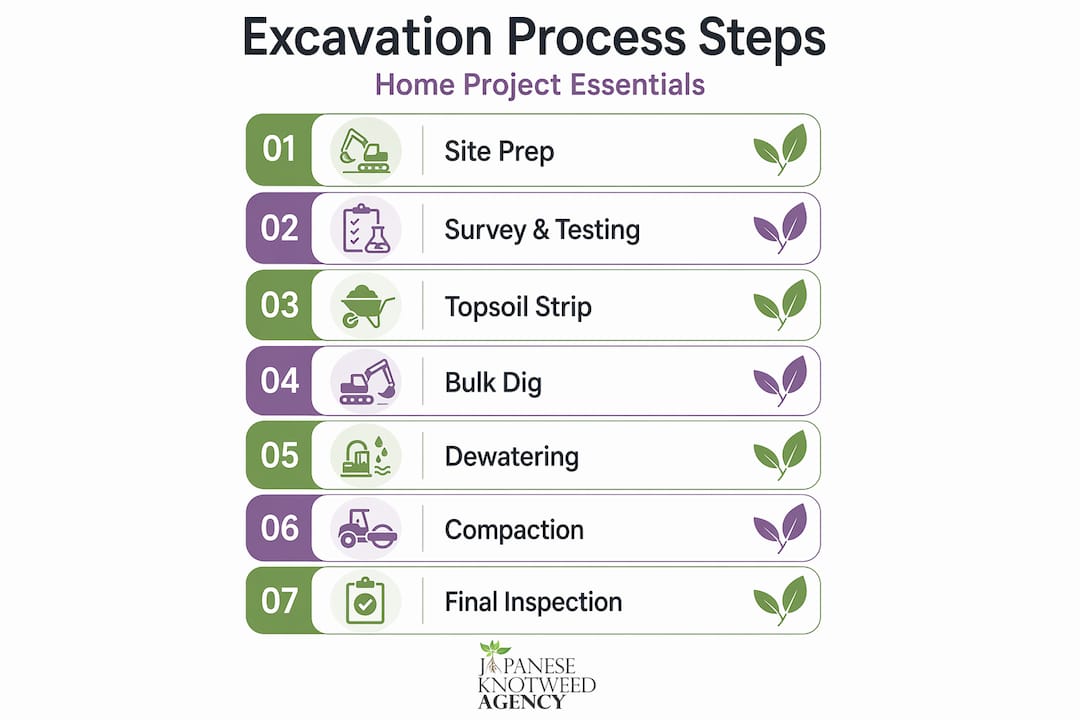
Vertical flow infographic of excavation process steps

Geotechnical and soil analysis should follow. Soil type governs everything from excavation technique to shoring requirements to compaction method. Clay-rich soils retain water and are prone to heave. Loose granular soils may require sheet piling at depth. A ground investigation report provides the data your structural engineer needs to design a safe excavation.

Key preparation steps before work begins include:

  • Locating all underground utilities by contacting your local authority and using a professional cable and pipe detection service
  • Obtaining the relevant council approvals, including planning permission where required and, in England, Building Regulations approval for foundations
  • Securing environmental consents where the site is near watercourses or contains invasive species such as Japanese Knotweed
  • Installing site hoarding, welfare facilities, and temporary erosion controls such as silt fencing along site boundaries
  • Briefing the full contractor team on site-specific hazards, including the location of all utility corridors

Pro Tip: Before submitting any planning application, arrange an invasive plant survey for your site. Knotweed or other invasive species discovered mid-excavation can halt works entirely and trigger regulatory obligations that add significant cost.

Skipping comprehensive site assessments leads directly to improper foundation stability and unforeseen utility conflicts. The assessment stage is not an administrative formality. It is the foundation upon which every subsequent excavation decision rests.

Clearing the site and stripping topsoil

With assessments complete and consents in place, the physical work of preparing the ground can begin. Site clearance and topsoil stripping are the first active stages of the excavation process overview, and they must be carried out methodically.

  1. Remove all above-ground vegetation, including grass, scrub, and garden planting, using appropriate machinery scaled to site size and access constraints.
  2. Treat any confirmed invasive species, such as Japanese Knotweed, in accordance with current legislation before disturbing the ground. Moving contaminated soil without treatment can spread rhizome material and carries legal risk.
  3. Carry out stump removal for all trees scheduled for clearance, maintaining buffer zones where tree root systems may affect adjacent structures or boundary walls.
  4. Demolish any existing surface structures, including sheds, driveways, or concrete slabs, and remove all rubble from site before excavation machinery is positioned.
  5. Strip topsoil to a minimum depth of 150 to 300 mm, depending on organic content, across the entire excavation footprint. Organic-rich topsoil has no place in a foundation subgrade. It compresses under load and promotes biological decay.
  6. Stockpile stripped topsoil in a designated, clearly marked area away from the excavation zone. Where topsoil is clean and uncontaminated, it can be retained for later landscaping use rather than removed from site at cost.

The discipline in this stage lies in not rushing. Contractors who strip too quickly or inconsistently leave organic pockets in the subgrade that compromise compaction results later. A clean, homogeneous stripped surface is the correct starting point for bulk excavation.

Bulk excavation and trench excavation

This is the stage most people associate with excavation: the machinery, the soil displacement, and the shaping of the ground to meet structural drawings. A sound stepwise excavation method here requires both the right equipment and strict adherence to safety protocol.

Equipment selection is determined by site access, excavation volume, and soil conditions. A 360-degree tracked excavator suits most residential bulk digs. Where access is restricted, a 13-tonne midi excavator or even a tracked dumper arrangement may be required. Choosing machinery that is too large for site conditions causes unnecessary ground disturbance and access damage.

Key principles governing the bulk and trench excavation phase include:

  • Maintaining correct batter slopes on open-faced excavations, typically 1:1 or as specified by the geotechnical engineer, to prevent slope failure
  • Installing shoring, trench boxes, or sheet piling for any trench exceeding 1.5 metres in depth, in line with Health and Safety Executive guidance
  • Leaving a hand-trim allowance of 50 to 100 mm above the specified formation level to prevent over-excavation. Loose backfill cannot replicate undisturbed native soil density and creates a weak point beneath the slab or foundation
  • Cutting utility trenches to the exact widths and depths specified on structural and services drawings, with appropriate bedding allowances for pipe diameter
  • Maintaining a mandatory hand-dig buffer zone of 450 to 600 mm either side of all marked utility lines. Mechanical equipment must not enter this zone under any circumstances

Safety note: Trench collapses are among the most serious hazards in construction. Trenches deeper than 5 feet require engineered protection as a legal obligation, not a recommendation. Never allow operatives to enter an unshored trench of this depth.

Collaborative planning among surveyors, engineers, and contractors is what keeps this stage safe and on programme. Ground movement monitoring, particularly for deeper residential basements, should be active throughout.

Dewatering, compaction, and subgrade preparation

Once bulk excavation reaches formation level, attention turns to water management and ground preparation. These stages are frequently underestimated by homeowners managing their own excavation project planning, yet they are what separates a durable foundation from one that will move and crack within a decade.
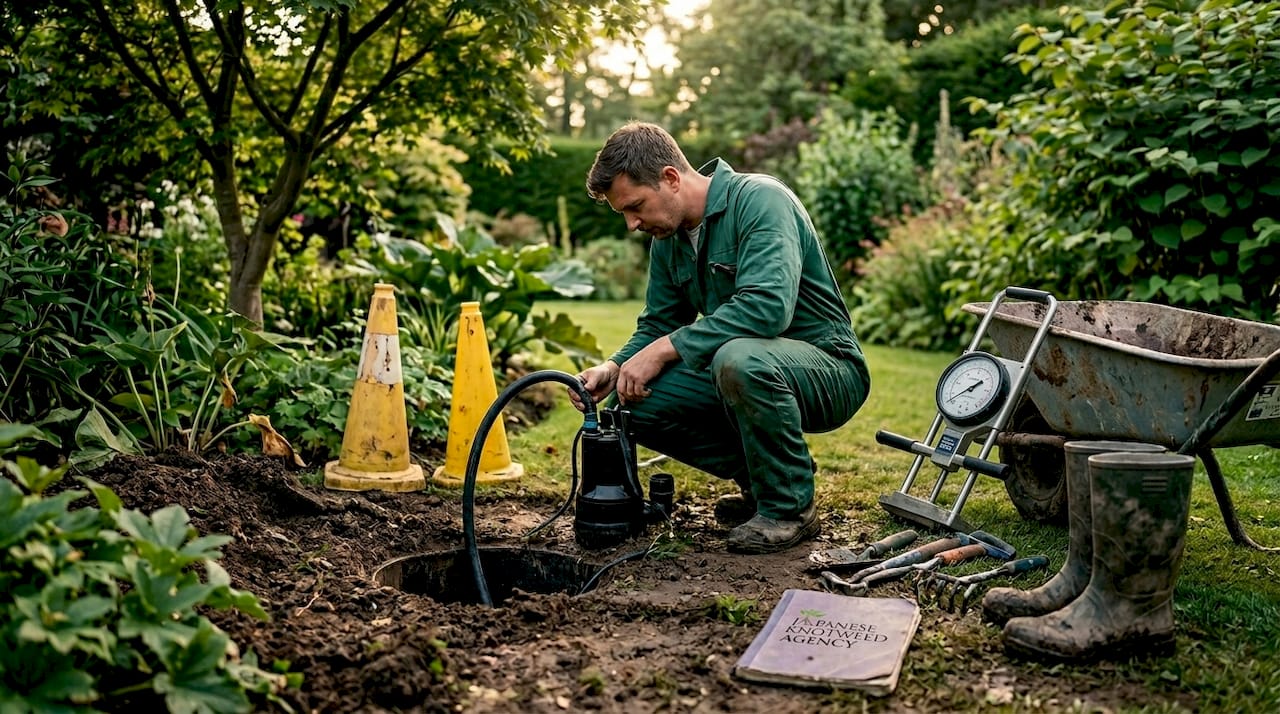
Worker inspecting sump pit and pump in backyard

Standing or seeping groundwater must be removed before compaction begins. Submersible pumps positioned in a sump pit at the lowest point of the excavation are the standard approach. Where groundwater ingress is continuous, a wellpoint dewatering system around the excavation perimeter may be necessary. Attempting to compact saturated soil produces no meaningful improvement in bearing capacity.

Stage Method Acceptance standard
Dewatering Sump pumping or wellpoint system Formation level free-draining before compaction
Compaction Vibrating roller or plate compactor in 200 mm lifts 95 to 98% Proctor dry density
Testing Nuclear density gauge or dynamic cone penetrometer Test results recorded and passed to engineer
Sub-base Granular type 1 MOT stone laid and compacted Minimum 150 mm depth, tested and approved
Blinding 50 mm lean mix concrete Level, continuous, and cured before reinforcement

Fill material must be compacted in lifts no greater than 200 mm, with compaction testing carried out at each lift before the next is placed. This is not optional. It is the only way to verify that your subgrade is performing to specification.

Pro Tip: Request a copy of every compaction test result from your contractor. These records are part of your building file and may be required by your structural engineer, building inspector, or future mortgage lender when assessing the property.

Final inspection and verifying readiness

The final stage of the excavation steps guide is verification. Before any concrete, reinforcement, or pipe bedding is placed, a structured inspection must confirm that the excavation meets the dimensions, levels, and compaction standards specified in the design.

The roles involved in this sign-off typically include:

  • The structural engineer, who checks formation levels, trench widths, and bearing capacity against design assumptions
  • The geotechnical engineer or specialist, where ground conditions were complex or varied from the original investigation
  • The building control inspector, who must formally approve the excavation before foundations are poured under Building Regulations

Common problems identified at this stage include over-excavation of trench bases, inadequate compaction results, and standing water that was not fully removed before testing. Each of these has a remediation route, but catching them at inspection costs far less than discovering them after concrete has been placed.

Water damage from improper drainage is described by structural engineers as a slow and silent threat. Drainage must be actively designed to divert surface and groundwater away from the foundation zone, not managed reactively once problems appear. Effective grading during excavation is one of the most frequently overlooked details, yet it is what keeps water away from your foundations for the life of the structure.

The inspection stage also provides the opportunity to confirm that all utility trenches have been backfilled in 200 to 300 mm lifts with compaction at every stage. Failure here leads to settlement, pipe separation, and surface cracking that can take years to manifest but is costly to remedy.

My perspective on residential excavation

What I have observed, working alongside surveyors and contractors on residential excavation projects across England and Wales, is that the vast majority of problems are entirely preventable. They are not caused by bad contractors or poor ground conditions. They are caused by homeowners and developers who underestimate the importance of the preparation stages and move too quickly toward the visible, tangible work.

In my experience, the utility survey and the soil investigation are the two stages most commonly skipped or reduced in scope when budgets are under pressure. This is precisely backwards. These are the stages that determine everything downstream. Discovering an uncharted gas main at 1.2 metres depth during bulk excavation is not a minor inconvenience. It can halt the project for weeks.

I have also seen drainage planning treated as an afterthought. Grading is designed on paper and then not verified on site as excavation progresses. Water finds its way into every unintended void, and a foundation sitting in intermittently saturated ground will move. The cost of correcting that movement, whether through underpinning or remedial drainage, is always far greater than the cost of getting it right during excavation.

What I tell every homeowner I work with is this: invest in the survey, follow the process, and do not make concessions on compaction testing or drainage design. The savings from cutting those corners are illusory.

— Alan

How Japaneseknotweedagency supports your excavation project

Excavation on residential land in England and Wales carries one risk that a standard structural survey will not identify: the presence of Japanese Knotweed or other invasive species within the excavation zone. Moving contaminated soil without specialist assessment and treatment is a legal and financial liability that can affect your ability to sell or mortgage the property.

https://japaneseknotweedagency.co.uk

Japaneseknotweedagency provides professional property surveys for invasive weeds across England, Wales, and Ireland, carried out before excavation begins to identify and manage any contamination risk. Where knotweed is present, Japaneseknotweedagency’s chemical-free knotweed solutions achieve a 95% success rate using thermo-electric treatment, root barrier installation, and controlled excavation, without the environmental risks associated with herbicide-based approaches. You can also book a survey to protect your project before groundworks commence.

FAQ

What is the first step in a residential excavation project?

The first step is a thorough site assessment, including a topographic survey, geotechnical soil investigation, and underground utility mapping. Starting without this information significantly increases the risk of utility strikes and foundation instability.

How deep must a trench be before shoring is legally required?

Any trench exceeding 1.5 metres in depth in the UK requires protective measures such as shoring, sloping, or a trench box. Under Health and Safety Executive guidance, this is a legal obligation for all construction sites.

What compaction standard should excavated fill meet?

Fill material should achieve 95 to 98% Proctor dry density, compacted in lifts no greater than 200 mm and verified by a nuclear density gauge or dynamic cone penetrometer before each subsequent lift is placed.

Can I excavate near utility lines with machinery?

No. Mechanical excavation equipment must not be used within 18 to 24 inches of any marked utility line. This zone must be excavated by hand to prevent accidental damage to gas, water, or electrical services.

Does Japanese Knotweed affect residential excavation projects?

Yes. Knotweed rhizomes can extend up to 3 metres in depth and 7 metres horizontally from the visible plant. Disturbing the root system without specialist management spreads the plant and can create legal liability. A professional invasive species survey should be carried out before any knotweed excavation works begin.

What is eco-safe weed management for homeowners


TL;DR:

  • Eco-safe weed management emphasizes sustainable, non-toxic techniques that avoid synthetic herbicides and prioritize soil health. It involves methods like hand weeding, mulching, soil solarisation, and natural contact herbicides, all working together over time to control weeds effectively. Understanding specific weed species and soil conditions helps gardeners achieve lasting results through integrated practices rather than quick chemical reactions.

Most homeowners reach for a chemical spray the moment weeds appear in their garden. It is understandable. Synthetic herbicides offer speed and convenience, but they carry costs that go well beyond the price on the label. What is eco-safe weed management, then, and why does it matter to you as a gardener? It is an approach that prioritises sustainable, non-toxic methods to control weeds without polluting soil, water, or harming the wildlife and people sharing your outdoor space. This article explains what it involves, how it works in practice, and what to expect from the process.

Table of Contents

Key takeaways

Point Details
Eco-safe means non-toxic and sustainable These methods avoid synthetic herbicides and rely on mechanical, cultural, and natural alternatives instead.
Natural herbicides act fast but are non-selective Products like pelargonic acid and acetic acid can knock down annual weeds quickly but will damage any plant they contact.
Soil health drives long-term results Correcting nutrient imbalances and supporting microbial life reduces weed pressure over months, not days.
Persistent perennials need integrated management Mulch and natural sprays alone will not control established perennial weeds; mechanical removal is also required.
Professional surveys add precision An invasive weed survey helps you understand what you are dealing with before committing to a management plan.

What is eco-safe weed management?

Eco-safe weed management is a structured approach to controlling unwanted plants by combining mechanical, cultural, and naturally derived methods, while minimising reliance on synthetic chemicals. Weed competition accounts for nearly 45% of agricultural yield losses globally, and weed management represents roughly one-third of production costs in many growing systems. That scale of impact explains why the search for safer alternatives has gathered such momentum in recent years.

The core principles of eco-safe weed management are straightforward:

  • Sustainability. Methods should not degrade soil structure, poison waterways, or persist harmfully in the environment.
  • Low toxicity. Products and techniques should be safe for children, pets, pollinators, and soil organisms.
  • Integration. No single method works in isolation. Effective management combines physical removal, soil improvement, timing, and where needed, naturally derived herbicides.
  • Resistance prevention. Unlike synthetic herbicides, which contribute to weed resistance through repeated use, varied eco-safe methods reduce the risk of resistant weed populations developing.

The contrast with conventional synthetic herbicide use is significant. Broad-spectrum chemicals like glyphosate are effective, but their long-term effects on soil biology and non-target species remain a subject of ongoing scientific and regulatory scrutiny. Eco-friendly weed control seeks to manage weeds as part of a living system rather than as a problem to be chemically eliminated.

Pro Tip: Before selecting any eco-safe method, identify the specific weed species in your garden. Annual weeds and perennial weeds respond very differently to the same treatments, and confusing the two wastes time and effort.

Practical eco-friendly weed control methods

There is no shortage of organic weed management options available to homeowners. The most effective approach layers several methods together rather than relying on one alone. Here is how to manage weeds organically using techniques suited to home gardens:

  1. Hand weeding and hoeing. The most reliable method for annual weeds. Hoe on warm, dry days so uprooted weeds desiccate quickly rather than re-rooting in moist soil.
  2. Mulching. A thick layer of organic mulch, bark, wood chip, or compost suppresses light and inhibits germination of weed seeds near the surface. Apply at a depth of at least 7 centimetres for meaningful suppression.
  3. Soil solarisation. Covering bare soil with clear plastic sheeting in summer traps solar heat. Solarisation targets the top 12 inches of soil and significantly reduces annual weed seed banks before planting. It is less effective on established perennial weeds.
  4. Natural contact herbicides. Products containing pelargonic acid or acetic acid (concentrated horticultural vinegar) offer rapid knockdown. Pelargonic acid shows results within 3 to 24 hours and breaks down quickly in the environment without leaving persistent residues.
  5. Thermal and steam methods. Advanced thermal weed control, including steam-foam technology, kills weeds down to the root using heat. Government trials confirm effective weed destruction combined with environmental safety, making this a credible professional-grade option.
  6. Ground cover planting. Dense, low-growing plants that colonise bare soil remove the conditions weeds need to establish. This is a long-term but highly durable form of eco-conscious weed suppression.

Pro Tip: Apply natural contact herbicides on hot, sunny days above 20°C. UV radiation and heat significantly enhance the efficacy of pelargonic acid and acetic acid-based products, reducing the number of repeat applications required.

For a more detailed step-by-step approach, the chemical-free weed eradication guide at Japaneseknotweedagency covers the process in depth for residential properties.

Soil health and garden ecology

The most commonly overlooked dimension of eco-safe weed management is soil health. Most homeowners focus on what is growing above the surface, but the real leverage lies below it. Soil nutrient imbalances, particularly disrupted calcium-to-magnesium ratios and poor bacterial-to-fungal balance, create conditions that actively favour weed proliferation.

Understanding this changes your entire approach. Consider the following connections:

  • Compacted, poorly aerated soil favours dock, plantain, and creeping buttercup. Improving drainage and aeration through aeration, organic matter addition, and reduced foot traffic removes their competitive advantage.
  • Nutrient-depleted soil encourages fast-growing annual weeds that thrive where perennial plants struggle to compete. Composting and organic amendments gradually shift this balance.
  • Disturbed soil exposed by digging or excavation is an open invitation for opportunistic weed species. Minimising bare soil periods with cover crops or mulch closes that window.
  • Microbial diversity plays a direct role in suppressing certain weed seed germination through competitive exclusion and allelopathic interactions in the soil matrix.

“The biggest misconception is expecting immediate weed control like chemical spraying. Sustainable control requires addressing soil imbalances and takes time to restore ecosystem balance, with benefits developing over 2 to 18 months.” — Agronomist Shané Steffen

Organic amendments such as well-rotted compost, green manures, and biochar gradually shift the soil’s microbial ecology. This is not a rapid process, but it is a durable one. Homeowners who invest in soil health typically find their weed burden reduces noticeably across two to three growing seasons, with less intervention required each year.

Common misconceptions about organic weed management

Hands spreading compost in garden soil

The benefits of eco-safe weed control are real, but so are its limitations. Misunderstanding what these methods can and cannot achieve is one of the main reasons homeowners become frustrated and return to synthetic herbicides.

The table below compares common assumptions with the reality of organic weed management:

Assumption Reality
Natural herbicides are selective Most organic herbicides are non-selective and will damage or kill any plant they contact, including desirable ones.
One application is sufficient Annual weeds often need repeat treatments; perennial weeds require multiple seasons of integrated management.
Mulch controls all weeds Mulch cannot control established perennials like bindweed or quackgrass, which can grow through even thick layers.
Results are immediate Eco-safe methods work on different timescales to chemicals. Soil-based improvements take months; contact herbicides act in hours but may need repeating.
Any natural product is safe near water Some concentrated organic acids can still affect aquatic organisms. Always check product guidance before applying near ponds or drainage channels.

Perennial invasive species present the greatest challenge within any eco-safe programme. Plants like Japanese Knotweed cannot be resolved by mulching, vinegar applications, or hand weeding. They require professional, integrated chemical-free solutions that address the extensive root system, not just the visible growth above ground. Understanding this distinction protects you from wasted effort and prevents weeds from re-establishing season after season.

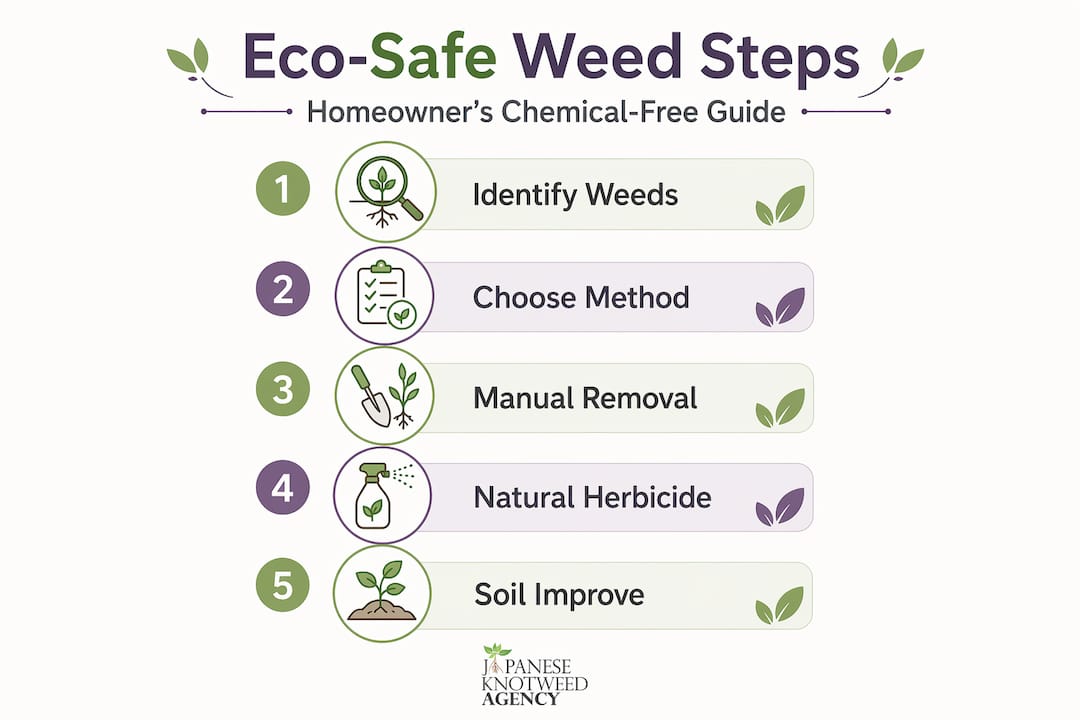
Infographic showing eco-safe weed steps

My perspective on eco-safe weed management

I have worked in invasive weed management for many years, and the most consistent pattern I observe is this: homeowners who expect eco-safe methods to perform like synthetic herbicides will always be disappointed. That is not a failure of the methods. It is a failure of expectation.

What I have found is that success depends entirely on shifting your frame of reference. Chemical sprays suppress symptoms. Eco-safe management addresses causes. When you start improving soil structure, reducing bare ground, and timing your interventions to the weed’s most vulnerable growth stage, you are no longer reacting to a problem. You are modifying the conditions that create it.

The homeowners I see achieving lasting results are those who understand that successful weed management integrates cultural practices across multiple seasons rather than relying on any single product. They are patient, observant, and willing to treat their garden as an ecology rather than a problem to be chemically corrected.

The one piece of advice I return to most often: start with a proper survey. Knowing precisely what species you are managing, where the root systems extend, and how the weed interacts with your soil and surrounding planting transforms your management plan from guesswork into something genuinely purposeful.

— Alan

How Japaneseknotweedagency can help

Eco-safe weed management at home becomes significantly more effective when you understand precisely what you are dealing with from the outset. For homeowners managing persistent or invasive weed species, a professional survey is the logical starting point.

https://japaneseknotweedagency.co.uk

Japaneseknotweedagency are pioneers of chemical-free treatment for Japanese Knotweed and other invasive plant species across England, Wales, and Ireland. Their thermo-electric treatment method delivers up to 5,000 volts directly to the rhizome network, causing internal cell damage without the use of herbicides. With 95% success rates documented for chemical-free knotweed treatment, and additional services including root barrier installation and excavation, they offer a genuinely sustainable alternative to chemical management programmes. To understand your property’s weed risk in full, book a survey and receive expert guidance tailored to your situation.

FAQ

What does eco-safe weed management involve?

Eco-safe weed management uses mechanical, cultural, and naturally derived methods to control weeds without synthetic herbicides. Methods include hand weeding, mulching, soil solarisation, and natural contact herbicides such as pelargonic acid.

Are natural herbicides safe around children and pets?

Most natural contact herbicides break down rapidly in the environment and carry significantly lower toxicity than synthetic alternatives. Always read product labels and allow treated areas to dry fully before allowing children or pets back onto the garden.

How long does eco-safe weed control take to work?

Contact herbicides like pelargonic acid show results within 3 to 24 hours for annual weeds. Soil health improvements that reduce weed pressure over time take between 2 and 18 months to deliver measurable benefits.

Can I manage Japanese Knotweed with organic methods at home?

Japanese Knotweed cannot be effectively controlled through standard organic methods such as mulching or vinegar application. Its extensive rhizome network requires professional treatment, such as the thermo-electric approach used by Japaneseknotweedagency.

When should I call a professional for weed management?

If you are dealing with invasive species, persistent perennial weeds that have not responded to multiple seasons of organic management, or weeds encroaching from a neighbouring property, a professional survey will give you the clarity needed to act effectively.

房产勘查流程详解:2026年购房者实操指南


简述:

  • 完整的房产勘查流程包括结构安全检查、产权合法性核实和环境评估,确保交易合法可靠。购房者应提前两周启动流程,配备专业设备,准确出具报告,确保产权清晰且房屋安全。专业验楼和权籍调查是保障权益的重要环节,避免交房后产生隐患和纠纷。

房产勘查流程是指通过系统性步骤,对房屋结构安全、产权合法性及环境状况进行全面核查,以保障购房交易安全与贷款合规的专业程序。这一流程涵盖结构检测、权籍调查和环境评估三大维度,由持牌验楼师借助高精度测绘设备完成。无论是首次置业的家庭,还是申请房贷的个人,完整执行房产勘查流程详解中的每个环节,都是规避风险、保障权益的必要前提。忽视任何一个环节,都可能在交房后引发结构安全隐患或产权纠纷。


房产勘查流程详解:完整步骤与时间安排

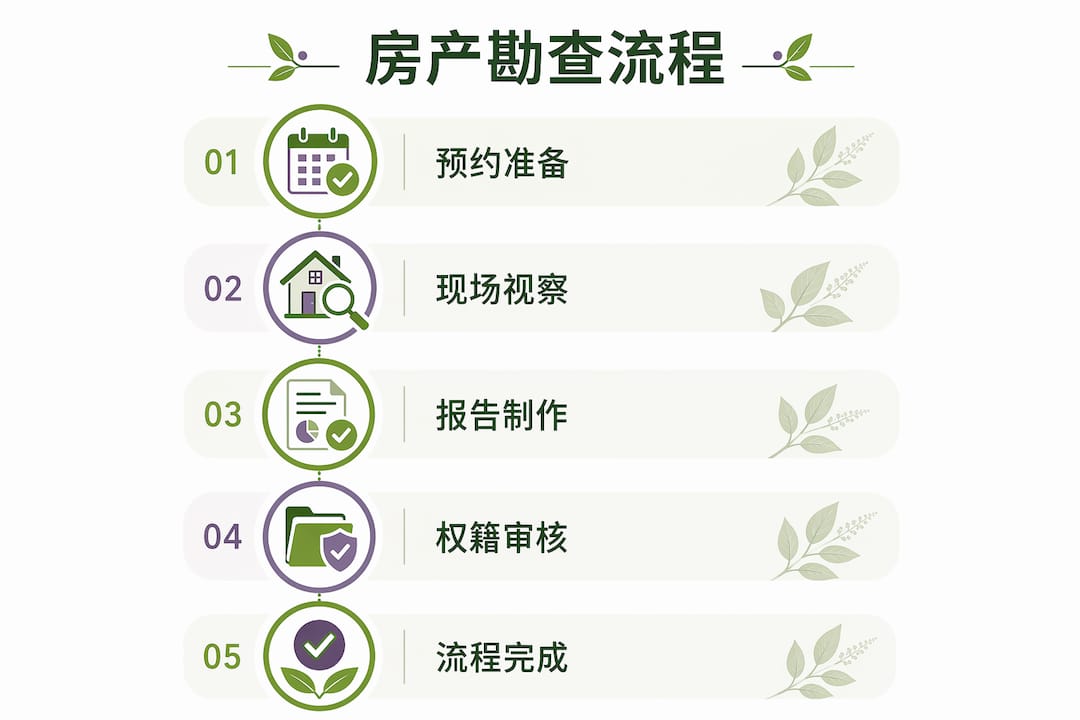
了解完整的房产勘查步骤,有助于购房者合理安排时间,提前准备所需文件。整个流程通常分为以下五个阶段:

  1. 预约并选择持牌验楼师:优先选择具备专业资质、配备红外热成像仪和GNSS RTK测量设备的验楼机构。资质核查是第一步,不可省略。
  2. 准备相关文件:包括产权证、建筑设计图纸、历史维修记录及相邻地块协议。文件齐全可显著缩短现场核查时间。
  3. 现场视察与实测现场视察时长约1.5至3小时,验楼师对结构、防水、电气及管道系统逐项检测。这一阶段是整个流程的核心,数据质量直接影响报告准确性。
  4. 书面报告出具:报告通常在3至7个工作日内完成,内容包含缺陷清单、照片标注、问题分类及修缮建议。报告是后续谈判和贷款申请的关键依据。
  5. 跟进与权籍审核:将勘查成果提交不动产登记系统,完成产权核实与登记。

以下表格列出各阶段的时间参考:

阶段 所需时间
预约与文件准备 1–3个工作日
现场视察与实测 1.5–3小时
报告出具 3–7个工作日
权籍审核与登记 3–5个工作日
总周期 7–14个工作日

购房者应在签署购房合同前预留足够时间完成全部流程。若贷款审批有时间节点,建议提前两周启动勘查程序,避免因报告延迟影响交易进度。

房产勘查全流程一览图


房屋结构与防水质量如何进行现场勘查?

现场结构勘查的核心目标是识别肉眼难以察觉的隐性缺陷。房屋安全等级分为A至D级,D级为危房,购买风险极高。验楼师在现场重点排查以下项目:

  • 墙体裂缝与地基沉降:斜向裂缝通常指向地基问题,水平裂缝则可能反映承重结构受损。
  • 腐蚀与变形:木质结构腐蚀、钢筋外露锈蚀均属高风险缺陷,需立即评估修缮成本。
  • 防水层完整性:浴室、厨房及阳台是渗漏高发区,需重点检测。

在仪器辅助方面,红外热成像仪可识别墙体内部的温差异常,从而定位隐蔽渗漏点。GNSS RTK设备则用于精确测量房产边界,误差控制在±0.05米以内,符合法律登记标准。

防水检测中,浴室积水测试是验证防水层有效性的标准方法。具体操作是堵住排水口,放水静置24小时,观察是否出现渗漏。这一方法简单直接,但必须由验楼师在场记录,结果才具备法律效力。

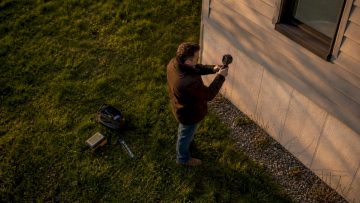
近距离操作红外热成像仪的实拍画面

在装修质量标准方面,磁砖空心率超过单块面积1/3即需修缮。建议购房者在合同中约定保留5%的交屋保留款,作为修缮履约保障。这笔资金在验收合格后方可支付,是保护自身权益的有效手段。

专业提示: 现场勘查时,请要求验楼师对每处缺陷拍照存档,并在报告中注明缺陷位置坐标。照片加坐标的组合记录,在后续与卖方谈判时具有更强的说服力。


权籍调查流程是什么?为何关乎交易合规?

权籍调查是房产勘查步骤中法律属性最强的环节,直接决定产权是否清晰、交易是否合规。权籍调查成果经审核后录入不动产登记系统,作为产权登记、转移和抵押的法定依据。这意味着,任何遗漏或错误都可能导致后续交易无法完成。

申请权籍调查时,需提交以下材料:

  • 土地使用权证或不动产权证书原件
  • 建设工程规划许可证及竣工验收文件
  • 相邻权利人的身份证明文件
  • 历史产权变更记录(如有)

现场指界确认是权籍调查的关键环节。相邻权利人须共同到场,签署《土地权属界线协议书》,并由测绘人员使用GNSS RTK等高精度设备实测界址点坐标。测量精度须达到±0.05米,方可满足法律登记要求。

以下表格梳理了权籍调查的核心环节与法律要求:

环节 法律要求
申请材料提交 产权证、规划许可证等原件齐备
现场指界确认 相邻权利人共同签署界线协议书
高精度测量 GNSS RTK,精度±0.05米
成果审核 经主管部门审核后推送登记平台
不动产登记 作为产权转移与抵押的法定依据

权籍调查与不动产登记是前后衔接的两个程序。调查成果未经审核,登记程序无法启动。购房者应主动跟进调查进度,确保成果在交房前完成审核,避免因登记延误影响贷款放款节点。参考房产调查全流程指南,可进一步了解各环节的衔接细节。


验楼过程中有哪些常见误区?

许多购房者认为自行验楼可以替代专业服务。这一判断存在明显风险。DIY验楼缺乏专业设备,无法有效识别结构沉降、墙体渗水等隐蔽问题。普通人用肉眼能发现的,往往只是表面缺陷,而真正影响房屋价值和安全的问题,往往藏在墙体内部或地基深处。

专业验楼师的核心优势体现在以下几个方面:

  • 红外线热成像仪:识别墙体内部温差异常,精准定位渗漏源头,误判率极低。
  • 水平仪与沉降检测仪:量化地基沉降程度,判断是否超出安全阈值。
  • 模拟压力测试:对管道系统施加模拟水压,检测是否存在隐性泄漏。
  • 浴室积水测试:静置24小时验证防水层,结果客观可量化。

验楼报告的价值不仅在于记录缺陷,更在于为谈判提供依据。报告内容包含缺陷清单、照片标注和修缮建议,购房者可凭此要求卖方降价或预留交屋保留款。在贷款审批环节,银行通常要求提供专业验楼报告作为房屋价值评估的参考依据。没有报告,贷款审批可能面临额外障碍。

专业提示: 拿到验楼报告后,建议将缺陷按"结构性问题"和"装修性问题"分类整理,再与卖方谈判。结构性问题的修缮成本通常远高于装修问题,分类清晰有助于争取更合理的价格调整。

购房前的杂草检测同样是容易被忽视的环节。入侵植物如日本虎杖的根系可穿透建筑基础,对结构造成长期损害,且在标准验楼流程中往往不被纳入检测范围。


关键要点

完整执行房产勘查流程,是购房者保障结构安全、产权清晰与交易合规的唯一可靠路径。

要点 详情
流程总周期 从预约到完成权籍审核,整体需7至14个工作日,应提前规划。
专业设备不可替代 红外热成像仪和GNSS RTK等设备能识别肉眼无法发现的隐蔽缺陷。
防水测试须静置24小时 浴室积水测试是验证防水层有效性的标准方法,结果需由验楼师记录存档。
交屋保留款保障权益 建议在合同中约定保留5%交屋款,待验收合格后方可支付。
权籍调查是法律前提 调查成果录入不动产登记系统后,方可合法完成产权转移与抵押登记。

我在2026年对房产勘查流程的真实判断

从事房产勘查与入侵植物评估多年,我见过太多购房者在交房后才发现问题。这些问题几乎都有一个共同点:勘查流程不完整,或者某个环节被草率处理。

最常见的误区是"目测够用"。现场视察时,很多人盯着墙面颜色和装修风格,却对地基沉降迹象视而不见。没有水平仪,你无法判断地板是否存在0.3厘米的倾斜。没有红外热成像仪,你看不到墙体内部正在蔓延的渗漏。这不是经验问题,是物理限制。

权籍调查是另一个被低估的环节。我处理过多个案例,买家在入住后才发现相邻地块存在产权争议,而这些争议本可以在指界确认阶段通过签署协议彻底解决。一份签署完整的《土地权属界线协议书》,价值远超其看起来的那张纸。

交屋保留款的问题也值得单独强调。5%听起来不多,但在一套价值数百万的房产中,这笔资金足以覆盖大多数结构性修缮费用。很多买家因为急于完成交易而放弃这一保障,事后追悔莫及。

2026年,GNSS RTK和红外热成像技术的普及显著提升了勘查效率和数据精度。这些工具不是噱头,是真正改变了勘查结果可靠性的技术进步。选择配备这些设备的专业团队,是对自己最实际的保护。

— Alan


Japaneseknotweedagency 专业勘查服务:保障您的购房安全

Japaneseknotweedagency 在英格兰、威尔士及爱尔兰地区提供专业的房产勘查服务,覆盖结构验楼、权籍调查及入侵植物环境评估全流程。团队配备红外热成像仪和GNSS RTK高精度测绘设备,确保每份报告数据准确、内容详实,可直接用于合同谈判与银行贷款申请。

https://japaneseknotweedagency.co.uk

服务范围包括日本虎杖等入侵植物的专业现场评估,这一环节在标准验楼中常被遗漏,却可能对房屋结构和贷款审批产生重大影响。如需了解服务详情或预约勘查,请访问 Japaneseknotweedagency 常见问题页面,获取专业解答与预约支持。


常见问题

房产勘查流程一般需要多长时间?

整体流程通常需要7至14个工作日,其中现场视察约需1.5至3小时,报告出具需3至7个工作日。建议在签署购房合同前至少两周启动流程。

验楼报告包含哪些内容?

验楼报告包含缺陷清单、照片标注、问题分类及修缮建议,是与卖方谈判交屋保留款和申请银行贷款的核心文件。

权籍调查和不动产登记有什么区别?

权籍调查是对房产边界和产权归属的实地核查程序,成果经审核后录入不动产登记系统,才能完成法律意义上的产权转移和抵押登记。两者是前后衔接的独立程序。

磁砖空心超过多少面积需要修缮?

单块磁砖空心面积超过1/3即达到修缮标准。购房者应在合同中约定5%交屋保留款,确保卖方履行修缮义务后方可付清尾款。

入侵植物是否属于房产勘查的检测范围?

标准验楼流程通常不包含入侵植物检测。日本虎杖等入侵植物的根系可穿透建筑基础,对结构造成长期损害,建议单独委托专业机构进行入侵植物现场评估,尤其是在申请房贷前。

推荐

Why weed barriers fail: what gardeners need to know


TL;DR:

  • Weed barriers often fail within a few years due to material degradation, debris buildup, and installation issues.
  • Proper installation and integrated soil health approaches provide more reliable long-term weed suppression than barriers alone.

Weed barriers are one of the most widely purchased products in the gardening market, yet they are also one of the most reliably disappointing. Many homeowners install them expecting years of trouble-free weed suppression, only to find weeds returning within a single growing season. Understanding why weed barriers fail goes well beyond blaming a cheap product. The reasons are rooted in material science, soil biology, and installation practice, and recognising them is the first step towards making genuinely informed decisions about weed control on your property.

Table of Contents

Key takeaways

Point Details
Barriers degrade quickly Most landscape fabrics lose effectiveness within two years as pores clog and material weakens.
Installation gaps cause failure Seams need at least 15 cm overlap and edges must be buried to prevent weed ingress at margins.
Debris creates new growing medium Organic matter accumulating on top of fabric gives weed seeds a perfect germination bed.
Material choice matters Petroleum-based fabrics persist in soil as fragments, whilst natural alternatives biodegrade but offer shorter life spans.
Integrated approaches work better Combining mulch, soil preparation, and fabric gives more reliable, longer-lasting weed suppression.

Why weed barriers fail: the core mechanisms

Weed barriers are designed to do two things: block sunlight from reaching weed seeds and create a physical layer that roots cannot penetrate. In the short term, they do both reasonably well. The problem is that neither function holds up under real garden conditions for long.

Landscape fabric suppresses weeds temporarily but tends to fail after a couple of years as the material degrades and begins to harm soil health. Soil particles, organic debris, and fragments of mulch progressively clog the fabric’s pores, reducing both drainage and the air exchange that plant roots depend upon. Over time, the barrier that was meant to protect your beds becomes a compacted, oxygen-starved layer that actively works against healthy plant growth.

The embedded-root problem is perhaps the most frustrating outcome. Once organic matter accumulates on the fabric surface, weed seeds germinate in that debris rather than in the soil below. Their roots grow down through the fabric, anchoring through the fabric layer and making removal almost impossible without tearing up the entire installation. What started as a labour-saving measure becomes an extraordinarily time-consuming remediation task.

There is also a soil biology dimension that is rarely discussed in product marketing. Landscape fabrics reduce CO₂ movement between the soil and atmosphere around 1,000 times more than wood chip mulches do. This level of disruption harms beneficial soil organisms, degrades soil structure, and undermines the long-term health of everything you are trying to grow.

  • Pore clogging from sediment and decomposing mulch reduces both drainage and aeration
  • Root penetration occurs through accumulated debris rather than through the fabric itself
  • Soil gas exchange is severely restricted compared to organic mulch alternatives
  • Exposed or lifted edges create ready entry points for weeds at the margins
  • UV degradation makes many fabrics brittle and prone to tearing within two to three seasons

Pro Tip: Lift a corner of any weed fabric that has been in place for two or more seasons. If you find dark, compacted debris beneath it and fine roots threading through the material, the barrier has already failed. Early detection saves considerably more work later.

Material types and their limitations

Not all weed barriers are made equally, and understanding the differences helps explain why some fail faster than others. The two broad categories are synthetic fabrics, typically made from polypropylene, and natural barriers such as cardboard or hessian.

Material Durability Soil impact Environmental concern
Woven polypropylene 3 to 5 years Restricts gas exchange and moisture Fragments but does not biodegrade
Non-woven polypropylene 1 to 3 years Clogs quickly with sediment Same fragmentation issue
Cardboard 6 to 12 months Biodegrades and feeds soil organisms Minimal, but inks may be a concern
Hessian or jute 1 to 2 years Adds organic matter as it breaks down Biodegradable and low impact

Most landscape fabrics are petroleum-based and break into small fragments rather than decomposing. This means that once a synthetic barrier starts failing, you are not simply removing a worn product. You are extracting plastic fragments from your soil, often mixed thoroughly into the top layer where they will persist indefinitely. Professional gardeners are increasingly removing these materials precisely because the long-term soil contamination outweighs the short-term suppression benefit.

Deteriorating plastic barrier mixed with garden soil

Fabric thickness and pore size directly influence how quickly a barrier fails. Lightweight, highly porous fabrics allow fine-rooted weeds to push through within a single season. Heavier, UV-stabilised fabrics perform better under direct sunlight and mechanical pressure, but even premium products degrade given sufficient time and organic matter accumulation. No synthetic fabric currently offers a genuinely permanent solution.

Installation quality and ongoing maintenance

The majority of weed barrier failures are operational rather than a consequence of product defects. Correct installation makes a measurable difference to how long a barrier performs, and neglecting that preparation is where most homeowners come unstuck.

  1. Clear the area completely before laying fabric. Any existing weeds, particularly perennials with established root systems, will push through or around the barrier if left in place.
  2. Prepare and level the soil surface. Stones or clods of earth create pressure points that accelerate wear and create gaps.
  3. Overlap seams by at least 15 centimetres. Seam overlap of at least 6 inches reduces weed ingress at join points, which are otherwise the first places weeds exploit.
  4. Bury edges in a shallow perimeter trench. Lifted edges are an open invitation for weeds entering laterally.
  5. Inspect the surface every six months and clear accumulated organic debris before it forms a viable growing medium.

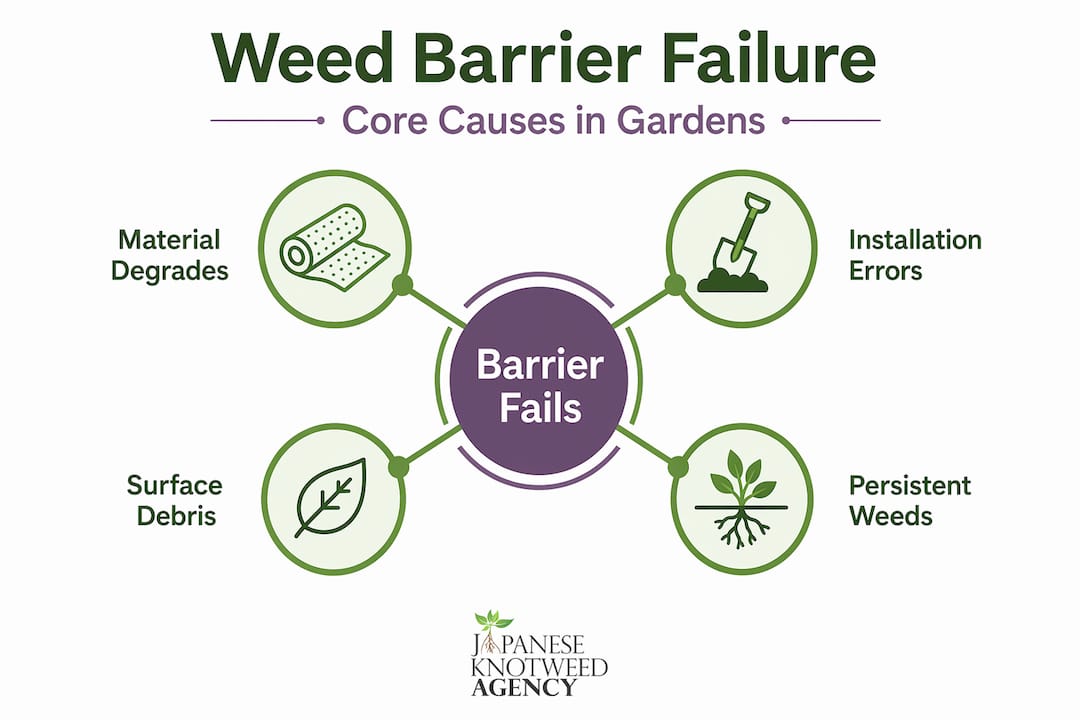
Failure to maintain surface debris and poor installation are the operational causes behind most reported problems with weed barriers. The fabric itself is rarely the sole culprit. A well-installed barrier with regular maintenance will always outperform a hastily laid product left untouched for years.

Pro Tip: When cutting holes for established plants, use the smallest aperture possible and press the edges firmly down. Large, unfinished cuts are among the most common entry points for opportunistic weeds, particularly in the first year after installation.

Alternatives and complementary strategies

Given the common weed barrier issues described above, many homeowners are now asking whether fabric is worth using at all. The honest answer depends on the setting. For permanent, low-maintenance beds, a combination of methods tends to outperform fabric alone.

  • Organic mulch applied at a depth of 7 to 10 centimetres suppresses weeds effectively and, unlike synthetic fabric, wood chip mulches decompose and feed soil biota, improving soil structure year on year rather than degrading it
  • Cardboard sheet mulching (sometimes called soil solarisation or the no-dig method) uses overlapping cardboard directly on soil, which biodegrades within a season, smothers existing weeds, and adds organic matter without the plastic fragmentation problem
  • Pre-emergence herbicides form a chemical barrier in the soil that prevents seeds from germinating. Pre-emergence herbicides prevent seedling emergence during germination, complementing a physical barrier rather than replacing it. Where chemical-free management is a priority, these products are less appropriate, but they are part of the integrated toolkit for weed control
  • Combining fabric with a deep mulch layer can extend suppression life, but only if the fabric is properly installed and the mulch is managed to prevent it becoming a seed bed in its own right
  • Holistic weed control treats the garden as a system, addressing soil health, moisture levels, and plant density alongside any physical or chemical suppression. Dense planting that shades the soil surface is itself one of the most durable long-term weed control strategies available to homeowners

Weed control should be seen as a system involving mulch decomposition, soil moisture management, and barrier choice rather than relying on fabric alone. Treating any single product as a complete solution is where the expectation gap originates. You can read more about sustainable weed management to build a longer-term approach that works with your soil rather than against it.

My perspective on barriers and what really works

I have seen a great many gardens where the weed barrier was installed with the best of intentions and became the source of the most significant maintenance headache the homeowner had ever encountered. The “set and forget” mentality is the real driver of failure here, and no product label ever fully disabuses people of it.

What I have observed consistently is that soil harm compounds over time. A barrier that looks fine at the end of year one is often causing measurable damage to soil biology by year three. By the time weeds are visibly returning through it, the soil beneath may already be compacted, poorly aerated, and depleted of the microbial activity that supports healthy plant growth. Removing the fabric at that stage is only the beginning of the remediation work.

Infographic showing main causes of weed barrier failure

My honest view is that fabric has a narrow legitimate use case: short-term suppression in areas where you are establishing new planting and need a season or two of protection whilst root systems develop. Beyond that application, integrated approaches that prioritise soil health will give you a more productive garden over a five to ten year horizon. For persistent or invasive species, particularly those with deep rhizome systems like Japanese knotweed, no surface barrier is adequate. Those situations require specialist assessment and targeted treatment from the outset.

Informed, vigilant homeowners who treat weed management as an ongoing responsibility rather than a one-time installation will always achieve better results. That is not a complicated position, but it is one the gardening product market does not always encourage.

— Alan

Dealing with persistent weeds? Japaneseknotweedagency can help

If surface weed barriers have not resolved your problem, there is a reasonable chance the challenge runs deeper than a fabric solution can address. Japaneseknotweedagency specialises in chemical-free weed eradication for invasive and persistent plant species, including Japanese knotweed, across England, Wales, and Ireland.

https://japaneseknotweedagency.co.uk

The team delivers thermo-electric treatment on site, root barrier installations, and excavation works tailored to each property. Where fabric and mulch fall short, a professional survey gives you a clear picture of what you are actually dealing with and the most appropriate course of action. You can book a survey directly or explore plant eradication survey guidance to understand what the process involves before committing. For answers to common questions about invasive species and treatment options, the agency FAQ is a practical starting point.

FAQ

Why do weed barriers stop working after a few years?

Landscape fabric degrades as pores become clogged with sediment and organic debris, reducing its ability to block light and restrict root growth. Weed seeds then germinate in the accumulated surface layer rather than the soil below.

Does the type of fabric make a difference to how long it lasts?

Yes. Heavier, UV-stabilised fabrics resist mechanical damage and sun degradation better than lightweight porous materials, but all synthetic fabrics eventually degrade and none offer a permanent solution.

What is the best alternative to weed barrier fabric?

A 7 to 10 centimetre layer of organic mulch such as wood chips suppresses weeds effectively whilst improving soil structure. Cardboard sheet mulching is a practical, biodegradable option for beds being established from scratch.

Can installation errors alone cause weed barrier failure?

Absolutely. Installation geometry is critical. Insufficient seam overlap, lifted or unburied edges, and gaps around plants are among the most common reasons weed barriers fail, even when the product itself is of good quality.

Are synthetic weed barriers harmful to soil health?

Yes, over time. Petroleum-based fabrics fragment rather than biodegrade, introducing plastic particles into the soil. The fabric also restricts the gas exchange and moisture movement that beneficial soil organisms require to function properly.

家庭日本虎杖解决方案:无化学根除完整指南


TL;DR:

  • 日本虎杖以其强大再生能力和广泛根系网络成为家庭中最难清除的入侵植物之一。无化学方案如机械挖除结合覆盖技术,既安全又有效,需持续管理数年以确保根除。专业的无化学处理服务为家庭提供安全、环保的根除选择,有效防止复发。

日本虎杖以其极强的再生能力和广泛的根系网络著称,是众多房主面临的最顽固入侵植物之一。对于寻求有效家庭日本虎杖解决方案的业主而言,化学除草剂固然存在,但其对家人、宠物及周边生态的潜在危害让许多人望而却步。本文系统梳理适合家庭环境的无化学及低影响处理方案,从机械挖除到生态抑制,再到方案对比,帮助您根据实际情况做出知情决策。

目录

关键要点

要点 详情
无化学优先原则 机械挖除配合覆盖技术是家庭环境中最安全的根除起点
根除需持续管理 日本虎杖彻底根除可能需要数年坚持,非单次操作可完成
复合方案效果最佳 结合机械、生态与辅助手段能显著提高成功率并降低再生风险
废弃物需妥善处理 挖出的根系必须依法处理,不可随意堆放或混入普通垃圾
专业评估不可忽视 侵害范围较大时应寻求专业调查,避免因误判延误治理时机

1. 家庭日本虎杖解决方案的核心选择标准

选择适合自家情况的家庭日本虎杖解决方案之前,需要先对几个关键标准作出评估。不同家庭的院落面积、土质结构、侵害程度和家庭成员构成各不相同,这些因素直接影响方案的可行性与安全性。

以下是评估方案时需考虑的核心维度:

  • 环境安全性:是否含化学成分?对儿童、宠物及附近水源有无风险?无化学方案在家庭环境中优先性更高。
  • 根除彻底性:日本虎杖的根茎系统深入地下,根系深度可达3米以上,方案必须针对根部而非仅处理地表植株。
  • 再生风险控制:仅处理地上部分无法阻断再生。有效方案需要同时抑制地下根茎的营养供给。
  • 成本与时间投入:机械方法初期体力消耗大,但长期费用低;专业服务成本较高,但效率更稳定。
  • 施工难易程度:家庭业主自行操作需考虑工具获取、体力条件及废弃物合规处理能力。
  • 长期维护需求:彻底根除通常需要数年持续管理,方案应具备可重复性。

明确这些标准后,才能在后续章节的具体方案中找到最匹配自身条件的组合路径。

2. 机械挖除法:根系清除的完整操作流程

机械挖除是目前公认的无化学根除核心手段之一。其原理直接:通过物理移除地下根茎,从根本上切断植株的营养来源。根系挖除步骤清晰,适合有一定体力条件的家庭自行操作。

按照去除虎杖的步骤,以下流程经过验证,适合家庭小规模操作:

  1. 初步调查侵害范围:在挖掘前先标记所有可见植株,并借助探针或浅挖探查根茎分布范围,避免遗漏边缘根系。
  2. 准备合适工具:使用重型铁锹、根系叉或迷你挖掘机(侵害面积较大时)。切勿使用旋耕机,旋耕会将根茎切碎并大面积扩散,反而加剧蔓延。
  3. 分层挖掘:从植株茎秆外缘50厘米处开始向内挖掘,深度至少60至90厘米,确保取出主根茎及其分叉。
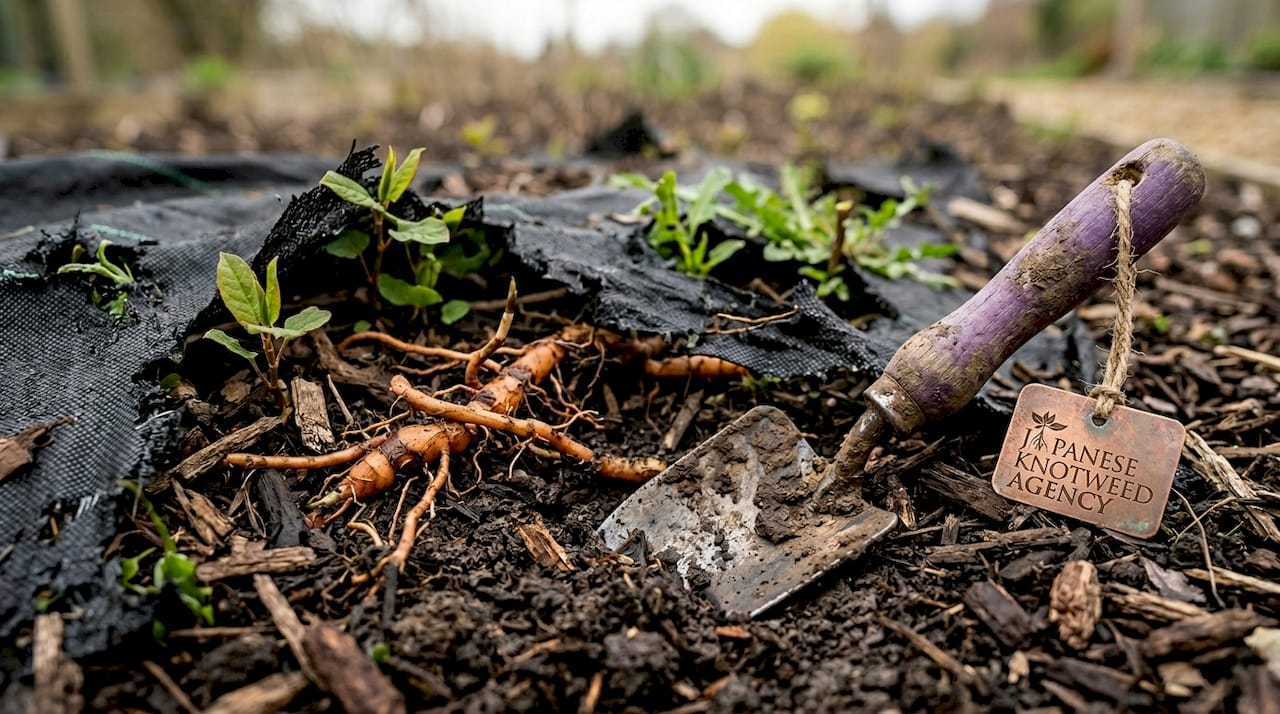
  4. 彻底清除根碎:即使是直径2毫米的根段也能重新发芽,因此必须用细筛网筛查挖出的土壤,拣除所有可见根段。
  5. 合规处理废弃物:根据英格兰、威尔士及爱尔兰的相关法规,日本虎杖根茎属于受控废弃物,必须送往授权填埋场处理,严禁自行焚烧或堆肥。
  6. 覆盖处理防止再生:覆盖材料如高密度遮光布或工业级黑色塑料布,覆盖挖除区域至少12至24个月,持续抑制残余根茎萌发。
  7. 定期复查与补挖:每季度检查一次覆盖区域,发现新芽立即处理,并记录再生情况以评估根除进度。

专业提示: 覆盖时将遮光布边缘压入土中至少30厘米,并在接缝处重叠覆盖,防止光线渗入促使残余根茎生长。

挖除法的主要挑战在于根系深度和体力消耗,但其无化学的特性使其成为有儿童或宠物的家庭的首选出发点。

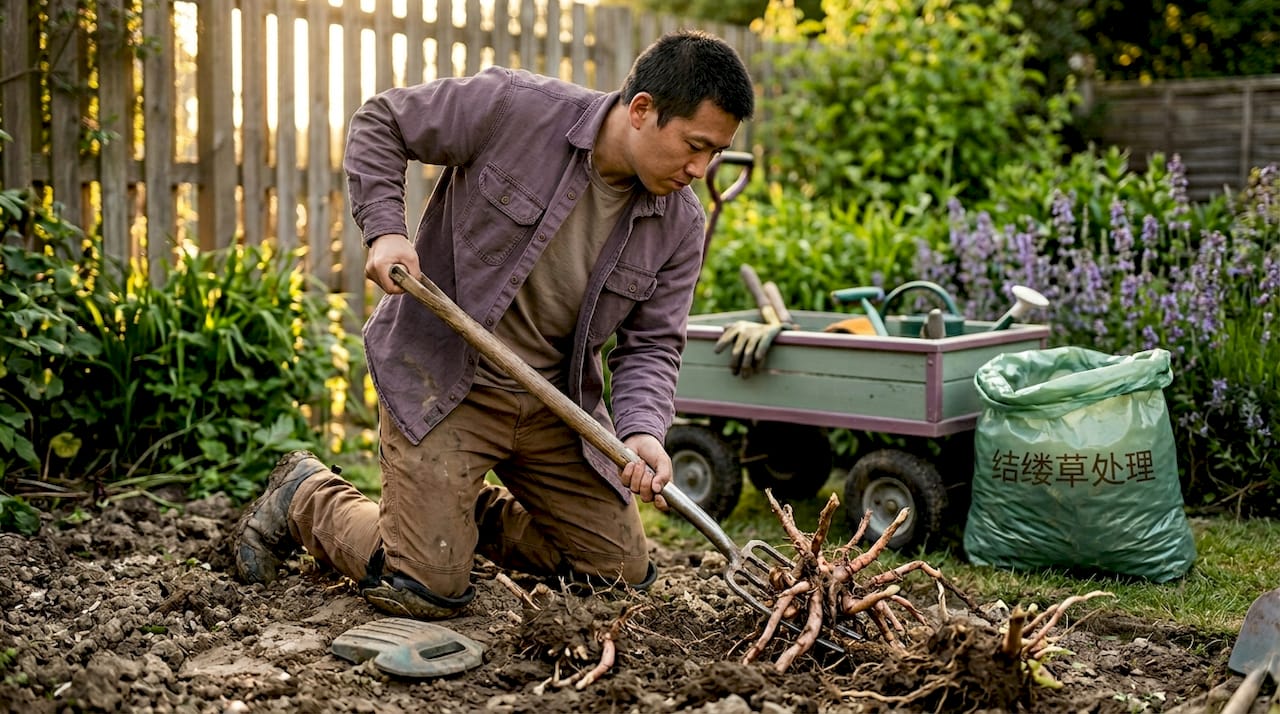
一位男士正在自家花园里挖除顽固的虎杖根部。

3. 地面覆盖抑制技术:低成本长效管理

覆盖法与挖除法配合使用,能显著降低残余根系的再生成功率。其核心逻辑是通过遮光剥夺植物进行光合作用的条件,从而减缓生长并逐步耗尽根茎储存的能量。

常用覆盖材料及其适用场景如下:

  • 高密度遮光布:专业级园艺遮光布(遮光率95%以上)是最推荐的选择,耐用性高,透气性优于塑料布,适合长期覆盖。
  • 工业级黑色聚乙烯薄膜:成本低,但需注意夏季高温下可能产生裂缝,应定期检查并及时修补。
  • 多层纸板覆盖法:适用于轻微侵害区域,将多层瓦楞纸板紧密铺设后再覆盖木屑或树皮,既无化学污染,又有改良土壤的附加效果。
  • 砾石或混凝土硬化:适合永久性解决局部区域问题,但施工成本较高,且未必能完全阻断深层根茎。

覆盖法单独使用时,通常需要持续3至5年才能有效消耗根茎能量。与机械挖除结合使用,可将整体治理周期缩短至1至2年。

4. 生态友好型方案:自然抑制与生物控制

生态方法代表了家庭日本虎杖解决方案中对环境干预最小的一类选择,其核心在于借助自然力量对植株施加长期压力,而非一次性物理清除。

自然覆盖通过遮光原理减少植株光合作用,配合种植高密度竞争性植物(如快速生长的乔木或地被植物),可在一定程度上压制虎杖扩张。这种方法不产生任何化学污染,是对周边水源和土壤生态影响最小的处理方式。

在生物控制领域,研究人员多年来一直在探索利用日本虎杖原产地的天敌来控制其在英国的蔓延。其中最受关注的是木虱(Aphalara itadori),这种昆虫以虎杖汁液为食,生物控制研究表明其具有一定抑制效果,但目前在英国仍处于受控试验阶段,尚未向公众开放推广。这意味着家庭业主目前无法单独依赖生物控制作为主要手段。

生态方案的局限性同样明显:效果缓慢,通常需要5年以上才能看到显著变化;对于已大面积蔓延的侵害,单一生态方法的控制力不足。其最大价值在于作为机械挖除后的辅助维护手段,防止后续复发,而非独立根除工具。

5. 化学辅助方法的安全使用指南

对于愿意接受有限化学辅助的业主,了解如何安全合规地使用除草剂同样属于完整家庭日本虎杖解决方案知识体系的一部分。需要指出的是,Japaneseknotweedagency 作为无化学治理的先驱,认为纯物理和电能处理方案在家庭环境中更安全、更可持续。

如确需使用草甘膦类除草剂,夏末施药是公认效果最佳的时机,此时植株正将营养输送回根系,除草剂随之渗透至根部的效率最高。以下安全准则不可忽视:

以下是化学辅助使用的核心安全要求:

  • 施药前必须佩戴手套、护目镜和防护服,防止皮肤和眼睛接触。
  • 在无风天气下施药,避免雾化药液飘散至邻近植物、蔬菜园或水源。
  • 施药后至少48小时内,禁止儿童和宠物进入处理区域。
  • 多次施药比单次大剂量更有效,且对环境的冲击更小。
  • 靠近水道50米范围内严禁使用草甘膦,须遵守当地环境法规。

专业提示: 将草甘膦注射直接施入茎腔而非叶面喷洒,可大幅降低药液扩散风险,同时提高根部吸收率,是家庭环境中相对更负责任的施药方式。

化学辅助方法最适合作为顽固再生情况的补充手段,而非主要治理工具。与机械挖除结合使用时,能有效提高整体成功率。

6. 主要方案对比表:帮助您做出决策

复合治理策略能显著提升整体效果,下表从成本、效果、安全性和适用场景四个维度对比各主要方案:

方案类型 成本估算 对家庭安全性 预期见效时间 最适用场景
机械挖除法 低至中(自行操作) 极高,无污染 1至3年 小至中等侵害面积,有体力操作条件
覆盖抑制法 极低 极高,无污染 2至5年 配合挖除使用,作为长期维护手段
生态自然抑制 极低 极高,无污染 5年以上 轻微侵害或挖除后防复发维护
草甘膦除草剂 中(需严格防护) 1至2年(多次施药) 顽固再生、机械手段难以触及区域
专业无化学处理 极高,专业操作 6至24个月 大面积侵害或涉及房屋结构风险

防止再生的长期维护提示:任何方案执行后,每年春季和秋季各进行一次系统复查是必要的。发现新芽应立即处理,因为早期干预的成本和难度远低于待其重新蔓延后的补救。长期管理计划至少应坚持3年,才能确认根除效果是否稳定。

7. 作者亲历:无化学方案为何更适合家庭

多年从事日本虎杖治理工作,我见过太多房主在走了化学除草剂的弯路之后,才意识到这条路在家庭环境中的代价。不是说化学方法完全无效,而是其风险往往被大大低估。在一些案例中,房主在处理后数周内仍能发现宠物出现健康异常,而草坪附近的蔬菜园也在不知情的情况下受到了污染。

我真正相信的是:家庭治理首先是安全问题,其次才是效率问题。在我们 Japaneseknotweedagency 采用的热电无化学处理方法中,高达5000伏的直接能量作用于根茎网络,造成内部细胞损伤并耗尽根茎储备的能量资源,整个过程对周围土壤和生态系统无任何化学污染。这是我在工作中看到的目前最接近"一劳永逸"的家庭友好型解决方案。

我也想坦率地说:没有任何单一方案能在所有情况下都奏效。最成功的案例,无一不是多种手段组合、持续监控、定期跟进的结果。房主需要的不是一个"完美方案",而是一套可以坚持执行的管理计划。

— Alan

了解 Japaneseknotweedagency 的无化学根除服务

如果您正面对顽固的日本虎杖侵害,或者不确定自行操作能否达到彻底根除的效果,Japaneseknotweedagency 提供专为家庭业主设计的无化学根除方案,在英格兰、威尔士及爱尔兰地区均可提供上门专业调查与处理服务。

https://japaneseknotweedagency.co.uk

我们的热电处理技术无需使用任何化学品,即可对根茎网络造成内部细胞损伤,95%的成功率已在大量实际案例中得到验证。无论是小型庭院侵害还是涉及房屋结构的复杂情况,我们均可提供针对性方案。如需了解逐步处理流程,可参考我们的家庭杂草管理指南,或直接联系我们的团队获取免费初步评估。

常见问题解答

如何判断院子里是否有日本虎杖?

日本虎杖夏季茎秆可高达3米,叶片呈铲形,茎部有明显紫红色斑点。春季新芽呈红色锥状,是早期识别的关键特征。

机械挖除后还会再生吗?

会。根系残留哪怕只有2毫米的碎片也能重新萌发,因此挖除后必须配合覆盖和持续复查,通常需要坚持1至3年。

家庭环境下能完全不使用化学品处理虎杖吗?

可以。机械挖除、覆盖抑制和 Japaneseknotweedagency 的热电处理均为纯无化学方案,其中热电处理在专业操作下效果更为稳定。

自行处理和请专业机构处理有何区别?

自行操作成本低,但对小面积侵害更适用。大面积或涉及房屋基础结构的情况,专业评估和处理能有效规避再生风险并保障房产价值。

日本虎杖挖出的根系可以自行处理吗?

不可以。根据英格兰、威尔士及爱尔兰现行法规,日本虎杖根茎属于受控废弃物,必须送往授权处理设施,随意丢弃或堆肥均属违法行为。

推荐